
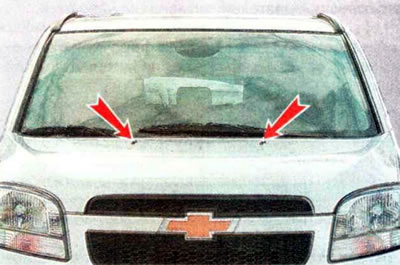
The windshield washer consists of a tank installed on the left under the front bumper trim, an electric pump installed on the tank, pipelines and nozzles. To supply washer fluid to the windshield, two front windshield washer nozzles located on the hood are used.
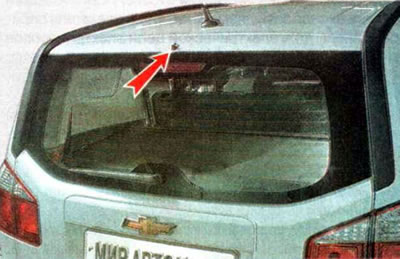
The nozzle that supplies fluid to the rear window is located at the top of the luggage compartment door.
Recommendation. It is advisable to combine the inspection with a check of the technical condition of the windshield wipers.
Checking the technical condition
1. Using the right steering column switch, turn on the front windshield washer. The liquid must be supplied under sufficient pressure from two nozzles. When the nozzles are working properly, the washer fluid jets should be directed evenly into the center of the windshield.
2. Turn on the rear window washer. When the nozzle is working properly, the windshield washer fluid should be sprayed with sufficient pressure to the center of the glass.
Depending on the nature of the windshield washer malfunction, the sequence of testing and the range of elements to be tested vary. Therefore, the troubleshooting sequence is given for the most typical windshield washer malfunctions, from which you choose your particular case.
To complete the work you will need a multimeter (assistant may be required)
Liquid is supplied, but not to the specified parts of the glass
It is necessary to clean and adjust the windshield washer nozzles.
Liquid is supplied from all windshield washer nozzles, but the pressure is very weak (in the cold season)
Low-quality (thickening) low-freezing windshield washer fluid in cold weather. Try using a different brand of windshield washer fluid. This can also be caused by insufficient amount of washer fluid in the tank, damage to the windshield washer hoses or a faulty windshield washer pump.
No fluid is supplied from the windshield washer nozzles (the electric pump does not work)
1. Check the fuse Ef56 15A of the windshield washer circuit in the fuse and relay box, which is located in the engine compartment. We replace the blown fuse. If the fuse blows again, there is a short circuit in the electric pump circuit or in one of the electric pumps.
2. Disconnect the wiring harness connector from the windshield washer electric pump (see below).
3. Inspect the connector and make sure there is no corrosion or damage. If necessary, we treat it with a special cleaning agent for electrical contacts and clean its contacts from oxides.
4. Connect the multimeter in voltmeter mode to the terminals of the connector.
5. The assistant turns on the ignition and the windshield washer being tested. The voltage should be 12 V. If there is voltage, then most likely the windshield washer pump is faulty.
Warning! When performing the following operation, do not apply a voltage greater than 12 V to the terminals of the block. To prevent a short circuit, put a piece of insulating tube on one terminal of the electric pump, first connect one of the wires to the terminal with the tube, and then connect the second wire to the other terminal.
To make sure that the electric pump is definitely faulty, use a piece of wire to connect one of the terminals of the windshield washer pump connector to the negative terminal of the battery. Using the second piece of wire with a 15 A fuse embedded in it, we connect the positive terminal of the battery to the second terminal of the electric pump connector.
A working electric pump will start working, if not, we replace it.
Note: If the fuse blows during the test, there is a short circuit in the electric pump. In this case, it also needs to be replaced.
If voltage is not supplied to the terminals of the block, we check the electrical circuit from the electrical equipment control unit to the windshield washer electric pump according to the electrical diagram.
6. If the circuit is OK, the electrical control unit or steering column switches may be faulty. To check, you need special diagnostic equipment, contact a specialized service station.
No fluid is supplied from all windshield washer nozzles, but the sound of the electric pump can be heard
1. Check the level of windshield washer fluid and top it up if necessary.
2. The water in the windshield washer reservoir or pipes has frozen (in the cold season). We place the car in a warm parking lot or garage and give the tank and pipes some time to warm up. We check the operation of the windshield washers and replace the water with low-freeze windshield washer fluid.
3. The windshield washer hose is damaged, pinched, or has come off the fitting of the electric pump or windshield washer nozzle.
No fluid is supplied from one of the front windshield washer nozzles
1. The hose came off the windshield washer nozzle.
2. The windshield washer hose is pinched or damaged.
3. The windshield washer nozzle is clogged. In this case, the injectors need to be washed and cleaned. Using a needle or a piece of thin steel wire with a diameter of 0.3-0.5 mm, clean the nozzle sprayer and replace the nozzle if necessary.
Replacing the windshield washer pump
1. We prepare the car for maintenance and repair.
2. Disconnect the front part of the right fender liner from the front bumper and remove it.
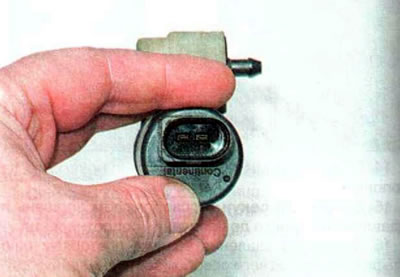
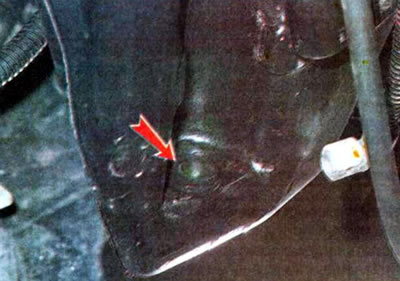
3. Place a container under the windshield washer reservoir to collect the windshield washer fluid. Overcoming a small amount of force, we disconnect the windshield washer electric pump from the tank. If necessary, carefully press out the electric pump using a screwdriver.

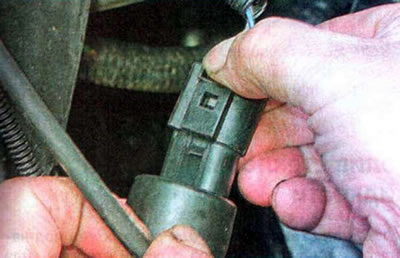
4. Press the lock...
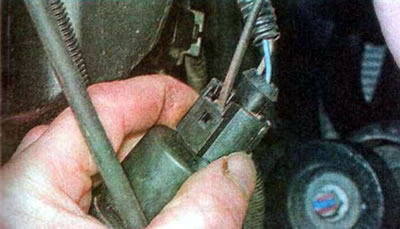
...and disconnect the wiring harness connector from the windshield washer electric pump.
5. Remove the front windshield washer hose from the electric pump fitting...
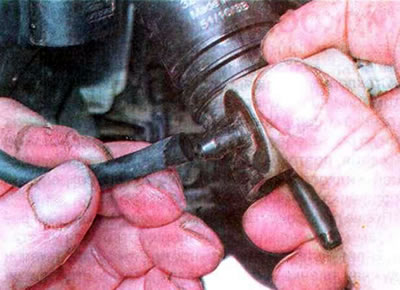
...and disconnect the rear window washer hose tip.
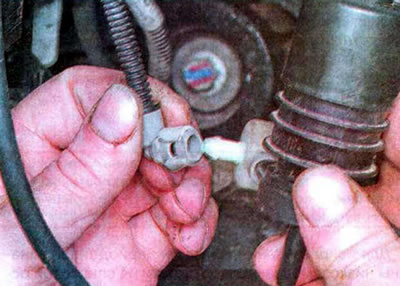
6. Remove the sealing sleeve from the hole in the tank.
We check the condition of the sealing sleeve. If there are cracks, tears, or the rubber has dried out, become hard and cannot effectively seal the connection between the tank and the pump, we replace it. Considering that it is difficult to get to the tank, and the bushing itself is inexpensive, it is advisable to replace it at the slightest doubt about its serviceability.
7. Install the parts in reverse order.