
To perform the work you will need an inspection ditch or overpass, a transparent flexible tube with an internal diameter of 4-5 mm, a special 10 mm wrench for pipe fastening fittings or an open-end wrench of the appropriate size, a container for draining brake fluid, new brake fluid recommended by the manufacturer.
We perform the work with an assistant in the following order:
1. We prepare the vehicle for maintenance and repair and install it on an inspection pit or overpass. Turn off the ignition.
2. Unscrew and remove the cover of the master brake cylinder reservoir. We add new brake fluid to the reservoir.
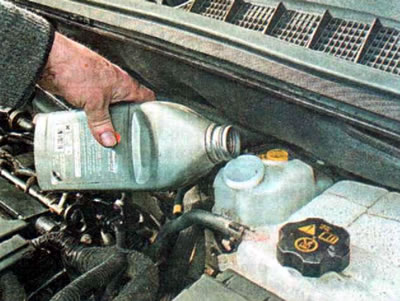
Warning! To prevent air from entering the hydraulic drive of the brake system during bleeding, make sure that the brake fluid level in the reservoir does not fall below the MIN mark.
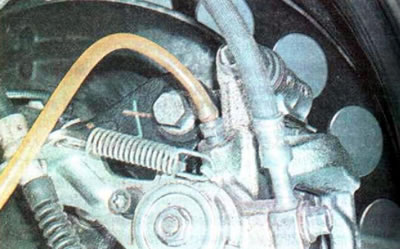
3. Using a rag, clean the bleed nipples and the surface around them from dirt on the front...
...and on the rear brake mechanisms.
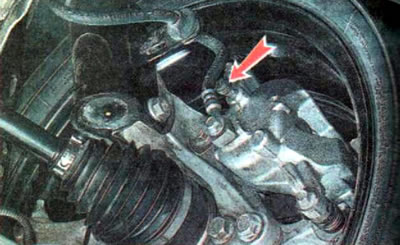
4. Remove the protective rubber cap from the dedicated nipple of the rear right brake mechanism.
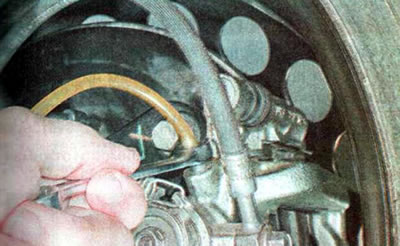
5. Place a transparent tube on the bleed nipple.
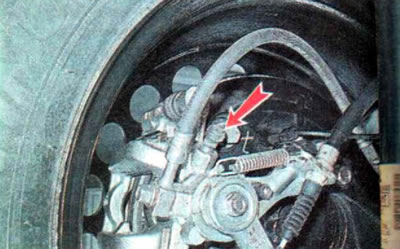
6. Pass the tube through a 10 mm open-end wrench. Lower the other end of the tube into a container to drain the brake fluid.
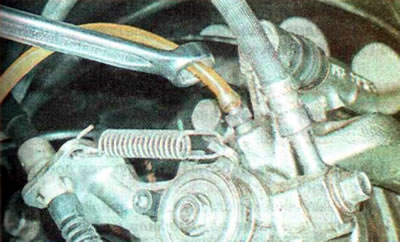
7. The assistant presses the brake pedal 3-5 times and holds it pressed.
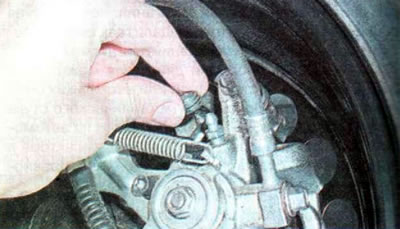
8. Unscrew the bleed nipple until liquid starts to come out of it.
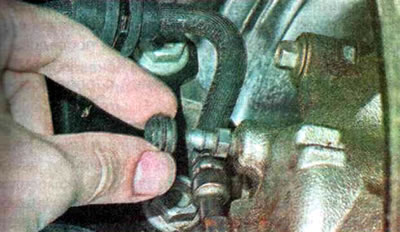
9. After the brake fluid stops coming out of the tube, tighten the fitting.
10. Repeat the steps described in paragraph. 7-9. until the brake fluid with air bubbles stops coming out of the tube, periodically checking its level in the reservoir of the main brake cylinder, after which we finally tighten the bleed nipple with a torque of 17 Nm.
11. Remove the tube and key from the bleed nipple and put a protective rubber cap on the nipple.
12. Bleed the left rear brake mechanism in the same way.
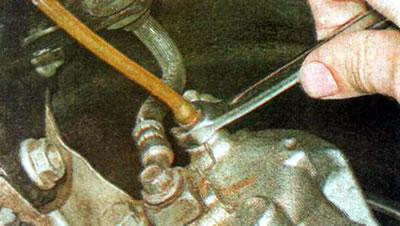
13. Remove the protective rubber cap from the bleed nipple of the front right brake mechanism.
14. Place a special wrench or a 10 mm open-end wrench and a transparent tube on the bleed nipple. We lower the other end of the tube into a container intended for draining brake fluid.
15. Next, we bleed the hydraulic drive of the front right brake mechanism in the same sequence as the rear wheel mechanisms (see above pp. 7-9).
16. After bleeding is complete, tighten the bleeder nipple with a force of 17 Nm.
17. Remove the tube and key from the bleed nipple and put a protective rubber cap on the nipple.
18. Similarly, we bleed the hydraulic drive of the left front brake mechanism, monitoring the fluid level in the reservoir of the main brake cylinder.
19. By pressing the brake pedal, we check the operation of the hydraulic drive and the absence of fluid leaks from the fittings. If the pedal is "soft" or it moves below its normal operating position, we re-check the tightness of the brake system and repeat bleeding the hydraulic drive.
20. Check and, if necessary, top up the fluid level in the master brake cylinder reservoir.
21. Start the engine and take a short drive to activate the anti-lock braking system and check its functionality. We make sure that the working stroke of the brake pedal has not changed, and the brake system and ABS indicator lights on the instrument panel are not lit.
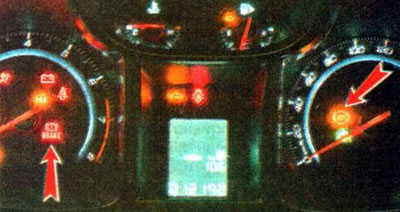
Warning! If the ABS warning lamp does not go out during the test drive, the brake system must be diagnosed using diagnostic equipment at a specialized service station.