


A compact spare wheel is much narrower than standard wheels and can be identified by the label on the side surface with the inscription TEMPORARY USE ONLY ("only for temporary use"). Such a wheel is designed only to get to the place of repair, and not for long-term operation. As a rule, the spare tire is marked with the maximum permissible speed; please be careful and do not exceed the posted speed limit.
A full-size wheel is an analogue of the standard wheels of a car, so its use allows you to operate the car without restrictions on speed and mileage. However, do not forget that when installing wheels of a different diameter or changing tires, you must also complete the spare wheel, otherwise the operation of the car will be prohibited when replacing it.
Warning. According to the "Appendix to the Basic Provisions for the Admission of Vehicles to Operation and the Duties of Officials to Ensure Road Safety", it is prohibited to operate a passenger car:
- if the tire tread depth is less than 1.6 mm;
- with tires that have external damage (punctures, cuts, tears), exposing the cord, as well as delamination of the carcass, separation of the tread and sidewall;
- if the fastening nut (bolt) is missing or there are cracks in the disk and wheel rims, there are visible violations of the shape and size of the fastening holes;
- if the tires do not match the vehicle model in size or load capacity;
- if tires of different sizes and designs are installed on one axle of a vehicle (radial, diagonal, tubed, tubeless), models with different tread patterns, new and with deep tread patterns, frost-resistant and non-frost-resistant, new and restored;
- if the vehicle is equipped with studded and non-studded tires.
The rear of motor vehicles with studded tires must be equipped with an identification sign "Studs".

Removal the spare tire and tool kit
The car is equipped with a full-size spare wheel. It is located under the luggage compartment floor.
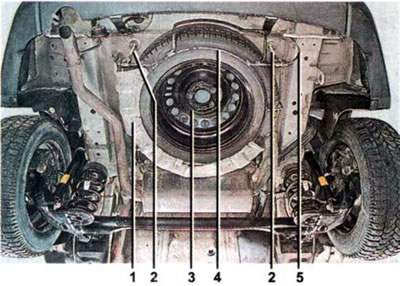
Spare wheel mount: 1 - protection of the spare wheel from thermal radiation of the muffler; 2 - holders; 3 - spare wheel; 4 — spare wheel mounting frame; 5 - safety rope
1. Open the trunk door. We open the lid of the box...
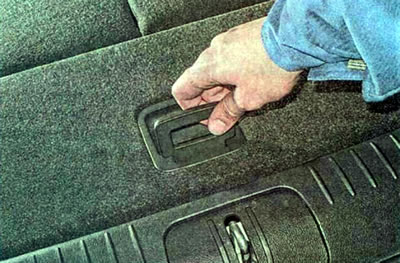
...which contains a case with tools.
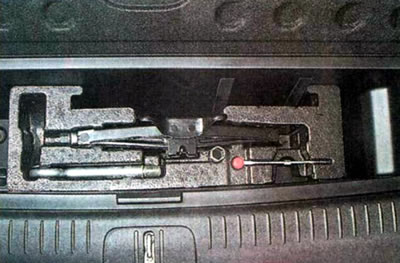
2. Take the case with the set of tools out of the drawer.
3. Remove two plugs from the bottom of the box (the photo shows the left one)...
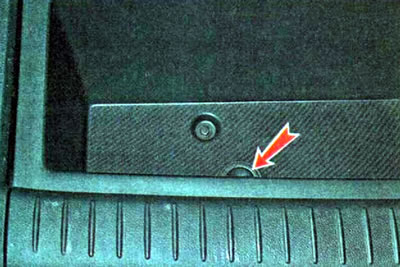
...and we get access to the two bolts of the spare wheel frame holders (for clarity, one of the bolts is shown with the box removed). We put a hexagonal extension on one of the bolts (from the tool kit).
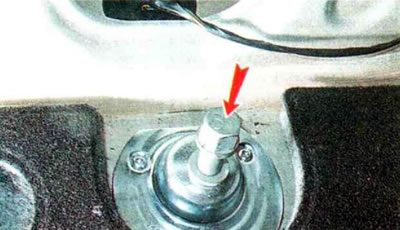
4. Using a wheel wrench, alternately turn the spare wheel mounting bolts counterclockwise until you feel a sharp increase in rotation resistance. We lift the frame by the bracket 2 and disconnect the clamps of the holders 1 from it. We disconnect the safety cable 3, lower the frame and remove the spare wheel.
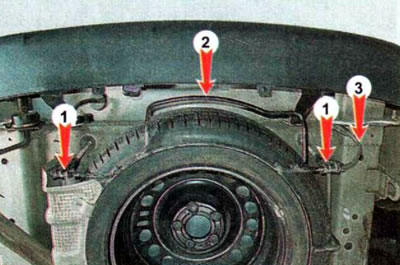
5. Replace the faulty wheel.
6. Remove the removed wheel and tools in reverse order. In this case, we place the wheel on frame 2 with the outer side facing up. The open sides of the holder grips must be facing forward in the direction of vehicle travel.