


Windscreen Wiper Motor Circuit Examination
Note: For the following checks, refer to the relevant electrical diagrams to verify wire color identification and determine component locations. When checking for voltage in the circuit, connect the electrode of a grounded 12-volt test lamp to each contact terminal of the electrical connector being tested in turn, waiting for it to light up, confirming the presence of voltage supplied to that connector. If the following checks do not reveal the cause of the malfunction, take the vehicle to an authorized service station for diagnostic procedures. The electronic memory of the PCM stores fault codes. which can be read using the appropriate diagnostic scanner.
1. If you notice a slowdown in the operation of the windshield wipers, first of all inspect the battery and make sure there is no break in the charging circuit (see chapter 5). If the test shows that the battery is in good condition, remove the electric motor (see below) and move the wiper arms manually. Make sure that the mechanism rods and its hinges are not jammed. If necessary, lubricate or repair the failed lever or joint. Reinstall the wiper motor. If the windshield wipers still operate slowly after turning them on, make sure that the electrical connectors are not loose or corroded (especially the grounding circuit connector). If the inspection does not reveal any defective connectors, replace the electric motor.
2. If the windshield wipers do not move after being turned on, inspect the corresponding fuse. If the check confirms that the fuse is in working order, ground the electric motor using an additional wire and check its functionality again. If the inspection confirms that the electric motor is operational, restore its grounding circuit. If a motor failure is detected, turn the windshield wiper switch to the "H1" position and check if voltage is supplied to the motor.
Note: To access the connector, the air intake cover must be removed (see chapter 11).
3. If it is determined that voltage is supplied, remove the electric motor and check its functionality by connecting the wires with a fuse directly from the battery to it. If the electric motor is found to be operational, inspect the windshield wiper mechanism for jammed rods or hinges (see item 1). If the electric motor is not confirmed to be operational, replace it. If the test shows that there is no voltage supplied to the motor, check the voltage supply to its relay. If it is determined that voltage is being supplied to the relay but not to the motor, check the functionality of the switch. If the test confirms that the switch is working, then the relay may be the source of the fault. Checking the functionality of the relay is described in subsection 5.
4. If the drive hold function does not turn on, check for an open circuit in the circuit from the switch to the windshield wiper control unit.
5. If the windshield wipers stop (or can't stop) in the initial position, which corresponds to the switch being in the "Off" position, make sure that voltage is supplied to the circuit wire that ensures the operation of the motor when the windshield wipers are turned off with the ignition on. If the test reveals no voltage, check the circuit between the motor and the fuse box for an open circuit.
Electric motor replacement
Windscreen wipers
6. Disconnect the negative battery cable (see chapter 1).
7. Unscrew the wiper arm nuts, mark the original relative positions of the wiper arms and their spindles, then remove the arms (see illustration).
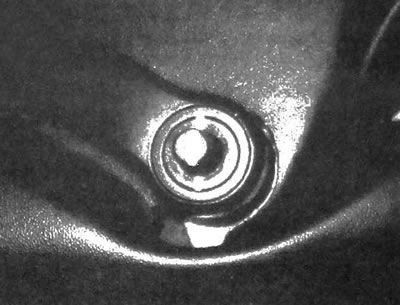
18.7. Unscrew the nut, mark the original relative position and, by rocking, disconnect the lever from the spindle; if necessary, use a small puller
Note: When removing from the spindle, try to rock the wiper arm. If this method does not allow removal, use a small puller, such as the one used to remove battery terminals.
8. Remove the air intake grille (see chapter 11).
9. Remove the windshield wiper motor/mechanism mounting bolts (see illustrations).
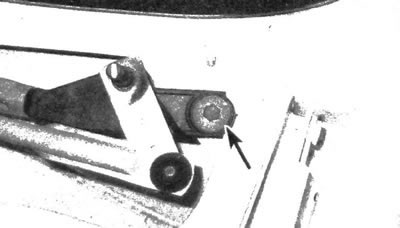
18.9a. Remove the mounting bolts located on each side of the windshield wiper linkage (shown on the left side)...
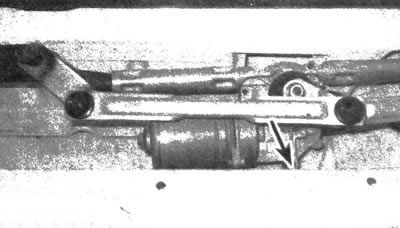
18.9b....and also the bolt located in the center (marked with an arrow, invisible from this angle)
10. Remove the electric motor together with the mechanism, then disconnect the electric motor from the rods (see illustrations).
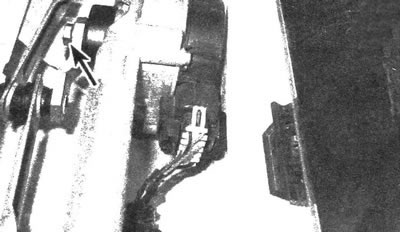
18.10. To separate the electric motor from the windshield wiper mechanism, it is necessary to unscrew the nut
11. Installation is carried out in the reverse order of removal.
Rear window wiper
12. Disconnect the negative battery cable (see chapter 1).
13. Mark the original location of the wiper arm on the rear hatch glass, then remove the cap and unscrew the nut located on the outside of the door, then remove the trim (see illustration). Avoid damaging the paintwork on the tailgate.
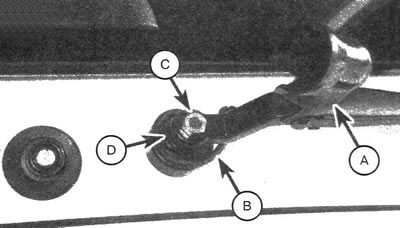
18.13. When performing the procedure on the tailgate, lift the cap (A), disconnect the washer hose (B), unscrew the nut (C) and remove the trim (D)
14. Remove the upper and lower inner tailgate trim panels as described in chapter 11.
15. Disconnect the connector from the rear wiper motor, then remove the two mounting bolts (see illustration).
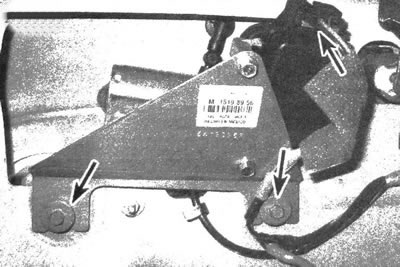
18.15. Disconnect the plug (marked with the upper arrow), located at the rear of the electric motor, then unscrew the two mounting bolts (marked with lower arrows)
Caution: When unscrewing the mounting bolts, it is necessary to support the electric motor.
16. Installation is carried out in the reverse order of removal.