
Contents: Removal procedure ↧ Installation procedure ↧
Removal procedure
1. Raise the vehicle and place it on the supports provided for this purpose and remove the wheels.
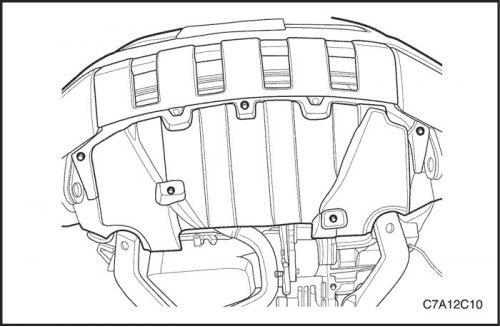
2. Remove the mudguard located under the vehicle body.
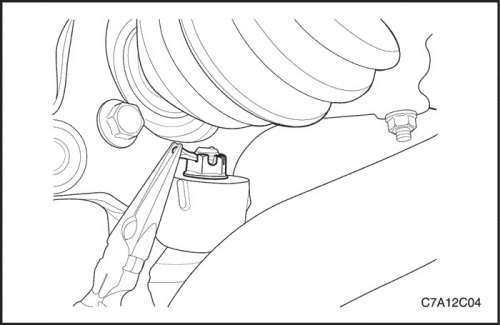
3. Remove the nut securing the ball joint of the front suspension arm to the steering knuckle and the cotter pin.
4. Remove the front muffler and catalytic converter. See Part 1G2. Engine exhaust system.
5. On 4WD vehicles, remove the driveshaft.

6. Remove the nut securing the outer tie rod to the steering knuckle.
7. Remove the nut securing the stabilizer bar connecting link to the strut.
Important: Do not allow the radiator to move after removing the frame. The upper part of the radiator should be secured with ties.

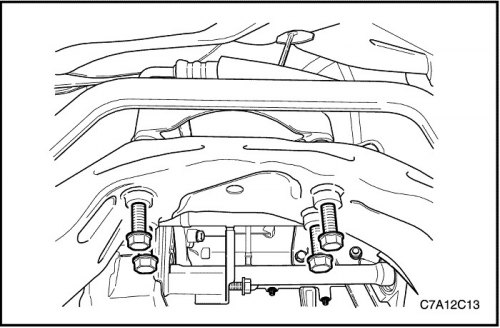
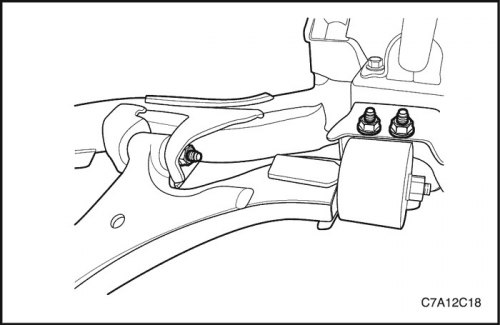
8. Remove the bolts securing the power steering gear to the frame.
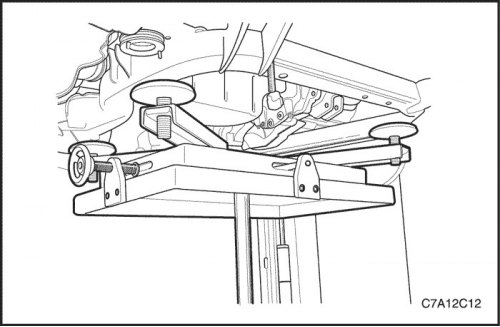
9. Support the frame on a jack stand.
10. Remove the bolts from the frame mounting bracket to the rear transmission suspension.
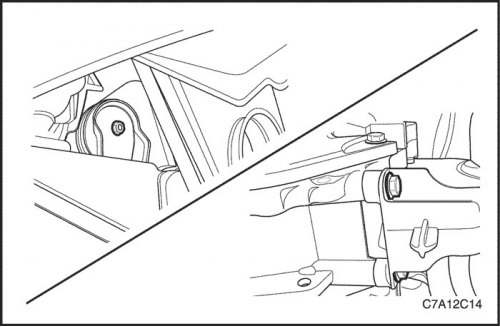
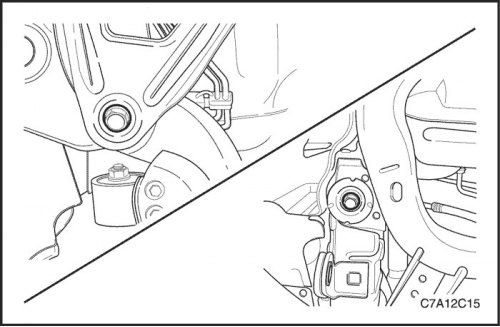
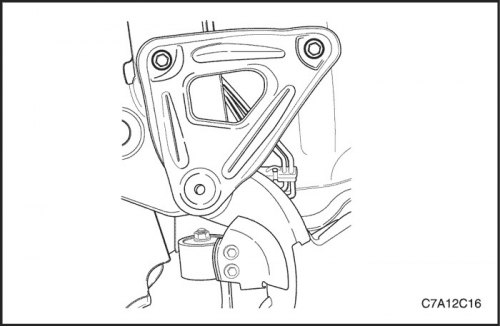
11. Remove the bolt securing the front gearbox mount to the frame and remove the mount.
12. Remove the bolts securing the frame to the body.
13. Remove the bolts securing the frame support bracket to the body.
14. Lower the frame slowly and carefully. Rotate the stabilizer bar and tie rod to provide sufficient clearance while lowering the frame.

15. Remove the bolts holding the stabilizer bar clamps to the frame.
16. Remove the bolts and nuts securing the suspension arm to the frame. See section in this section "Front suspension arm".
Installation procedure
1. Install the front control arm to frame mounting bolts and nuts. See section in this section "Front suspension arm".

2. Install the bolts securing the stabilizer bar clamps to the frame.
Tighten
Tighten the stabilizer bar clamp bolts to a torque of 50 N·m (37 ft·lbs).

3. Raise the frame slowly and carefully using a jack stand. Rotate the stabilizer bar and tie rod properly to position the frame in the correct position.
4. Install the frame support bracket and frame-to-body mounting bolts.
Tighten
Tighten the frame-to-body mounting bolts to a torque of 155 N·m (114 ft·lbs).
Tighten the frame support bracket mounting bolts to the body until a torque of 50 N·m is reached (37 ft·lbs).

5. Install the frame mounting bolts to the rear transmission suspension.
Tighten
Tighten the frame mounting bolts to the rear gearbox suspension until a torque of 110 N·m is reached (81 lb-ft).

6. Install the front transmission mount and install the frame to front transmission mount bolt.
Tighten
Tighten the front gearbox mount bolts to the gearbox until a torque of 50 N·m is reached (371 lbs.in).
Tighten the frame mounting bolt to the front gearbox mount until a torque of 110 N·m is reached (81 lb-ft).
7. Install the power steering gear mounting bolts to the frame.
Tighten
Tighten the power steering gear to frame mounting bolts to 110 N·m (81 lb-ft).

8. Install the nut securing the stabilizer bar connecting link to the strut.
Tighten
Tighten the stabilizer bar connecting link fastening nut until a torque of 65 N·m is reached (48 ft·lbs).
9. Install the tie rod end to steering knuckle mounting nut.
Tighten
Tighten the nut securing the transverse steering rod to the steering knuckle until a torque of 50 N·m is reached (371 lbs.in).

10. Install the front muffler and catalytic converter. See Part 1G2/1G3. Engine exhaust system.
11. Install the front suspension arm ball joint to steering knuckle nut and cotter pin. See section in this section "Front suspension arm".

12. Install the mudguard located under the vehicle body. See Part 9N. Frame and lower body.
13. Install the wheel using nuts.
Tighten
Tighten the wheel nut to a torque of 125 Nm (92 ft·lbs).
Important: Tighten the nuts evenly and alternately in a crisscross or star pattern to prevent excessive wheel play.