


Contents: 1. Quick Reference ↧ 2. Getting Started ↧ 3. Route and free navigation maps ↧ 4. Keyboards ↧
A-Navi system is a good choice of navigation system to install in your car. You can control it by simply tapping on the screen or by manually mapping.
1. Quick Reference
This chapter provides a brief guide to using the A-Navi system. Before exploring the features of this application in more detail, you should make sure that:
The A-Navi system requests positioning information from at least three satellites. You must also ensure that your position is determined when you start the application.
If the GPS receiver is used for the first time, it takes 2-3 minutes to confirm the information from the satellite and calculate the exact location (cold start). The current position data will be saved in memory. The next time you turn on the GPS receiver, it will take 1-3 minutes to determine your location (warm start). Once the GPS receiver has locked your position, the system will start navigation immediately without any additional steps when you launch the application.
2. Getting Started
Figure 2.1 Welcome screen

When you start the A-Navi system for the first time, the system will go to the Chevrolet welcome screen. It takes about 15 seconds for the welcome screen to automatically switch to the warning screen.
Figure 2.2 System warning
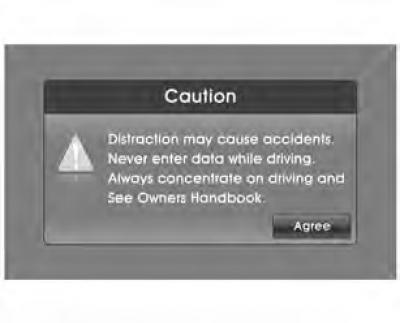
Please read the A-Navi warning carefully and click Click "Agree" to go to the free navigation map screen.
Figure 2.3 Free navigation map
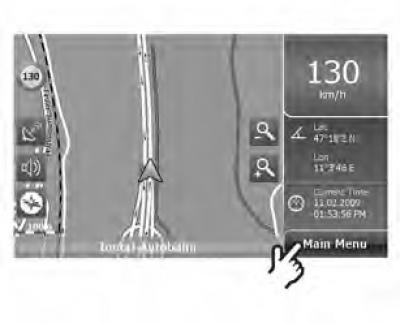
In Free Map mode, you can let the system track your movements without running any program.
Figure 2.4 Free navigation map
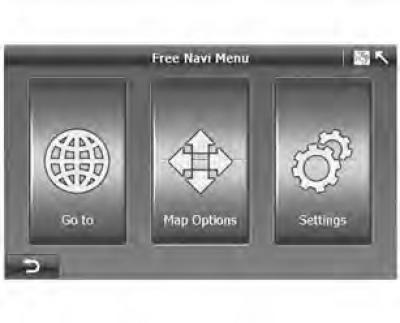
If you need to access additional functions, press the Main Menu button (Main menu) on the free navigation map. The system will then switch to the free navigation menu screen.
In the Free Navigation menu, you can access the main functions of the A-Navi system as follows:
- To set destinations, click Go To.
- To change the map parameters, click ":Map Options" (map parameters).
- To change the settings, click "Settings".
- Press the function key
 , and the system will return to the navigation map.
When using the A-Navi system for the first time, you may need to change the system language.
3. Route and free navigation maps
The most commonly used screen of the A-Navi system is the Free Navigation Map/Route Map screen. When you cold start the A-Navi system, the Free Navigation Map is displayed, while the Route Navigation Map is displayed when you continue the last navigation when you restart the system.
Figure 2.5 Free navigation map
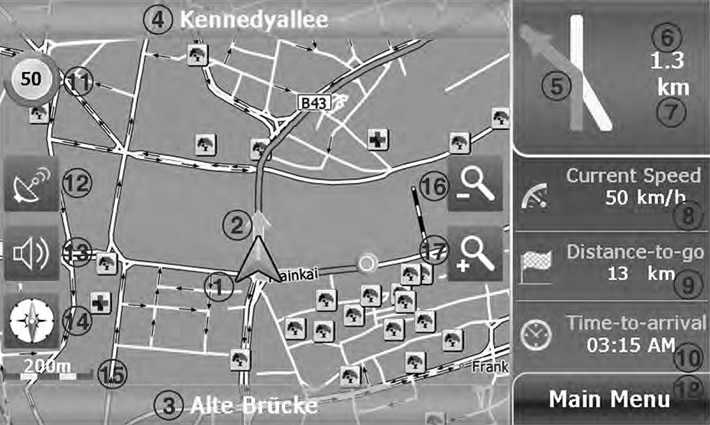
Figure 2.6 Free navigation map
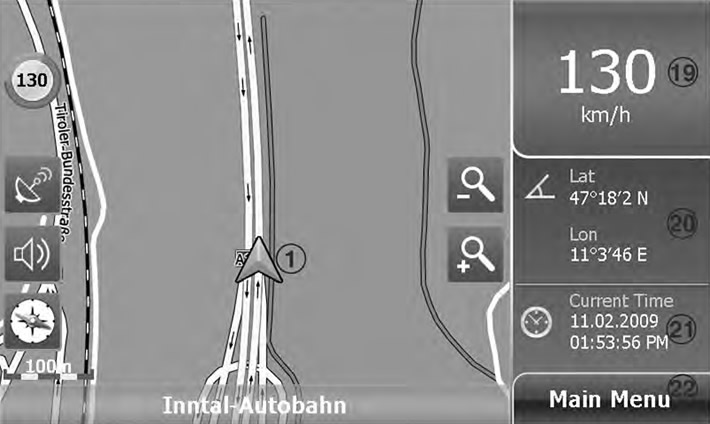
1. Car symbol - displays the current position and direction of movement of the car.
2. Turn signal - a silver arrow shows you which way to turn at an approaching turn.
3. Current road - if the road has no name, this field remains empty.
4. Next Road - The name of the next approaching road.
5. Turn directions - show the next road junction. When you select this icon, the system will announce the next turn with a message like "Turn left in 900 meters".
6. Distance to next turn - actually shows the distance to the next turn.
7. Distance scale
8. Current speed - shows the current speed of movement.
9. Remaining Distance - The remaining distance between the departure point and the destination or next waypoint.
10. Arrival time - estimated time of arrival at the destination.
11. Speed Limit Signal --- Shows the next speed camera and its speed limit.
12. GPS Status – Tap to view the GPS status. Gray means the GPS signal is weak or the GPS has not found a location, while green means the location has been found.
13. Volume – Tap to adjust the volume of the voice guidance.
14. Compass - indicates the direction to the north on the map.
15. Scale bar - shows the scale bar of the map.
16. Zoom in button – Click to zoom in on the map.
17. Zoom Out Button – Click to zoom out on the map.
18. Main Menu – Press to enter the Navi route menu.
19. Movement speed - current movement speed.
20. Longitude/Latitude - Shows the latitude and longitude of the point in the center of the map.
21. Current time
22. Main Menu - Click to enter the free navigation menu.
4. Keyboards
The A-Navi system has an alphabetic keyboard that contains Latin letters, numbers, punctuation marks and special symbols in 30 languages.
The alphabetic keyboard only displays letters.
Figure 2.7 Letter keyboard
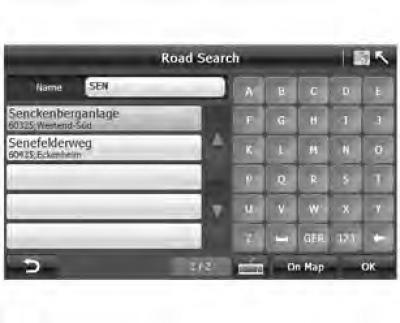
- 123: Tap to display the numeric keypad and punctuation marks.
- GER: Click to display special characters for German.
 : Click to display special characters of other languages.
Figure 2.8 Numeric keypad
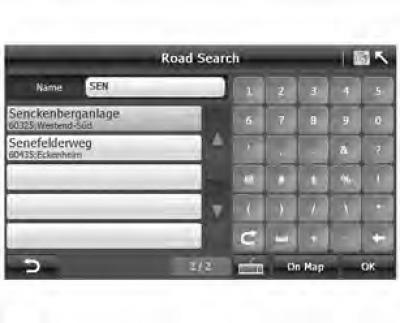
 : press to return to the letter keyboard
 : Space key.
 : Press to delete the last letter entered.
Figure 2.9 Keyboard with special characters
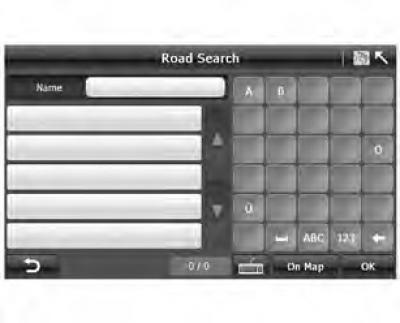
 : Press to return to the previous screen.
- On the map: Click to display the location of the selected entry on the map.
- OK: Confirmation of entered data or selection made.
Information taken from the official website «chevyman»