ChevyMan.ru
Mazda Mitsubishi Toyota Land Rover Honda Kia Nissan
English Русский
Български
Беларускі
Український
Српски
Hrvatski
Română
Polski
Slovenský
Magyar
|
Articles | Sitemap | Contacts |


Home   Aveo   Captiva   Cruze   Lacetti   Lanos   Niva   Tahoe   Others  
Cruze 1 (2008-2016)
  • Home
  • Cruze
  • J300 (2008-2016)
  • Body
  • Heating and air conditioning
  • Removal and installation the air conditioning compressor

Removal and installation the air conditioning compressor (Chevrolet Cruze J300)

            0

You will need: keys "10", "13".

1. Remove the refrigerant from the air conditioning system (see "Removal refrigerant from the air conditioning system").

2. Place the vehicle on an inspection pit.

3. Disconnect the wire from the negative terminal of the battery.

4. Remove the lower trim of the front bumper (see "Removal and installation the front bumper").
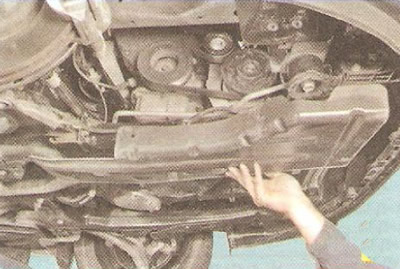
4. Remove the lower trim of the front bumper (see «Removal and installation the front bumper»).


5. Remove the right engine splash guard (see "Removal and installation engine mudguards").
5. Remove the right engine splash guard (see «Removal and installation engine mudguards»).


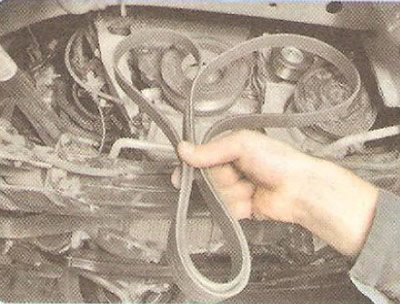
6. Remove the accessory drive belt (see "Replacement of auxiliary drive belt").
6. Remove the accessory drive belt (see «Replacement of auxiliary drive belt»).


7. Check the condition of the drive belt.


Note: Replace the belt if upon inspection you find:

  • signs of wear on the toothed surface, cracks, cuts, folds or separation of the fabric from the rubber;
  • cracks, folds, depressions or bulges on the outer surface of the belt;
  • fraying or delamination on the end surfaces of the belt;
  • traces of oil on the surface of the belt.

Warning: A belt with traces of motor oil on any of its surfaces must be replaced, as oil quickly destroys rubber. The reason for oil getting on the belt (usually due to a leak in the engine shaft seals) must be eliminated immediately.
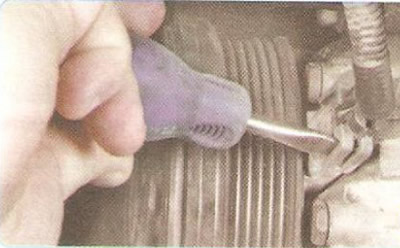

Warning: A belt with traces of motor oil on any of its surfaces must be replaced, as oil quickly…


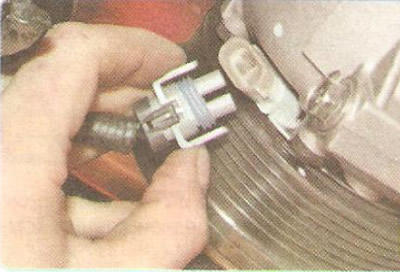
8. Press the clamps...

8. Press the clamps...


9. ...and disconnect the wiring harness connector from the compressor electromagnetic clutch.
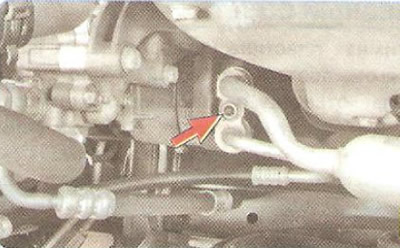
9. ...and disconnect the wiring harness connector from the compressor electromagnetic clutch.


10. Unscrew the nut securing the hose block pressure plate to the compressor.
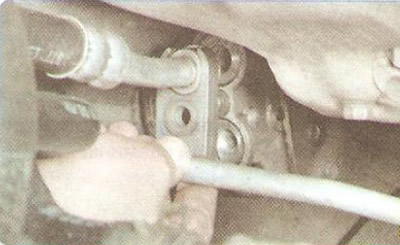


10. Unscrew the nut securing the hose block pressure plate to the compressor.


11. Disconnect the low and high pressure pipeline flanges from the compressor.
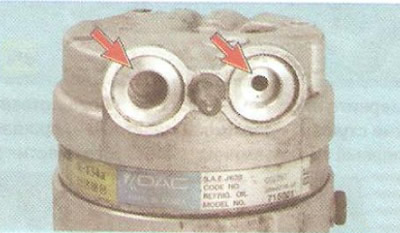
11. Disconnect the low and high pressure pipeline flanges from the compressor.


Warning: Immediately after disconnecting, plug the compressor openings and air conditioning lines to prevent moisture and dirt from entering the air conditioning system.
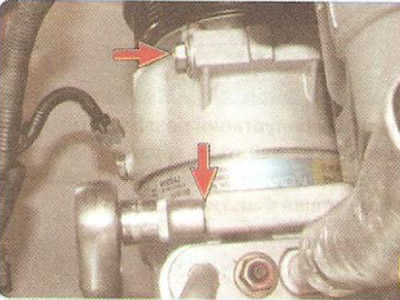

Warning: Immediately after disconnecting, plug the compressor openings and air conditioning lines…


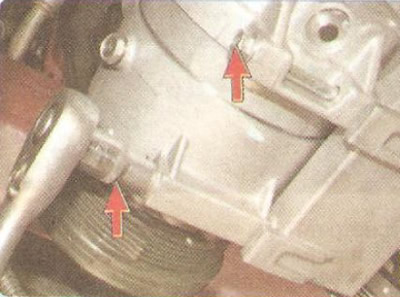
12. Turn the top two...

12. Turn the top two...


13. ...and two lower bolts securing the compressor to the bracket


14. Remove the bolts from the mounting holes and remove the air conditioning compressor.

15. Install the compressor and all removed parts in the reverse order of removal.
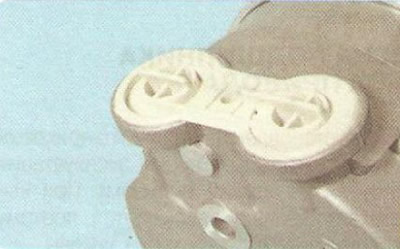
15. Install the compressor and all removed parts in the reverse order of removal.


Warnings: Open the process plugs of the flanges of the new compressor only immediately before connecting the pipelines.

Warnings: Open the process plugs of the flanges of the new compressor only immediately before…


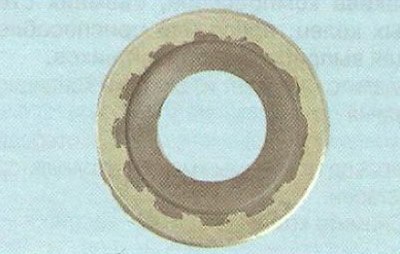
The flange of the pipeline block is sealed with two rubber-metal sealing rings. When the rings are pressed, the metal rim is deformed, so such rings are not suitable for reuse.


When installing new manifold flange O-rings, be sure to lubricate them with A/C compressor oil.

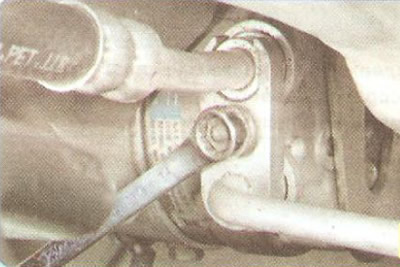
When installing new manifold flange O-rings, be sure to lubricate them with A/C compressor oil.


16. Make sure that when installing the belt, the V-grooves align with the pulley grooves.


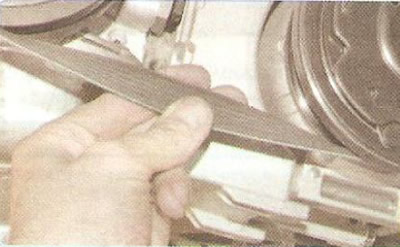
16. Make sure that when installing the belt, the V-grooves align with the pulley grooves.


17. Tighten the nut securing the hose block pressure plate to the compressor to a torque of 33 N·m.

18. Have the air conditioning system refilled with refrigerant at a specialist car air conditioning service centre.

Helpful Hint: When purchasing a new compressor, ask the seller about the amount and type of oil that is in the new compressor. This information may be useful to mechanics who will subsequently fill the system with refrigerant.


Information taken from the official website: CHEVYMAN.RU

The article was checked: Vladimir Romannikov
This article is available at russian, bulgarian, belarusian, ukrainian, serbian, croatian, romanian, polish, slovak, hungarian

Share information:

Previous articles
Cruze 1: Heating and air conditioning
Next articles

Removal and installation the air conditioning compressor pressure regulator
Features of air conditioning compressor operation
Replacing the sealing rings
Removal refrigerant from the air conditioning system
Safety rules for repair and maintenance of air conditioning systems
Replacing the drive pulley bearing
Replacing the compressor clutch solenoid
Replacing the condenser
Replacing the filter element of the receiver-dryer
Replacing the thermostatic valve


See similar articles on the topic of Chevrolet cars:
Features of air conditioning compressor operation Chevrolet Aveo T300 (2012-2018)
Air Conditioning Compressor Relay Chevrolet Captiva 1 (2006-2018)
Removal the air conditioning compressor Chevrolet Lacetti 1 (2002-2009)
Checking the condition and replacing the air conditioning compressor drive belt Chevrolet Lanos T150 (2002-2009)
Air Conditioning Control Chevrolet Niva 1 (2002-2016)
Air conditioning compressor — removal and installation Chevrolet Tahoe 1 (1992-2000)
Removal and installation the air conditioning compressor Chevrolet Lumina 1 (1989-1994)
Link in different formats to this page


Visitor comments

No comments yet


How much will 11 + 50 =


Cruze 1 (2008-2016) 
  • General information
  • User manual
  • Troubleshooting
  • Maintenance
  • Power unit
  • Engine repair
  • Lubrication system
  • Cooling system
  • Exhaust system
  • Supply system
  • Control system
  • Transmission
  • Clutch
  • Car gearbox
  • Front wheel drives
  • Chassis
  • Front suspension
  • Rear suspension
  • Steering
  • Brake system
  • Body
  • Exterior (external elements)
  • Interior (internal elements)
  • Doors, covers and windows
  • Heating and air conditioning
  • Security systems
  • Electrical equipment
  • Equipment and devices
  • Power devices
  • Lighting and signaling
  • Electrical circuits


ChevyMan.ru © 2017-2026 · Mobile version · Feedback · Site search · Interesting to read · Sitemap: EN BG BY UA RS HR RO PL SK HU

Aveo 2003-2008 · Aveo 2006-2011 · Aveo 2012-2018 · Captiva 2006-2018 · Cruze 2008-2016 · Lacetti 2002-2009 · Lanos 2002-2009 · Niva 2002-2016 · Tahoe 1992-2000 · Tahoe 2000-2014 · Lumina 1 1989-1994 · Trailblazer 1 2001-2008 · Orlando 1 2010-2018 ·
🛡️ For your security and to improve our service, this site uses cookies. You can disable them in your browser.