
Caution: This procedure should not be performed on vehicles equipped with ABS, as special tools are required to properly bleed the brakes. Take the vehicle to a service shop or other repair shop that has the appropriate tools and equipment.
Note: If repair is necessary (usually due to a brake fluid leak) before doing the work, think through all the options. You can often find new or factory reconditioned calipers; in this case, it is very easy to cope with such work. If you decide to restore the calipers yourself, then before starting work, provide yourself with a repair kit.
Removal
1. Remove the cap from the brake fluid reservoir and pump out 2/3 of the fluid using a special device.
2. Loosen the wheel nuts, raise the front of the vehicle and securely support it on struts. Remove the front wheel.
3. Reinstall the two wheel nuts with the flat side facing the wheel to hold the wheel in place.
4. Press the piston into the cylinder (see illustration 2.5).
5. Loosen the brake hose clamp bolt and disconnect the hose. Have a rag handy to wipe up any spilled liquid, and wrap a plastic bag tightly around the end of the hose to prevent liquid loss and contamination.
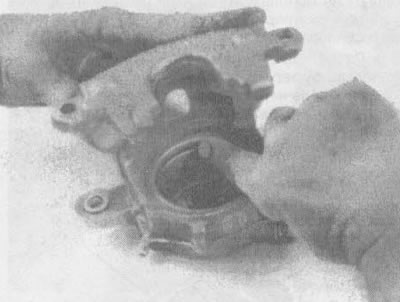
6. Unscrew the two bolts and remove the caliper from the car (see illustrations 2.6a and 2.6b).
Repair
7. Contact section 2 and remove the brake pads from the caliper.
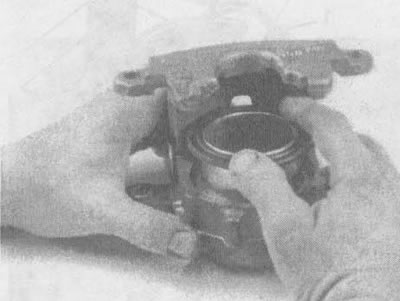
8. Clean the outside of the caliper with brake cleaner or denatured alcohol. Never use gasoline, kerosene or other petroleum-based cleaning solvents. Place the caliper on a clean workbench.
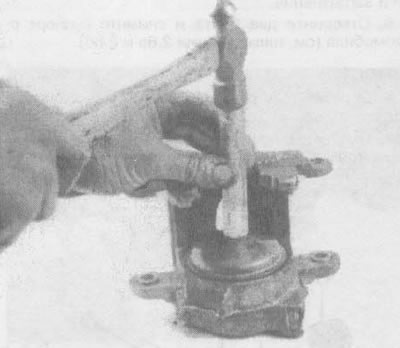
9. Place a block of wood in the caliper as a buffer, then use compressed air to push the piston out of the caliper (see illustration). Supply only enough air to force the piston out of the cylinder. If the piston comes out, even if the buffer is installed, the piston can be damaged.
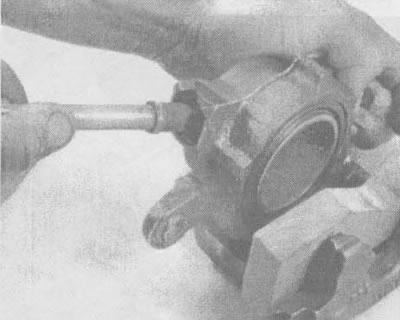
3.9. To push the piston out of the cylinder, use compressed air; be careful not to get your hands or fingers between the piston and the caliper!
Warning: Never place your fingers in front of the piston to try to grasp or protect it when applying compressed air - this could result in serious injury.
10. Carefully remove the dust boot from the caliper cylinder (see illustration).
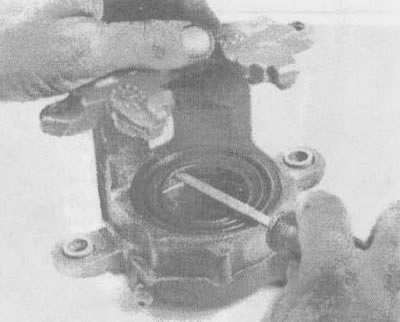
3.10. Carefully remove the dust boot from the casing, being careful not to scratch the cylinder surface
11. Using a wooden or plastic tool, remove the piston seal from the groove in the caliper cylinder (see illustration). Metal tools can damage the cylinder.
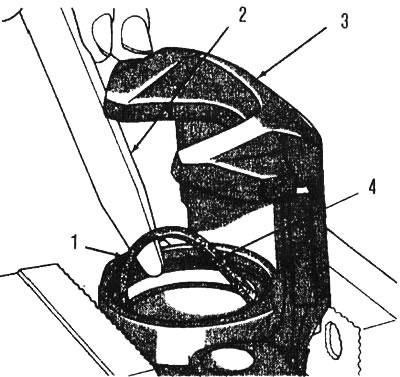
3.11. To avoid damaging the caliper cylinder or the seal groove, it is best to remove the seals with a plastic or wooden tool: 1 - cuff, 2 - plastic strip, 3 - caliper, 4 - groove
12. Remove the caliper bleeder valve, then remove and discard the bushings from the caliper ears. Replace all rubber parts (see illustration).
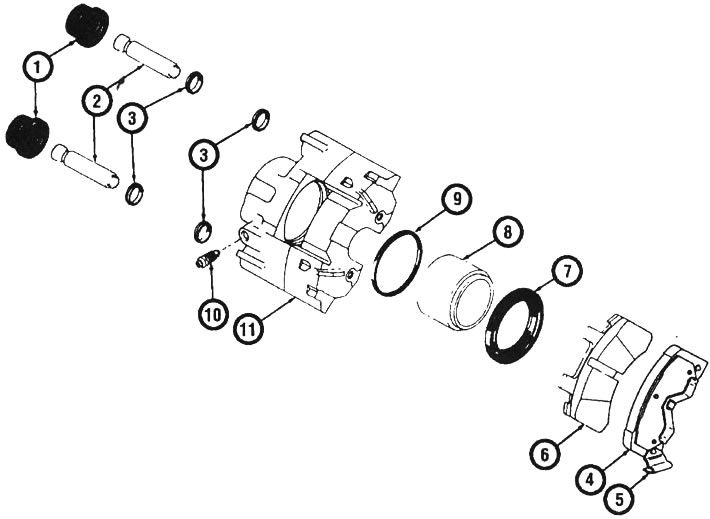
3.12. Disc brake caliper parts (for 1990 model year vehicles; others are similar): 1 - guide pin caps, 2 - guide pins, 3 - bushings, 4 - outer brake shoe, 5 - wear indicator, 6 - inner brake shoe, 7 - protective boot, 8 - piston, 9 - piston seal, 10 - bleed valve, 11 - caliper
13. Clean the remaining parts with brake cleaner or denatured alcohol, then dry them with compressed air.
14. Carefully inspect the piston for burrs and nicks and check for loss of coating. If there are surface defects, the parts must be replaced. Check the caliper cylinder in the same way. To remove minor corrosion and stains, polishing with fine-grained sandpaper is acceptable. If the guide pins are damaged or corroded, replace them.
15. When assembling, lubricate the piston and cuff with clean brake fluid. Place the seal in the groove of the caliper cylinder (see illustration).
3.15. Place the cuff in the caliper cylinder, making sure that it does not twist
16. Lubricate the piston with clean brake fluid, then insert the new boot into the piston groove with the folds facing the open end of the piston (see illustration).

3.16. Insert the new dust boot into the piston grooves so that the folds are directed towards the open end of the piston
17. Place the piston evenly in the cylinder, then press firmly to seat the piston (see illustration).
3.17. Insert the piston into the caliper cylinder evenly, without tilting
18. Position the boot in the caliper groove, then use a drift to push the boot into place (see illustration). Make sure the boot is flush with the surface of the caliper.
3.18. Using a special tool for installing gaskets, seat the dust boot in the caliper groove. If you don't have such a tool, gently tap the circumference of the boot with a mandrel until the boot is seated in place
19. Insert the bleed valve.
20. Install new bushings into the mounting bolt holes and fill the area between the bushings with silicone grease included in the repair kit (see illustration). Slide the cups into the holes in the guide pins.
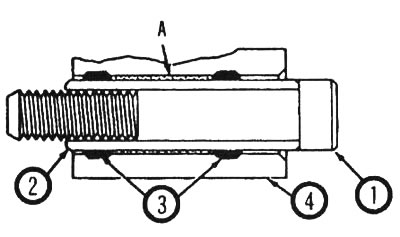
3.20. Place silicone grease between the guide pin bushings: 1 - guide pin, 2 - cup, 3 - bushing, 4 - caliper body, A - silicone grease
Installation
21. Check if the guide pins are too badly corroded.
22. Position the caliper over the disc and bracket, install the bolts and tighten them to the specified torque.
23. On 1990 vehicles, ensure that the gap between the caliper and bracket stops is within 0.005 to 0.012 inches (see illustration).
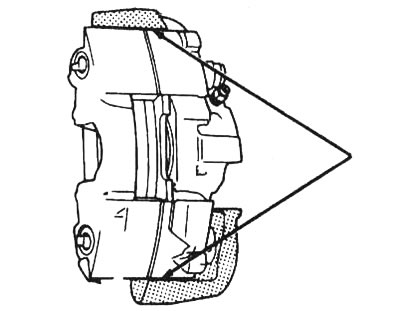
3.23. Measure the gap between the caliper and the bracket stoppers at the indicated points (only for cars produced in 1990)
24. Insert the brake hose clamp bolt using new copper washers, then tighten it to the torque specified in the specifications in this chapter. The brakes need to be bled (see section 9).
25. Install the wheels and lower the vehicle.
26. After completing the work, press the brake pedal firmly several times to seat the brake pads.
[For details, visit the website: «chevyman»]