


Examination
Caution: To avoid burns, do not remove the expansion tank cap when the engine is hot, as the liquid and steam are under pressure.
1. Place the vehicle on a flat, horizontal surface.
2. Check that when the engine is cold, the coolant level in the expansion tank is at the level of the "FULL COLD" mark located on the wall of the tank.
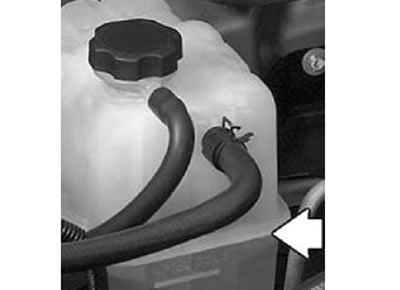
Tank (type 1) |
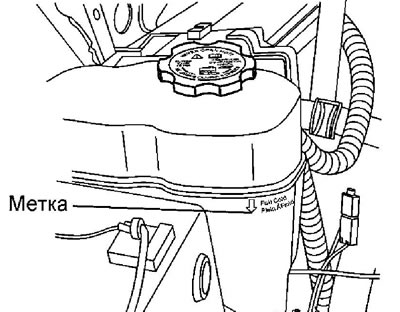
Tank (type 2) |
If the vehicle is equipped with a message alert system, a message will appear on the system display when the coolant level is low "LOW COOLANT LEVEL".
Some vehicle modifications use a low coolant level indicator to warn of low coolant levels "LOW COOLANT".
If the coolant level is low, check for leaks and, with the engine cold, add coolant to the expansion tank until the level reaches the "FULL COLD" mark. Add the same type of coolant as is used in the system.
Note:
- Since the cooling system is closed, the normal loss of coolant is small. A noticeable decrease in coolant level may indicate leaks.
- If the expansion tank cap is not tightly installed, significant coolant loss may occur, which may result in engine damage.
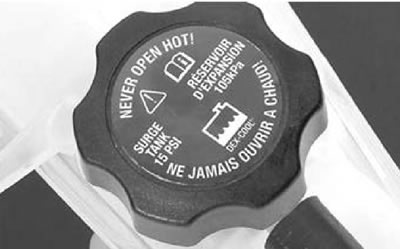
3. Check the quality of the coolant.
- a) Remove the expansion tank cap.
- b) Check that the coolant is clear and free of oil. If the coolant is contaminated, clean the cooling system passages and replace the fluid. c) Replace the expansion tank cap.
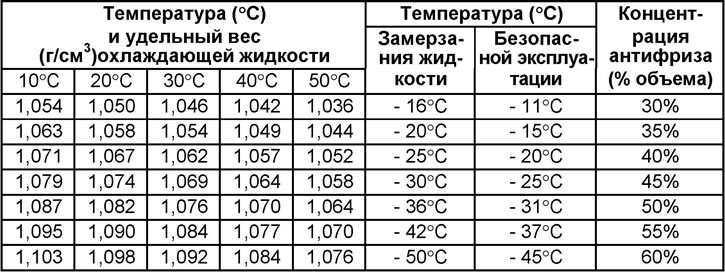
4. If necessary, check the concentration of antifreeze.
- a) Measure the specific gravity of the coolant using a hydrometer.
- b) Measure the coolant temperature and determine the antifreeze concentration taking into account the relationship between specific gravity and temperature based on the data in the table "Relationship between coolant density and antifreeze concentration". Check that the results correspond to the norm (see the section "Replacing the coolant"). If necessary, add antifreeze or distilled water.
Table. Relationship between coolant density and antifreeze concentration
[The original text can be found on the website: ChevyMan]