


Contents: Removal ↧ Installation ↧
Removal
1. Move the automatic transmission selector to position "P".
2. Remove the instrument panel knee support.
3. Remove the driver's seat.
4. Lift up the carpet and insulation around the driver's seat area.
5. Remove the cable retainer from the steering column.
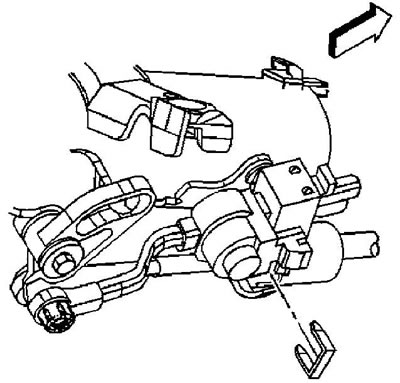
6. Remove the cable end from the steering column arm ball joint.
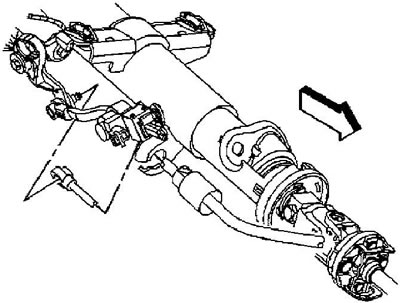
7. Squeeze the clamps and remove the cable from the steering column bracket.
8. Unscrew the bolt securing the cable support to the side member.
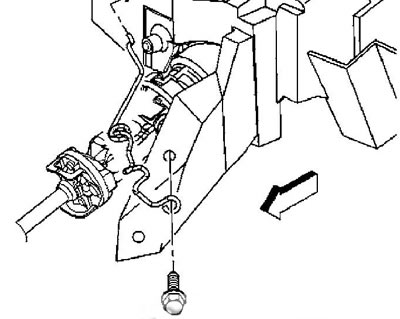
Caution: When removing and installing, avoid unnecessary twisting or bending of the automatic transmission control cable.
9. Remove the cable from the support.
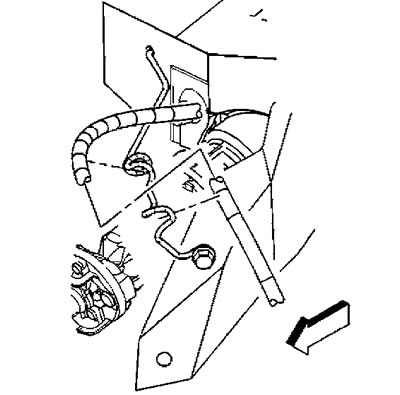
10. Remove the cable sealing ring from the floor panel.
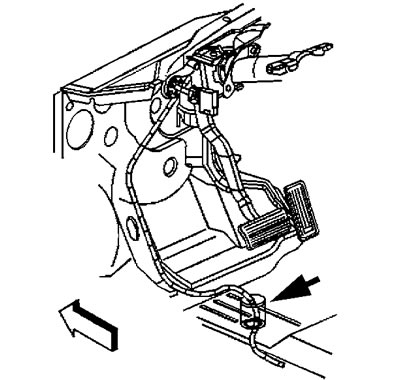
11. Raise the vehicle and place safety posts under the frame.
12. Disconnect the cable support clips from the floor panel reinforcement.
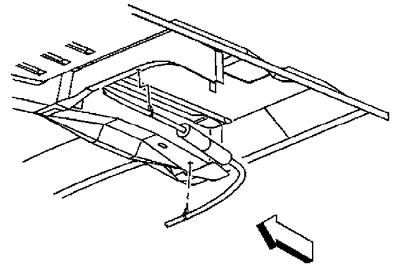
13. Make sure that the manual transmission control shaft is set to the parking position.
14. Remove the automatic transmission control cable fastening clamp from the bracket.
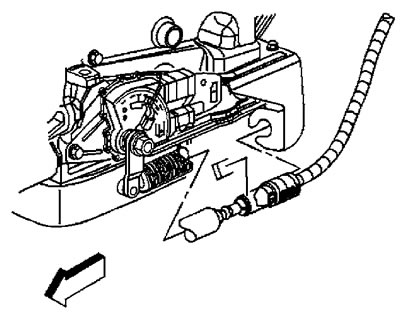
15. Disconnect the cable support clip on the transfer case.
16. Remove the end (2) of the control cable from the cable ball joint (1) on the automatic transmission lever.
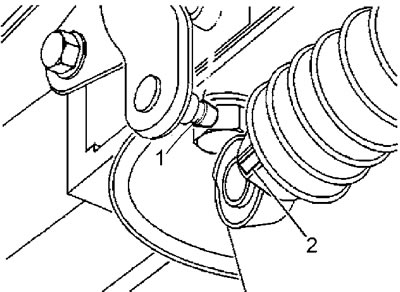
17. Squeeze the cable clamps and remove the cable from the bracket.
18. Remove the cable.
Installation
19. Installation is carried out in the reverse order. When installing, make sure that the shift shaft on the automatic transmission and the automatic transmission selector are in the "P" position.
(The original article can be found on the resource: CHEVYMAN.ru)