


Caution: If the automatic transmission is at operating temperature, take precautions to prevent liquid burns.
1. Raise the vehicle and place safety stands under the frame.
2. Place a container under the automatic transmission pan to collect the fluid.
3. If installed, unscrew the drain plug and drain the fluid. Tightening torque 18 N·m.
Note: Apply sealant to the plug threads before installation.
4. If there is no drain plug, unscrew the control cable support bracket mounting bolts, move the bracket and cable to the side. Tightening torque 25 N·m.
5. Unscrew the tray mounting bolts on the sides and at the front.
6. Loosen the rear pan mounting bolts four turns.
7. Tap the tray with a rubber mallet, tilt the tray and drain the liquid.
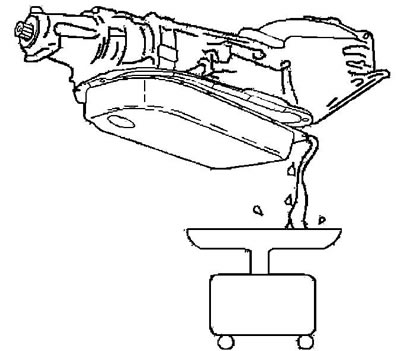
8. Unscrew the remaining pan mounting bolts.
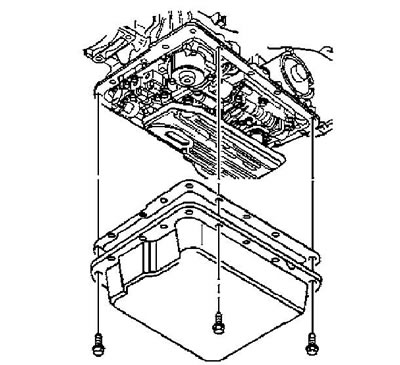
Tightening torque 11 Nm.
9. Remove the pan and gasket.
10. Remove the filter by turning the filter from side to side and pull it out of the valve body.
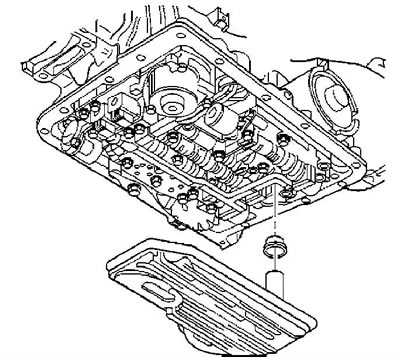
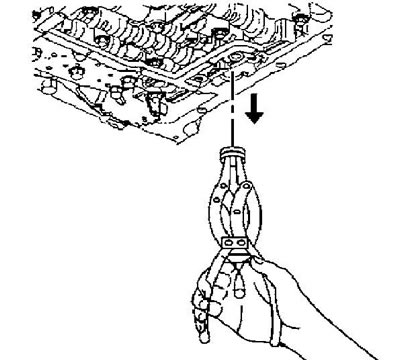
11. Remove and discard the filter seal. The filter seal may be stuck in the pump. If this happens, remove the seal with pliers.
12. Check the color of the liquid.
13. Inspect the filter. To do this, unclip the cover fasteners and remove the cover. The filter may contain particles of clutch friction lining material, bronze from worn bushings, and steel shavings. The presence of these particles will help in finding the causes of some malfunctions.
14. Installation is carried out in the reverse order. Use only NEW filter, filter seal and pan gasket. Before installation, clean the mating surfaces of the automatic transmission housing and pan.