
2. The most likely causes of valve noise are dirt trapped in the valve lifter, poor oil circulation, low viscosity, or insufficient pressure. Therefore, before you start removing the valve, check the oil for fuel, find out whether its purity and viscosity meet the technical requirements and, if necessary, top it up to the required level.
Removal
3. Remove the valve cover and intake manifold (see sections 4 and 5).
4. Remove the valve rocker arms and rods (see section 6).
5. There are several ways to remove the tappets from the hole. You can use a special puller to grab and remove the pusher, but you can often do without it. On late model engines with low carbon deposits, the tappets can often be removed with a small magnet or even just your fingers. You can also use a scriber's scribe with a curved end: its tip is inserted under the retaining ring located above the pusher (see illustrations).
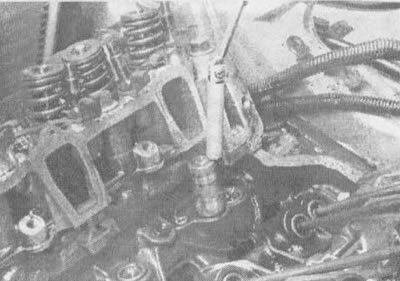
10.5a. The tappets can be removed using a device with a magnet... |
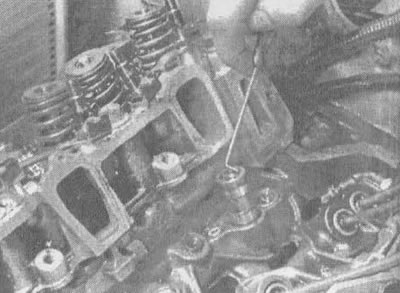
10.5b...or scribers with a curved end |
Warning! If you do not intend to replace the tappets (together with the camshaft) new parts, do not use tweezers to remove them. Moiyi pliers can damage the precision machined and hardened pushrods, rendering them unusable.
6. Before removing the valve lifters, prepare a box with marked compartments for storing them so that you do not mix up their installation locations when assembling the unit. After removing the tappets, store them in a place that is inaccessible to contamination (see illustration).
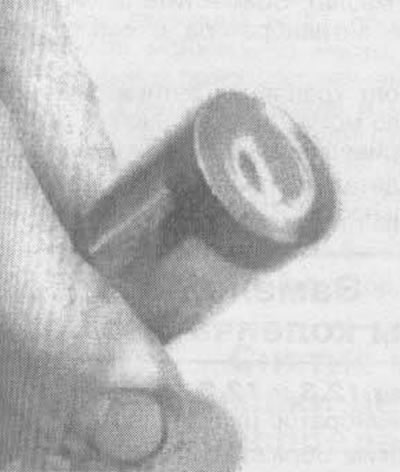
Note. Some engines can be fitted with factory-installed pushrods of both standard and 0.010-inch (0.25 mm) larger repair dimensions. The cylinder block of such engines has corresponding markings (see illustration).
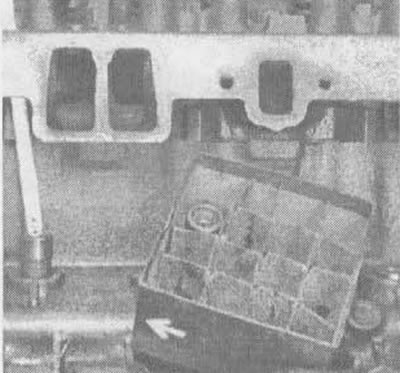
10.6a. Storing the tappets in a box like the one shown in the photo will allow you to install them in the same places from which they were removed |
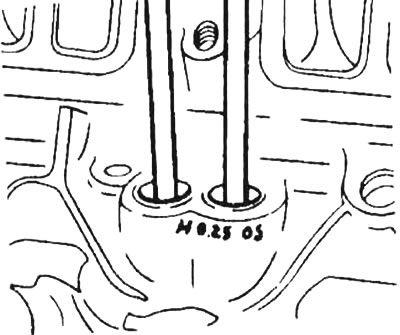
10.6b. If your car's engine was equipped with oversized tappets at the factory, the tappet bosses will be marked with a spot of white paint with the imprint "0.25 (mm) OS" |
Checking the status and installation
7. Valve lifter parts are not sold separately. The effort required to remove them from the engine again if cleaning them does not produce a positive effect is more expensive than the potential savings from repairing them.
8. Wash the tappets with solvent and dry thoroughly, being careful not to mix them up.
9. Check the walls, bases and seats of all push rods for signs of abrasion, scoring and uneven wear (see illustrations). If the walls of the pusher are damaged or worn (which is unlikely), also check the tappet holes in the cylinder block. If the rod seats are worn, check the condition of the rod ends.
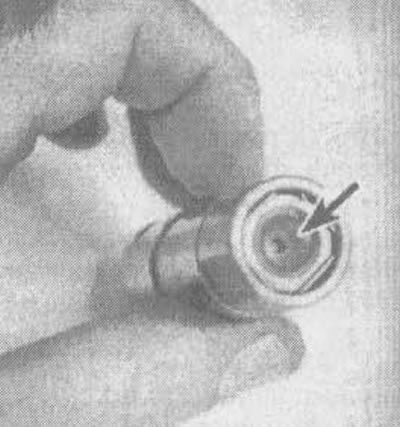
10.9a. At the top of each push rod, check the rod seat (shown by arrow) for absence of wear |
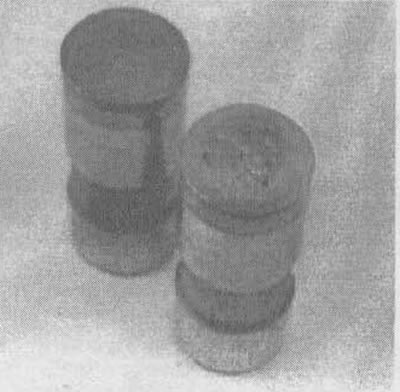
10.9b. If the lower part (base) of the tappet is worn with the formation of a depression, replace such a tappet assembly |
10.9v. The base of the pusher should be slightly convex; to check for the presence of a bulge, you can use another pusher by placing its side surface against the base of the first one. If the base of the tappet being tested is flat, this indicates that it is heavily worn and requires replacement |
10.9g. If there are burrs and scratches on the base of the tappet, both the tappet itself and the camshaft must be replaced |
10. If you are reusing the lifters removed from the engine, install them in the same holes from which they were removed. To remove air bubbles, dip the tappets in oil. Before installing the tappets, apply a layer of molybdenum grease to each of them.
11. The remaining assembly steps are performed in reverse order.
12. After starting the engine, check for oil leaks.
The article is based on data from the website «ChevyMan»