
To remove oil more completely, it should be drained from a warm engine. Therefore, it is advisable to change the oil immediately after the trip. Before starting work, it is necessary to purchase a new sealing ring for the drain plug along with the filter element (catalog number GH 90 528 145).
The oil filter cover sealing ring is supplied with the filter element. Both rings must be replaced at every oil change.
To perform the work, you will need a wide container with a capacity of more than 5 liters for draining the used oil, an inspection ditch or overpass.
Note: If there is no suitable container for collecting used oil, you can use a canister and drain the oil from it through a funnel. You can make a good container yourself from a plastic canister by cutting out its side wall.
We replace the engine oil and oil filter in the following order:
1. We prepare the car for maintenance and repair, install the car on an inspection pit or overpass.
2. Unscrew the oil filler cap (see above).
3. Remove the engine crankcase protection.
Warning! Oil is hot. When performing the following operation, be careful to avoid burning.
4. Using a TORX T45 key, loosen the drain plug.
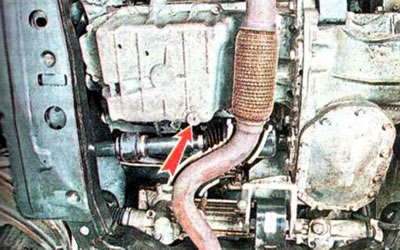
5. Place a container for used oil under the engine, unscrew the plug and drain the oil from the engine.
6. Using a 24 mm socket wrench, unscrew the oil filter cover.
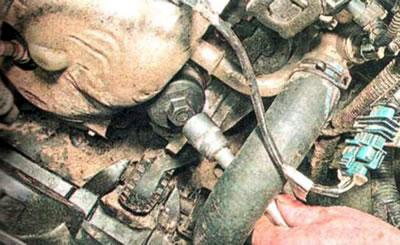
7. Remove the cover and take out the filter element.
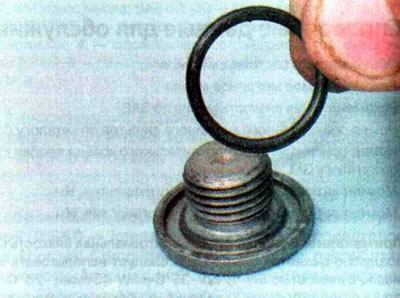
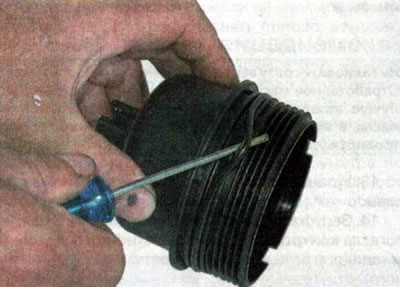
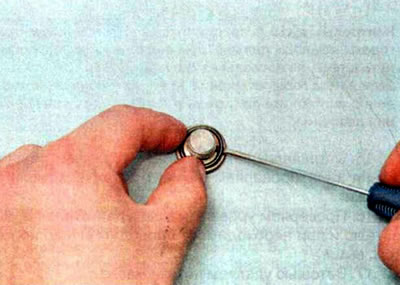
8. Replace the sealing ring on the cover...
...and on the drain plug.
9. After the oil stops leaking, screw the plug into the drain hole with a new sealing ring and tighten to a torque of 14 Nm.
10. Install the new filter element into the cover so that it is held in place by the clamps located on its upper end.

11. Apply clean engine oil to the rubber sealing ring of the cover. We screw the filter cover back into place with a new sealing ring and filter element to a torque of 24 Nm.
12. Place a funnel in the filler neck and pour engine oil into the engine crankcase, monitoring its quantity using the oil level indicator (see above).
Recommendation. Do not pour in all the required amount of oil at once. Used oil is usually not drained completely. It is better to first fill in about 2/3 of the total volume of oil, and then top it up as needed, monitoring the level with the indicator.
13. Install the oil filler cap.
14. Start the engine and make sure that the oil pressure warning light goes out (however, it can burn a little longer than usual), there are no oil leaks from under the oil filter cover or from under the drain plug.
Note: The oil pressure warning light may remain on for a little longer than usual, but should go out within a few seconds.
If the lamp remains on for 5 seconds or longer, stop the engine immediately and find out the reason for the pressure drop.
15. Stop the engine. If a leak is detected, check the tightening torque of the cap and plug.
16. Check the oil level in the engine using the indicator and, if necessary, top it up to the norm (see above).
17. Remove oil stains with a rag.
18. Install the engine crankcase protection.