
ChevyMan.ru
Mazda Mitsubishi Toyota Land Rover Honda Kia Nissan
English Русский
Български
Беларускі
Український
Српски
Hrvatski
Română
Polski
Slovenský
Magyar
|
Articles | Sitemap | Contacts |


Home   Aveo   Captiva   Cruze   Lacetti   Lanos   Niva   Tahoe   Others  
Orlando 1 (2010-2018) Trailblazer 1 (2001-2008, petrol) Lumina 1 (1989-1994)
  • Home
  • Chevrolet
  • Trailblazer 1
  • Transmission
  • Drive shafts and cardan
  • Differential gear seal — replacement

Differential gear seal — replacement (Chevrolet Trailblazer 1)

            0

Note: This procedure applies to both front and rear differential gear seals.


1. Loosen the wheel nuts, lift the rear or front with a jack (for rear and front differential respectively) part of the car and install special supports. Block the wheels on the supporting surface to prevent the vehicle from rolling off the supports. Remove the wheels.

2. Disconnect the driveshaft from the differential gear and secure it outside the work area (see subsection 3).

3. Turn the gear several times by hand. Measure the torque required to turn the gear using a torque wrench (see illustration). Record the obtained torque value to use the measurement results during the further procedure.
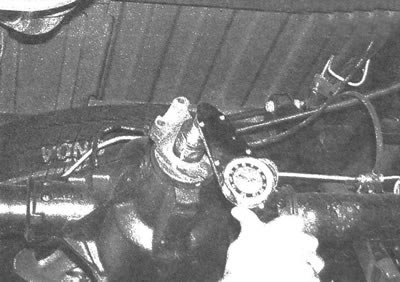
9.3 Using a torque wrench, measure the torque required to turn the differential gear

9.3 Using a torque wrench, measure the torque required to turn the differential gear


4. Mark the initial relative position of the gear flange and shaft (see illustration), then count and record the number of threads visible on the gear shaft.
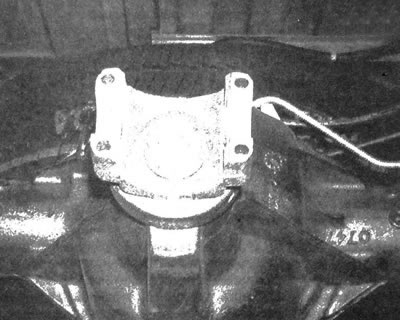
9.4. Before loosening the nut, mark the initial relative position of the flange and shaft, and also…

9.4. Before loosening the nut, mark the initial relative position of the flange and shaft, and also count the number of visible threads


5. Using a special device (available for sale) it is possible to prevent the differential gear flange from turning when the tightening force of the self-locking nut is released. A chain device can also be used to secure the flange (see illustration).
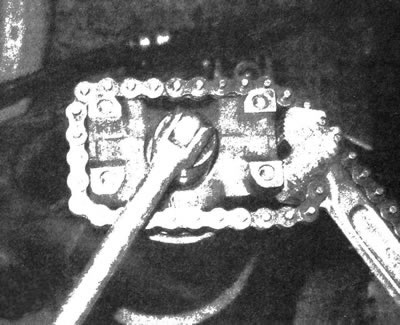
9.5. When loosening the nut, a chain device can be used to secure the flange

9.5. When loosening the nut, a chain device can be used to secure the flange


6. Unscrew the gear nut.

7. Remove the flange. It may be necessary to use a two-jaw puller that attaches to the flange at the rear to remove it. Do not attempt to remove the flange by prying it or hitting it or the end of the pinion shaft with a hammer.

8. Remove the old seal and discard it (see illustration).
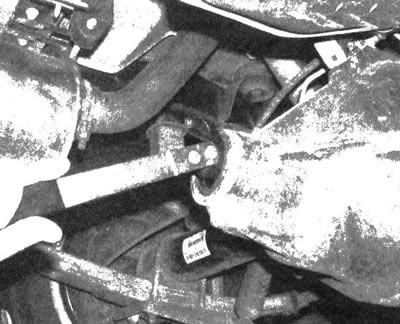
9.8. Using a special puller or a large screwdriver, remove the oil seal located on the differential…

9.8. Using a special puller or a large screwdriver, remove the oil seal located on the differential gear shaft (in this case, the gear should not be allowed to shift)


9. Lubricate the new seal and fill the space between its edges with grease for wheel bearings, then, without allowing it to slant, insert it into the socket using a special mandrel or a large-diameter socket head (see illustration). Make sure that the seal is installed into the housing without tilting and to its full depth.
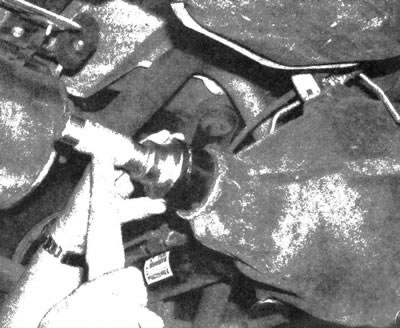
9.9. To insert a new gear seal into the differential housing, you can use a large-diameter socket…

9.9. To insert a new gear seal into the differential housing, you can use a large-diameter socket head equal to the outer diameter of the seal


10. After aligning the previously applied marks (see item 4), install the gear shaft flange. If necessary, tighten the pinion nut to place the flange in its original location. Do not attempt to drive the flange in with a hammer.

11. Apply RTV sealant to the ends of the spline grooves visible in the center of the flange to create a seal to prevent transmission oil leakage.

12. Install the sealing washer and new pinion nut. Tighten the nut so that the marked number of visible threads remains unchanged (see item 4).

13. Measure the torque required to turn the gear and carefully tighten the nut in small increments (no more than 7 Nm), bring it into line with the value described in point 3. Taking into account the allowance for the new seal to be attracted, tighten the nut so that the torque required to turn the gear slightly exceeds the marked value (no more than 0.5 Nm).

14. Install in reverse order all the elements removed during this procedure. Tighten all fasteners to the required torques.

The article was checked: Vladimir Romannikov
This article is available at russian, bulgarian, belarusian, ukrainian, serbian, croatian, romanian, polish, slovak, hungarian

Share information:

Previous articles
Trailblazer 1: Drive shafts and cardan
Next articles

Axle shaft bearing (rear) — replacement
Axle shaft seal (rear) — replacement
Half shafts (rear) — removal and installation
Bridges — description and inspection
Cardan joints — replacement
Bridge (rear) removal and installation
Drive shafts (4WD models) — general information and inspection
Drive shaft (4WD models) — removal and installation
Drive shaft boot (4WD models) — replacement
Front Axle Shift Drive (All Wheel Drive Models with Electric Shift Drive) — Replacement


See similar articles on the topic of Chevrolet cars:
Replacing the oil pan seal Chevrolet Aveo T300 (2012-2018)
Differential gear components Chevrolet Captiva 1 (2006-2018)
Replacing the oil pan seal Chevrolet Cruze 1 (2008-2016)
Replacing the camshaft seal Chevrolet Lacetti 1 (2002-2009)
Replacing the camshaft seal Chevrolet Lanos T150 (2002-2009)
Installation and adjustment of the drive gear of the gearbox Chevrolet Niva 1 (2002-2016)
Main gear shaft seal — replacement Chevrolet Tahoe 1 (1992-2000)
Link in different formats to this page


Visitor comments

No comments yet


How much will 44 + 45 =


Orlando 1 (2010-2018) 
  • General information
  • Introduction to manual
  • User manual
  • Maintenance
  • Troubleshooting
  • Power unit
  • Engine repair
  • Fuel and control system
  • Cooling and lubrication system
  • Ignition system
  • Transmission
  • Clutch
  • Gearbox
  • Drive shafts
  • Chassis
  • Car suspension
  • Steering
  • Brake system
  • Body
  • Exterior (external elements)
  • Doors, locks and windows
  • Electrical equipment
  • Equipment and devices
  • Windscreen wipers
  • Power devices
  • Electrical diagrams


Trailblazer 1 (2001-2008) 
  • General information
  • User manual
  • Troubleshooting
  • Maintenance
  • Power unit
  • Engine in a car
  • Engine overhaul
  • Cooling and heating
  • Fuel and exhaust system
  • Engine electrical equipment
  • Engine control
  • Transmission
  • Automatic gearbox
  • Transfer case
  • Drive shafts and cardan
  • Chassis
  • Brake system
  • Car suspension
  • Steering
  • Body
  • Exterior (external elements)
  • Interior (internal elements)
  • Doors, locks and windows
  • Electrical equipment
  • Equipment and devices
  • Electrical circuits


Lumina 1 (1989-1994) 
  • General information
  • Maintenance
  • Power unit
  • Engine 3.1L V6
  • Engine 3.8L V6
  • Engine overhaul
  • Cooling system
  • Power and exhaust system
  • Fuel injection
  • Engine electrical equipment
  • Reduced exhaust gas toxicity
  • Transmission
  • Automatic gearbox
  • Drive shafts
  • Chassis
  • Brake system
  • Car suspension
  • Steering
  • Body
  • Heating and air conditioning
  • Repair of body elements
  • Doors, covers and windows
  • Interior (internal elements)
  • Electrical equipment
  • Equipment and devices
  • Electrical circuits


ChevyMan.ru © 2017-2026 · Mobile version · Feedback · Site search · Interesting to read · Sitemap: EN BG BY UA RS HR RO PL SK HU

Aveo 2003-2008 · Aveo 2006-2011 · Aveo 2012-2018 · Captiva 2006-2018 · Cruze 2008-2016 · Lacetti 2002-2009 · Lanos 2002-2009 · Niva 2002-2016 · Tahoe 1992-2000 · Tahoe 2000-2014 · Lumina 1 1989-1994 · Trailblazer 1 2001-2008 · Orlando 1 2010-2018 ·
🛡️ For your security and to improve our service, this site uses cookies. You can disable them in your browser.