


2. Remove the master cylinder.
3. Remove the clutch slave cylinder.
4. On a gearbox with a cast iron housing, unscrew the bolts securing the clutch housing to the engine, pry up and remove the housing.
5. The clutch release fork and release bearing can be left on the clutch housing.
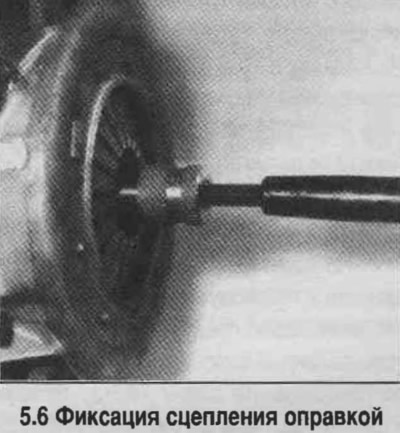
6. Secure the clutch by inserting the mandrel (see photo).
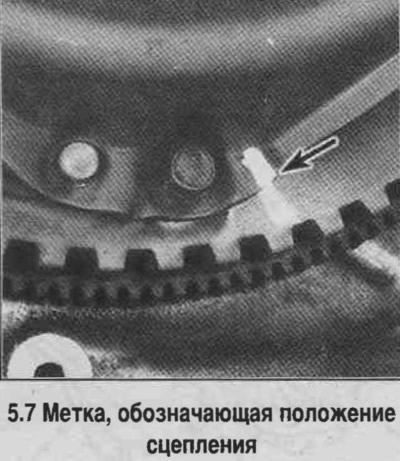
7. Locate the clutch disc timing marks (letters X or O), if they are absent, mark the position of the clutch on the flywheel (see photo).
7. Gradually and evenly, in a diagonal order, loosen the bolts, unscrew the bolts and remove the clutch.
8. As a rule, only the friction disk requires replacement. However, if the disk is found to be oiled, the cause must be found and eliminated.
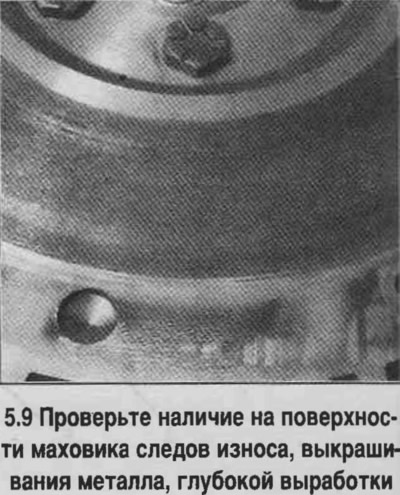
9. Check the condition of the flywheel (see photo). It is recommended to remove the flywheel and sand it down regardless of the surface condition.
10. Check the condition of the guide bearing.
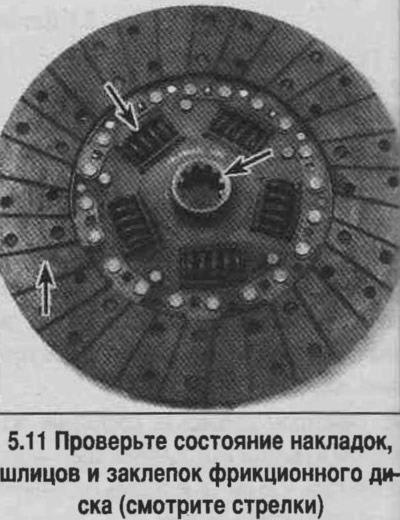
11. Check the condition of the friction disc surface, springs, and the strength of the rivets (see photo).
12. The release bearing is also changed along with the friction disc.
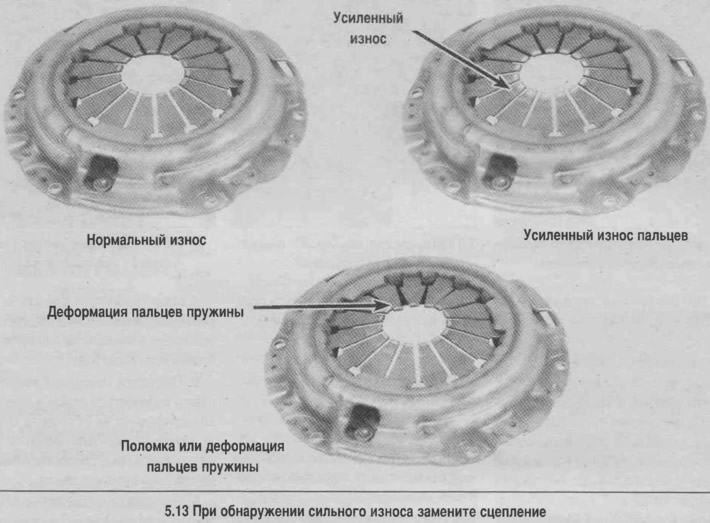
13. Check the surface condition of the pressure plate, diaphragm spring and spring pins (see photo). Minor defects of the disc can be sanded down with sandpaper; in case of significant defects, replace the clutch.
14. Clean the flywheel and clutch thoroughly. Install the clutch, aligning the marks, and tighten the bolts by hand.
15. Center the disc using a drift that should fit into the guide bearing and tighten the clutch bolts gradually and evenly.
16. Lubricate the release bearing groove, the friction surfaces of the fork and the splines of the gearbox input shaft with refractory grease. Lubricate the internal grooves of the release bearing with refractory grease, also lubricate the thrust parts of the clutch release lever.
17. Install the release bearing.
18. On a gearbox with a cast iron crankcase, install the bell housing and tighten the bolts to the specified torque.
19. Install the gearbox.
[The article is reprinted from the website: «CHEVYMAN.RU»]