


Contents: Removal ↧ Installation ↧
Removal
Early models
1. Unscrew the inner nuts and washers securing the front axle beam to the frame bracket.
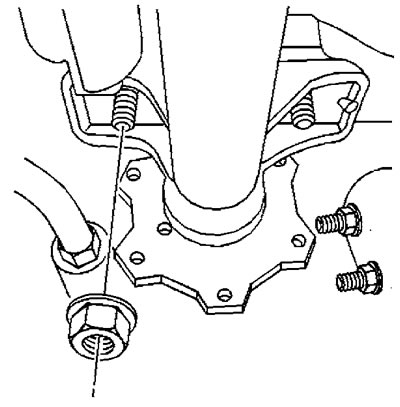
2. Place a jack under the bridge beam.
3. Unscrew the lower bolt securing the front axle main gear housing.
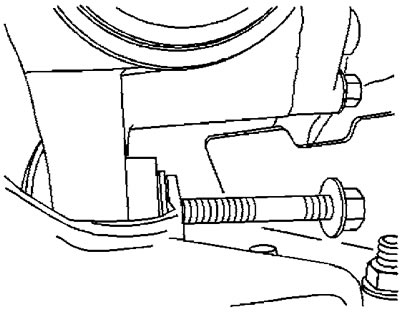
4. Unscrew the upper bolt securing the front axle main gear housing.
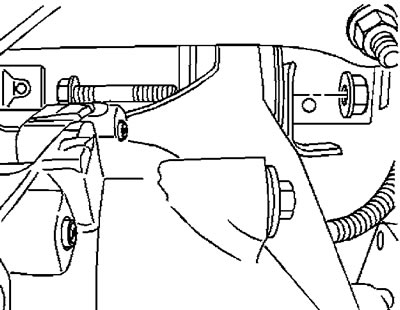
5. Lower the front axle.
6. Unscrew the automatic transmission cover mounting bolt.
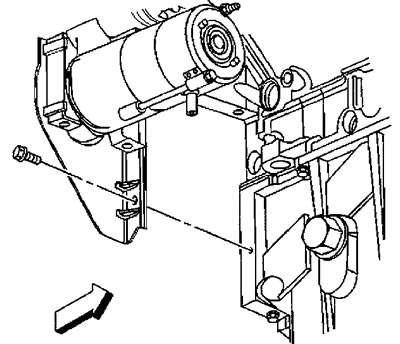
7. Loosen the oil pan protection mounting bolts (if installed).
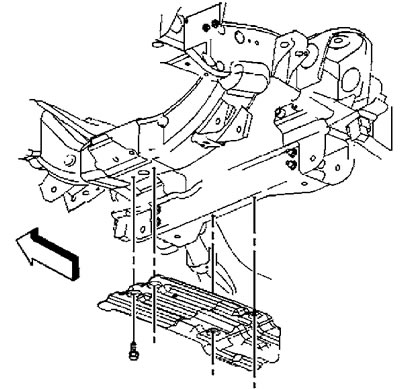
8. Remove the oil pan guard.
9. Unscrew the cross member mounting bolts.
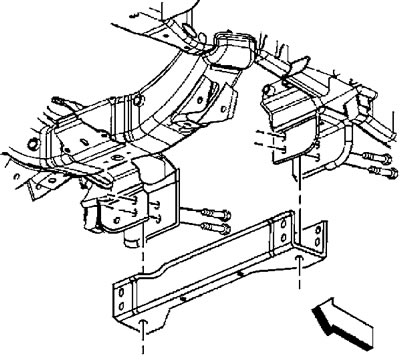
10. Remove the cross member.
11. Loosen the automatic transmission cover mounting bolt and remove the cover.
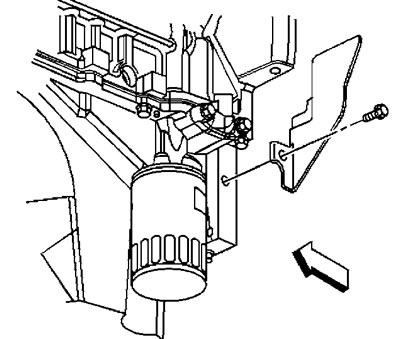
12. Drain the engine oil and remove the oil filter.
13. Replace the drain plug and tighten it by hand.
14. If the 4L60-E automatic transmission is installed, unscrew the right bolt and the automatic transmission mounting bolt-stud.
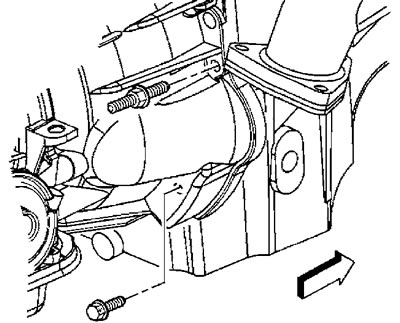
15. Unscrew the left lower bolt securing the automatic transmission.
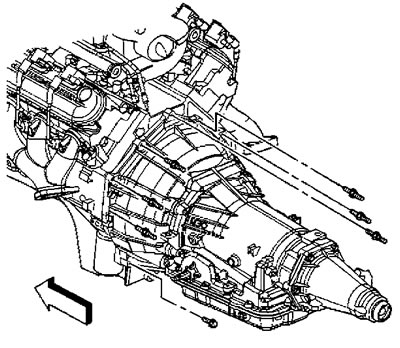
16. If the 4L80-E automatic transmission is installed, unscrew the torque converter cover bolts.
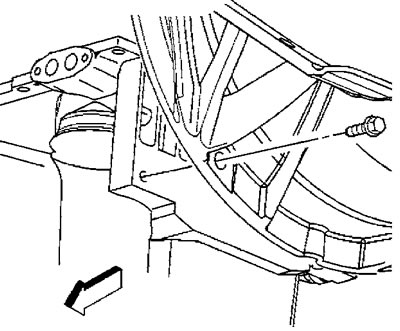
17. Disconnect the oil level sensor connector (3).
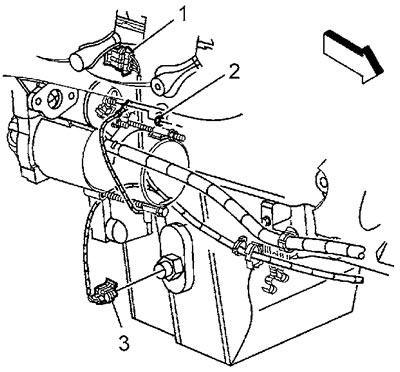
18. Loosen the battery cable channel bolt.
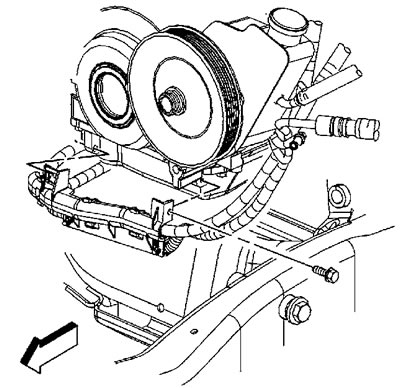
19. Pull the cable channel retaining pin out of the oil pan.
20. Disconnect the battery cable and cable support clip from the starter
21. Remove the engine oil cooler tubes from the battery cable clip.
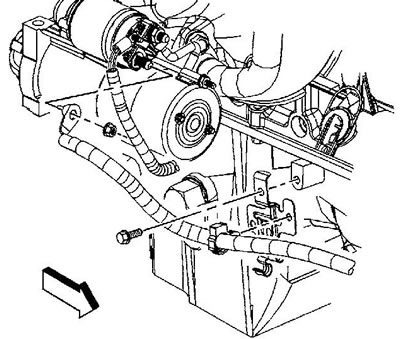
22. Loosen the mounting bolt and remove the battery cable clip.
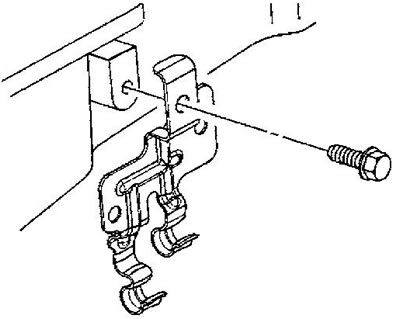
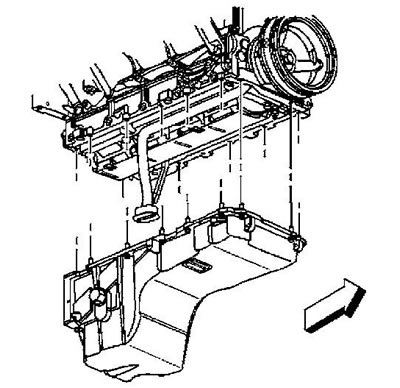
23. Loosen the oil pan mounting bolts.
24. Remove the oil pan.
Caution: Do not allow dirt to enter the engine oil line, install plugs on open holes.
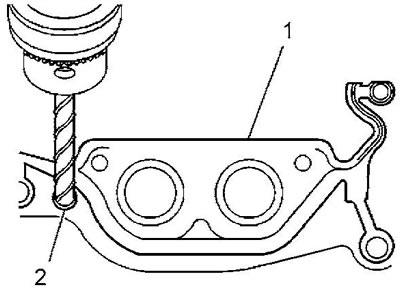
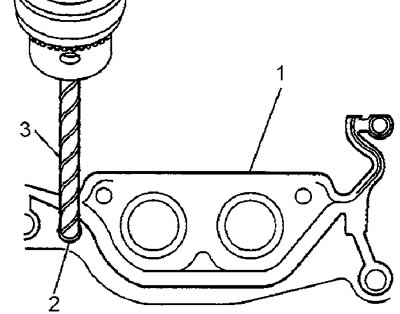
25. If the oil pan gasket needs to be replaced, drill out the rivets (2) securing the gasket to the oil pan.
26. Remove the gasket (1), discard the gasket and rivets.
Note: There is no need to rivet the new gasket to the pan.
Late models
1. Raise the vehicle and place safety stands under the frame.
2. On 1500 series models, remove the oil pan guard mounting bolts and remove the guard.
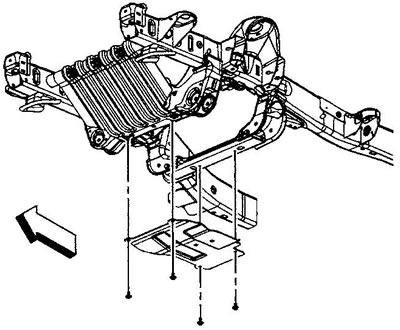
3. On 2500 Series models, loosen the two rear and remove the two front oil pan guard mounting bolts and remove the guard.
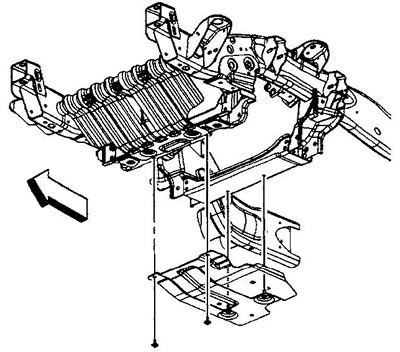
4. Remove the front axle final drive housing.
5. Unscrew the steering rack fastener and hang the rack on the wire.
6. Place a container under the oil pan drain plug to collect the oil.
7. Remove the drain plug (430).
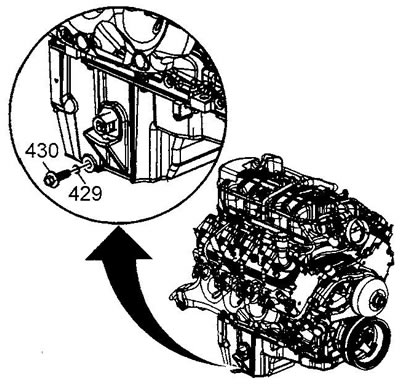
8. Drain the oil pan completely.
9. Install and hand tighten the drain plug.
10. Place a container under the oil filter to collect the oil.
11. Unscrew the oil filter (437).
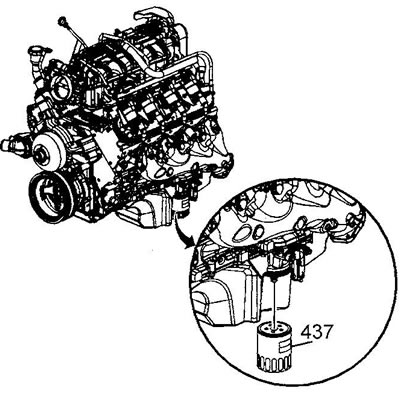
12. Drain the oil.
13. Install the oil filter and tighten it by hand.
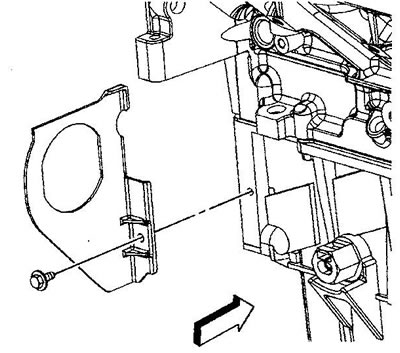
14. Unscrew the bolt securing the right automatic transmission cover.
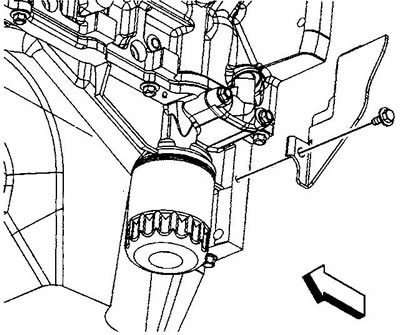
15. Unscrew the bolt securing the left cover of the automatic transmission.
16. Unscrew the crossbar fastener and remove the crossbar.
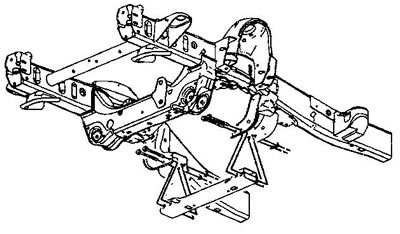
Shown is the 1500 Series crossbar
17. Unscrew the two lower automatic transmission mounting bolts.
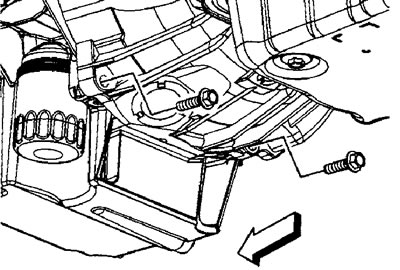
To point 17, automatic transmission 4L60-E/4L70-E |
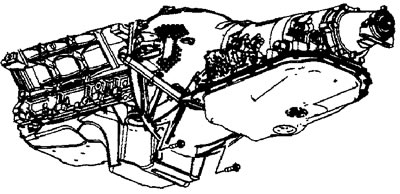
To point 17, automatic transmission 4L80-E |
18. On models with 6L80-E automatic transmission, unscrew the lower left and right automatic transmission mounting bolts.
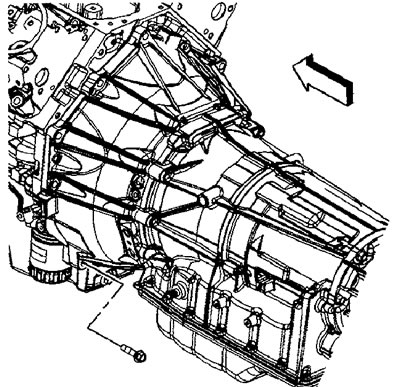
Automatic transmission 6L80-E, left bolt |
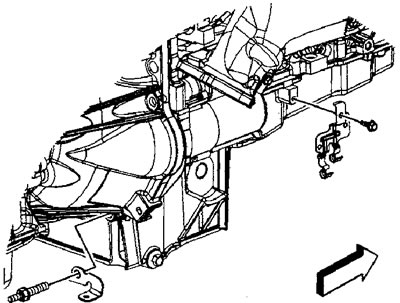
Automatic transmission 6L80-E, right bolt |
19. Disconnect the oil level sensor connector (4).
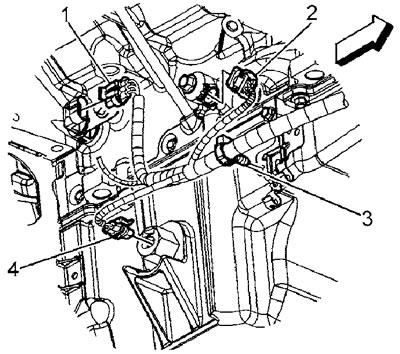
20. Remove the engine wire harness support clip (3) from the oil cooler pipe bracket.
21. Loosen the bolt (2) of the battery cable channel.
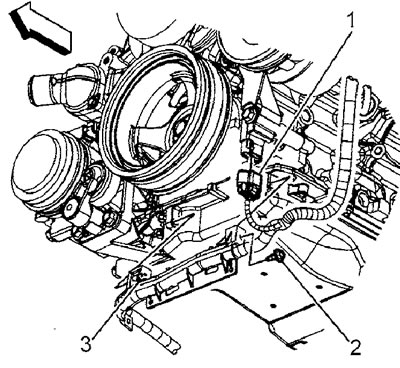
22. Remove the channel pin (3) from the oil pan.
23. Release the automatic transmission fluid cooler tubes from the oil pan clip.
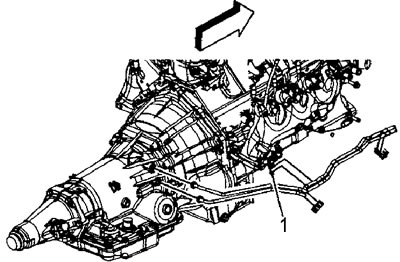
Shown are automatic transmissions 4L60-E/4L70-E
24. Loosen the bolt securing the cooler tube clip to the oil pan and remove the clip.
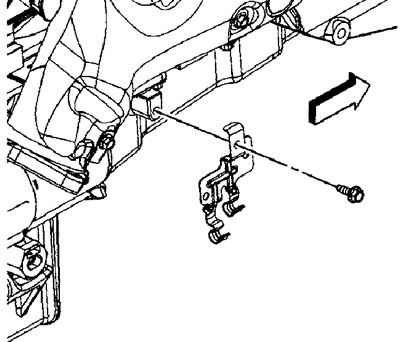
25. Loosen the oil pan mounting bolts.
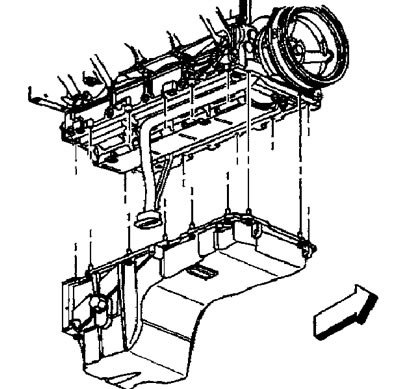
26. Remove the oil pan.
27. If the old pan is to be installed, proceed with installation. Otherwise, drill out the rivets (2) securing the pan gasket, remove the gasket (1), discard the gasket and rivets.
Note: There is no need to rivet the new gasket to the pan.
Installation
Note: The location of the hole for the lower automatic transmission mounting bolts is critical for the rigidity of the power unit alignment. It is important that the rear part of the oil pan does not protrude anywhere beyond the rear plane of the cylinder block.
Early models
1. If removed, install a new oil pan gasket.
2. Apply a bead of sealant approximately 5 mm in diameter and 20 mm in length to the joints of the block planes and engine covers. The protrusion of the front or rear cover gasket does not need to be cut off.
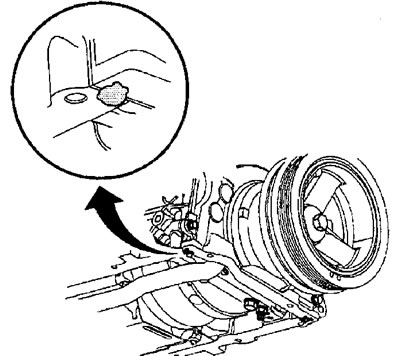
3. Install the pan and gasket onto the engine using two bolts.
Caution: Align the cylinder block oil line holes with the oil pan gasket holes.
4. Install the remaining pan mounting bolts.
5. Tighten the pan mounting bolts by hand.
6. If the 4L80-E automatic transmission is installed, install and hand tighten the torque converter cover bolts.
7. If the 4L80-E automatic transmission is installed, install the bolt and stud bolt securing the right side of the automatic transmission.
8. Install the lower left automatic transmission mounting bolt. Tighten:
- a) bolts securing the pan to the front cover. Tightening torque 25 Nm.
- b) bolts securing the pan to the rear cover. Tightening torque 12 Nm.
- c) automatic transmission and torque converter cover mounting bolts. Tightening torque 50 Nm.
9. Install the battery cable clip on the tray and tighten the mounting bolt. Tightening torque 9 Nm.
10. Secure the engine oil cooler tubes to the battery cable clip.
11. Fasten the battery cable to the starter, secure the cable to the clip.
12. Insert the battery cable channel retaining pin into the oil pan.
13. Tighten the cable channel mounting bolt. Tightening torque 12 Nm.
14. Connect the engine oil level sensor connector.
15. Install the automatic transmission cover, tighten the mounting bolt. Tightening torque 12 Nm.
16. Install the crossmember. Tighten the crossmember mounting bolts. Tightening torque 100 Nm.
17. Install the oil pan guard. Tighten the guard mounting bolts. Tightening torque 20 Nm.
18. Install the automatic transmission cover, tighten the cover mounting bolts. Tightening torque 12 Nm.
19. Raise the front axle to the installation position.
20. Install the upper bolt and nut securing the final drive housing. Tighten the nut by hand.
21. Install the lower bolt and nut securing the final drive housing. Tighten the upper and lower bolts. Tightening torque 100 Nm.
23. Screw on the front axle beam mounting nuts and tighten the nuts. Tightening torque 100 Nm.
24. Remove the jack from under the bridge beam.
25. Tighten the oil pan drain plug, install the oil filter and fill with engine oil.
Late models
1. If removed, install a new oil pan gasket.
2. Apply a bead of sealant approximately 5 mm in diameter and 20 mm in length to the joints of the block planes and engine covers. The protrusion of the front or rear cover gasket does not need to be cut off.
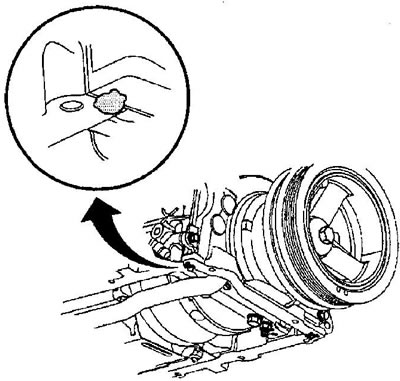
3. Install one pan mounting bolt into the pan to secure the gasket.
4. Install the tray in place and hand tighten the mounting bolts.
5. Install the lower automatic transmission mounting bolts, tighten the bolts by hand.
6. Tighten the bolts securing the pan to the front cover. Tightening torque 25 Nm.
7. Tighten the bolts securing the pan to the rear cover. Tightening torque 12 Nm.
8. Tighten the oil pan mounting bolts to the cylinder block. Tightening torque 50 Nm.
9. Install the cooler pipe support clip on the pan and tighten the mounting bolt. Tightening torque 9 Nm.
10. Secure the coolant cooler tubes to the clip.
11. Insert the battery cable channel fastening pin into the tray and tighten the channel fastening bolt. Tightening torque 12 Nm.
12. Connect the oil level sensor connector.
13. Secure the engine wire harness to the oil cooler tube clip.
14. Before installing the crossbar, remove any old glue residue from the frame and crossbar, clean the threads of the mounting bolts and nuts, and apply locking glue to the threads of the bolts.
15. Install the crossmember and tighten the mounting bolts and nuts. Tightening torque: 2500 series 120 Nm, 1500 series 100 Nm.
16. Install the left cover of the automatic transmission. Tighten the mounting bolt. Tightening torque 12 Nm.
17. Install the right automatic transmission cover. Tighten the mounting bolt. Tightening torque 12 Nm.
18. Install the new oil filter:
- a) Lubricate the filter sealing ring with engine oil.
- b) Tighten the filter. Tightening torque 30 Nm.
19. Tighten the oil pan drain plug. Tightening torque 25 Nm.
20. Install the front axle final drive housing.
21. Install the steering rack. Tighten the mounting bolts. Tightening torque: left-hand side bolts 200 Nm, right-hand side bolts 100 Nm.
22. Install the engine protection. Tighten the mounting bolts. Tightening torque 28 Nm.
23. Lower the vehicle.
24. Fill the engine with engine oil. Start the engine and check for oil leaks.