
ChevyMan.ru
Mazda Mitsubishi Toyota Land Rover Honda Kia Nissan
English Русский
Български
Беларускі
Український
Српски
Hrvatski
Română
Polski
Slovenský
Magyar
|
Articles | Sitemap | Contacts |


Home   Aveo   Captiva   Cruze   Lacetti   Lanos   Niva   Tahoe   Others  
Aveo T300 (2012-2018) Aveo T250 (2006-2011) Aveo T200 (2003-2008)
  • Home
  • Aveo
  • T200 (2003-2008)
  • Transmission
  • Manual gearbox
  • Disassembly and assembly of manual transmission

Disassembly and assembly of manual transmission (Chevrolet Aveo T200)

            0

Disassembly


1. Remove the gearbox from the vehicle.
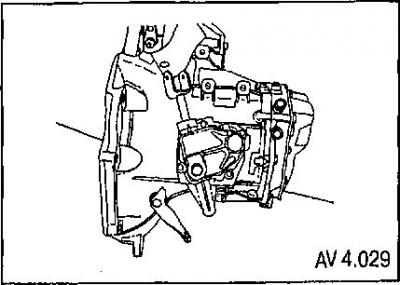
1. Remove the gearbox from the vehicle.


2. Remove the oil filler plug.

3. Remove the gear shift lever cover.
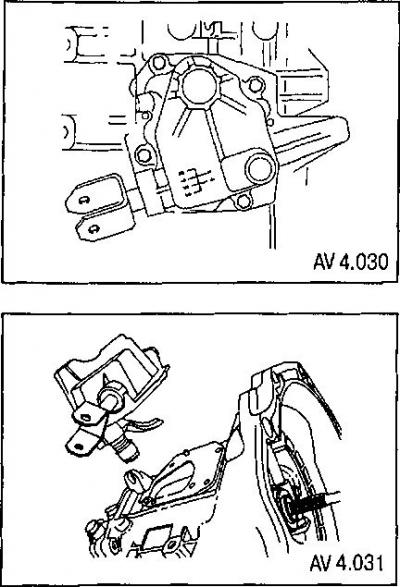
3. Remove the gear shift lever cover.


4. Install the lever cover on the process bracket.
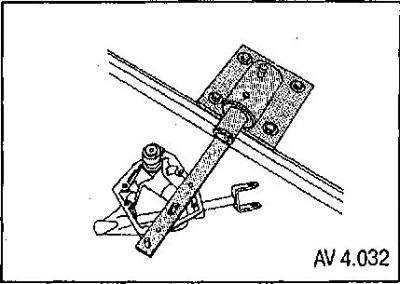
4. Install the lever cover on the process bracket.


5. Install the KM-552 device on the KM-113-2 base.

6. Remove the retaining ring, bushing, spring and intermediate lever.
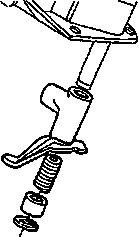
6. Remove the retaining ring, bushing, spring and intermediate lever.


7. Remove the shift lever pin.
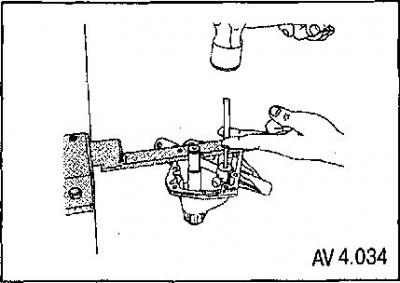


7. Remove the shift lever pin.


8. Remove the shift rod and shift lever.
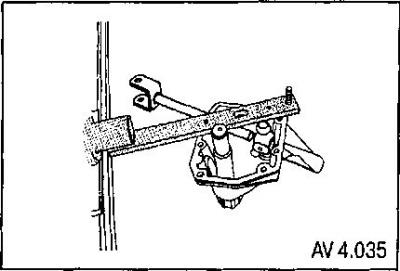
8. Remove the shift rod and shift lever.


9. Unscrew the screw and remove the speedometer sensor.
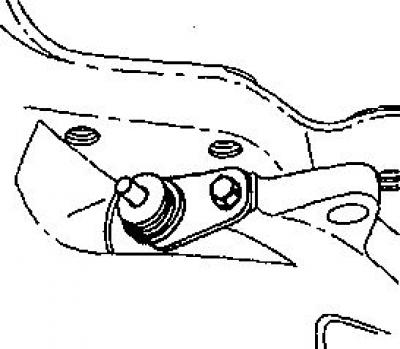
9. Unscrew the screw and remove the speedometer sensor.


10. Remove the gearbox cover.
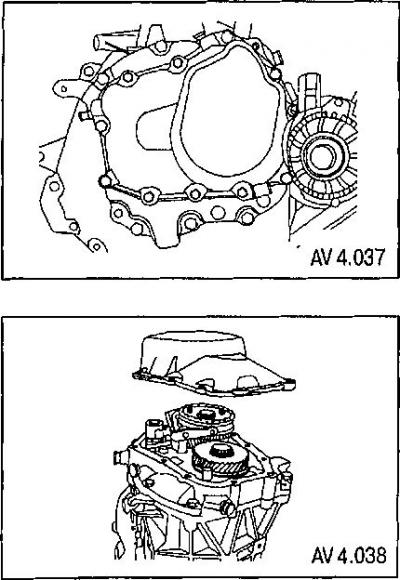
10. Remove the gearbox cover.


11. Engage second gear.


12. Loosen the bearing housing mounting screws.
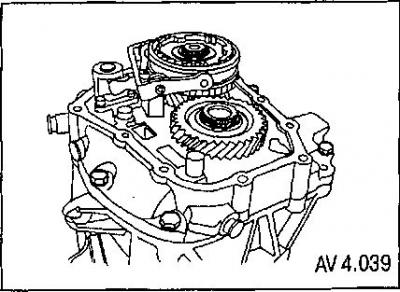
12. Loosen the bearing housing mounting screws.


13. Remove the bearing housing together with the shafts.
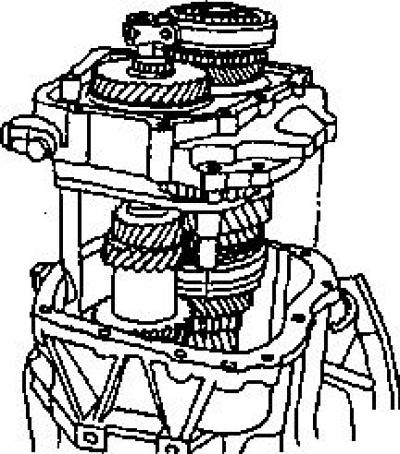
13. Remove the bearing housing together with the shafts.


14. Engage reverse gear.

15. Secure the bearing support in the fixture.
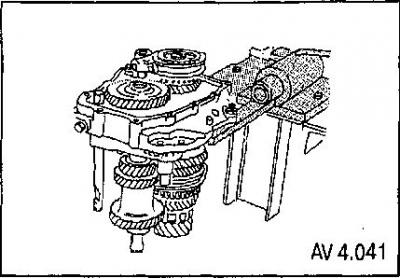
15. Secure the bearing support in the fixture.


16. Remove the bolts and 5th gear shift fork.
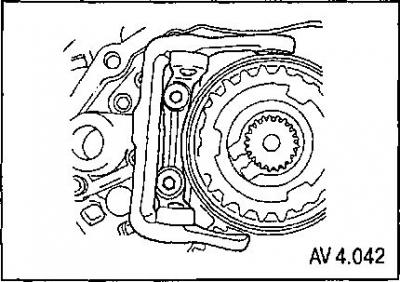
16. Remove the bolts and 5th gear shift fork.


17. Remove the retaining ring from the 5th gear block of the driven shaft.
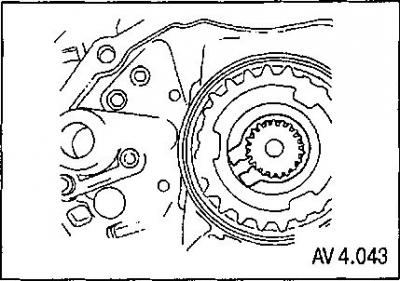


17. Remove the retaining ring from the 5th gear block of the driven shaft.


18. Remove the 5th gear engagement clutch and clutch hub.
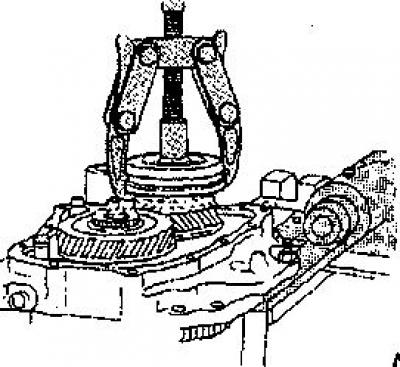
18. Remove the 5th gear engagement clutch and clutch hub.


19. Remove the 5th gear driven gear.
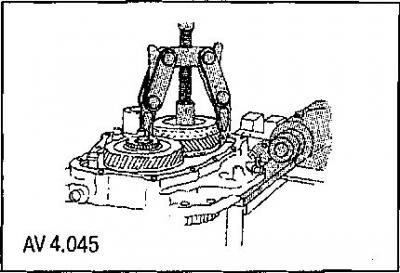
19. Remove the 5th gear driven gear.


20. Remove the bronze 5th gear synchronizer locking ring
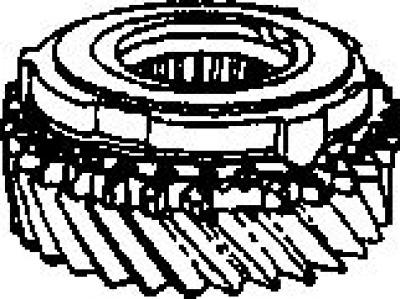
20. Remove the bronze 5th gear synchronizer locking ring


21. Remove the needle bearing, snap ring and thrust washers.
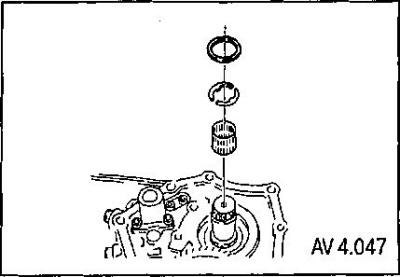


21. Remove the needle bearing, snap ring and thrust washers.


22. Remove the 5th gear pinion retaining ring.
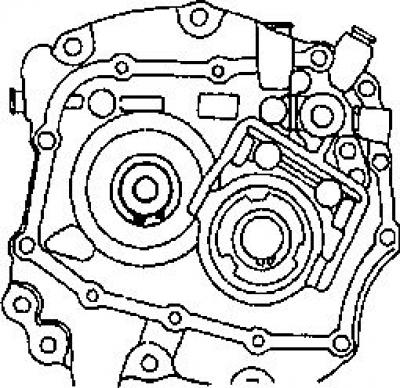
22. Remove the 5th gear pinion retaining ring.


23. Remove the 5th gear pinion.
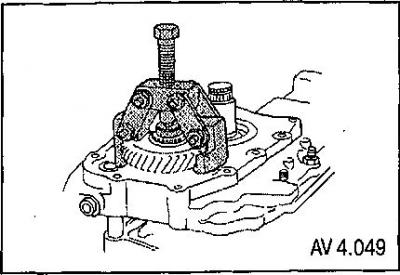
23. Remove the 5th gear pinion.


24. Remove the bolts and 5th gear connector from the backing plate using a stop.
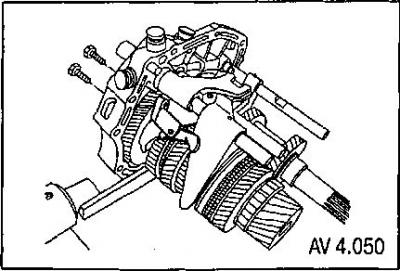
24. Remove the bolts and 5th gear connector from the backing plate using a stop.


25. Remove the 4th gear shift rod retainers.
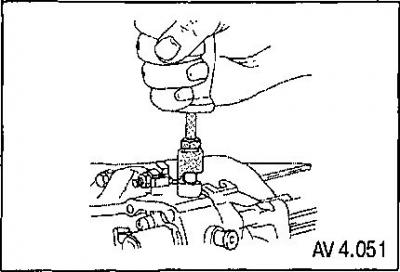


25. Remove the 4th gear shift rod retainers.


26. Remove the spring and locking pin from the small hole.
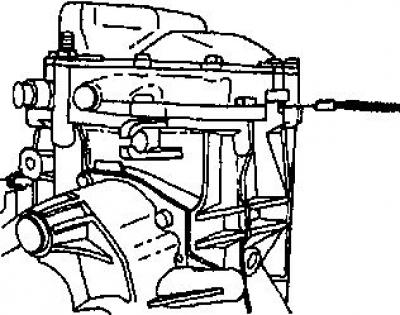
26. Remove the spring and locking pin from the small hole.


27. Remove the pin from the reverse gear rod/fork assembly.
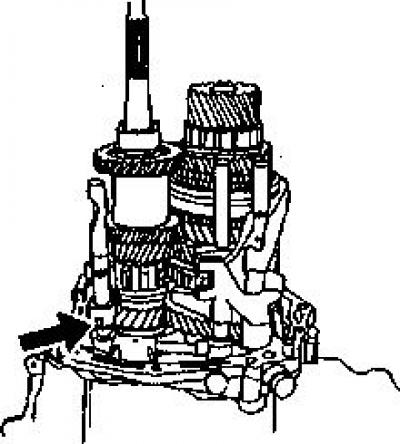
27. Remove the pin from the reverse gear rod/fork assembly.


28. Remove the reverse gear rod/fork assembly from the support plate.
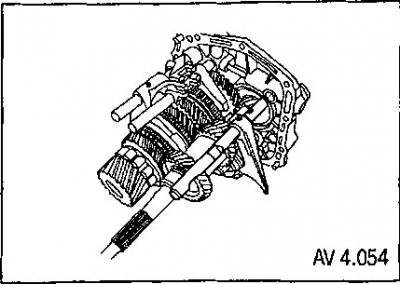
28. Remove the reverse gear rod/fork assembly from the support plate.


29. Remove the screws from the support bracket.
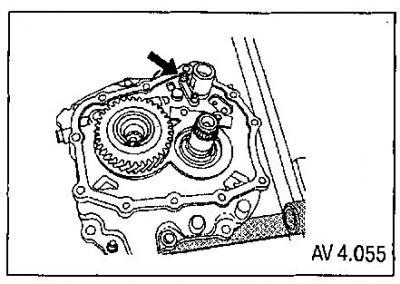
29. Remove the screws from the support bracket.


30. Remove the 1st and 2nd gear fork retaining pin.
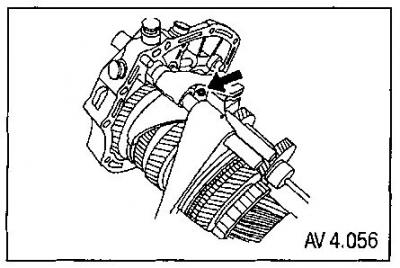
30. Remove the 1st and 2nd gear fork retaining pin.


31. Pull the 1st and 2nd gear rod outward until it comes out of the bearing housing.
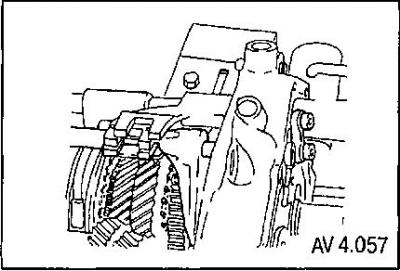
31. Pull the 1st and 2nd gear rod outward until it comes out of the bearing housing.


32. Remove the support bracket.
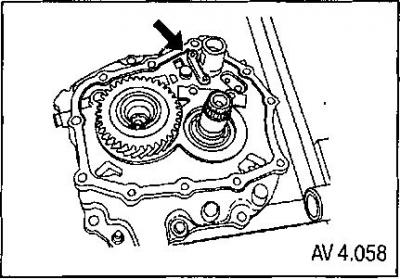
32. Remove the support bracket.


33. Remove the 3rd/4th gear fork retaining pin and the 3rd/4th gear rod.
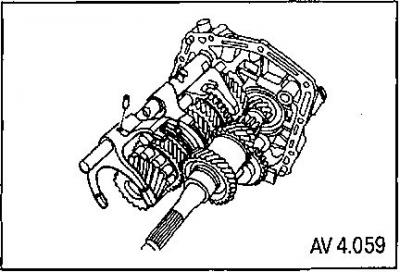
33. Remove the 3rd/4th gear fork retaining pin and the 3rd/4th gear rod.


34. Remove the 5th gear lever.
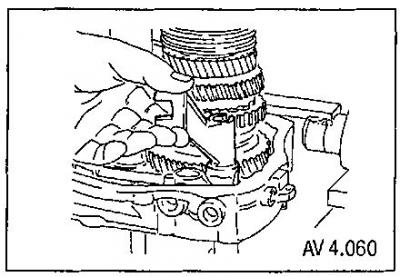
34. Remove the 5th gear lever.


35. Remove the 1st and 2nd gear rod.
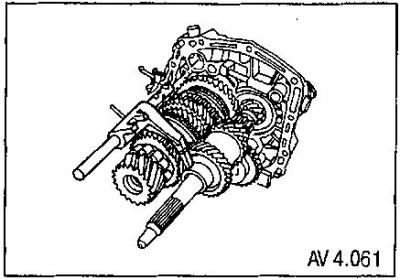
35. Remove the 1st and 2nd gear rod.


36. Press the retaining ring holding the driven shaft and secure it.
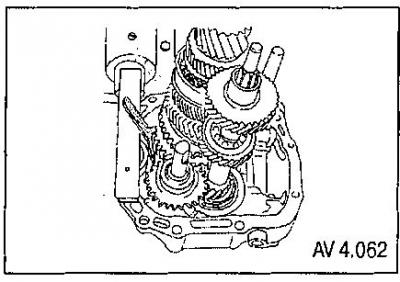
36. Press the retaining ring holding the driven shaft and secure it.


37. Keep the snap ring open at the base of the drive shaft using a snap ring expander.
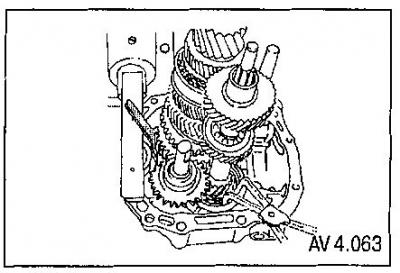
37. Keep the snap ring open at the base of the drive shaft using a snap ring expander.


38. Remove the driven shaft assembly and the input shaft assembly from the support plate.

The article was checked: Vladimir Romannikov
This article is available at russian, bulgarian, belarusian, ukrainian, serbian, croatian, romanian, polish, slovak, hungarian

Share information:

Previous articles
Aveo T200: Manual gearbox
Next articles

Removal and installation of gearbox
Replacing the wheel drive shaft seal
Removal the gear shift lever drive
Removal and installation the gearshift housing
Removal and installation the gear shift lever
Transmission drive (input) shaft
Driven (output) shaft of the transmission
Disassembling and assembling the differential
Assembly of the main transmission units


See similar articles on the topic of Chevrolet cars:
Manual transmission Chevrolet Captiva 1 (2006-2018)
Checking the level, topping up and replacing oil in a manual transmission Chevrolet Cruze 1 (2008-2016)
Checking the level and adding oil to a manual transmission Chevrolet Lacetti 1 (2002-2009)
Transmission, chassis, steering and braking system Chevrolet Lanos T150 (2002-2009)
Transmission control levers Chevrolet Niva 1 (2002-2016)
Checking the oil level in a manual transmission Chevrolet Tahoe 1 (1992-2000)
Checking the hydraulic fluid level in the automatic transmission (every 3000 miles or 3 months) Chevrolet Lumina 1 (1989-1994)
Link in different formats to this page


Visitor comments

No comments yet


How much will 23 + 16 =


Aveo T300 (2012-2018) 
  • General information
  • Vehicle device
  • User manual
  • Main malfunctions
  • Maintenance
  • Power unit
  • Engine
  • Lubrication system
  • Cooling system
  • Supply system
  • Exhaust system
  • Transmission
  • Clutch
  • Manual gearbox
  • Automatic gearbox
  • Front wheel drives
  • Chassis
  • Front suspension
  • Rear suspension
  • Steering
  • Brake system
  • Body
  • Exterior
  • Interior
  • Doors and trunk
  • Security systems
  • Electrical equipment
  • Engine electrics
  • Equipment and devices
  • Heating and air conditioning
  • Electrical circuits


Aveo T250 (2006-2011) 
  • Manual
  • Driver's workplace
  • Salon equipment
  • Vehicle characteristics
  • Maintenance
  • Engine 1.5 SOHC
  • Engine repair
  • Fuel supply system
  • Control system
  • Cooling system
  • Engine 1.6 DOHC
  • Engine repair
  • Control system
  • Transmission
  • Clutch
  • Manual gearbox
  • Automatic gearbox
  • Wheel drive
  • Chassis
  • Wheel suspension
  • Steering
  • Brake system
  • Body
  • Exterior
  • Interior


Aveo T200 (2003-2008) 
  • General information
  • User manual
  • Power unit
  • Engine repair 1.5L SOHC
  • Fuel system
  • Control system
  • Cooling system
  • Transmission
  • Clutch
  • Manual gearbox
  • Automatic gearbox
  • Drive shafts
  • Chassis
  • Front suspension
  • Rear suspension
  • Steering
  • Brake system
  • Body
  • Exterior (external elements)
  • Interior (internal elements)
  • Electrical equipment
  • Equipment and devices
  • Electrical circuits


ChevyMan.ru © 2017-2026 · Mobile version · Feedback · Site search · Interesting to read · Sitemap: EN BG BY UA RS HR RO PL SK HU

Aveo 2003-2008 · Aveo 2006-2011 · Aveo 2012-2018 · Captiva 2006-2018 · Cruze 2008-2016 · Lacetti 2002-2009 · Lanos 2002-2009 · Niva 2002-2016 · Tahoe 1992-2000 · Tahoe 2000-2014 · Lumina 1 1989-1994 · Trailblazer 1 2001-2008 · Orlando 1 2010-2018 ·
🛡️ For your security and to improve our service, this site uses cookies. You can disable them in your browser.