
ChevyMan.ru
Mazda Mitsubishi Toyota Land Rover Honda Kia Nissan
English Русский
Български
Беларускі
Український
Српски
Hrvatski
Română
Polski
Slovenský
Magyar
|
Articles | Sitemap | Contacts |


Home   Aveo   Captiva   Cruze   Lacetti   Lanos   Niva   Tahoe   Others  
Aveo T300 (2012-2018) Aveo T250 (2006-2011) Aveo T200 (2003-2008)
  • Home
  • Aveo
  • T300 (2012-2018)
  • Body
  • Interior
  • Removal and installation of interior trim

Removal and installation of interior trim (Chevrolet Aveo T300)

            0

You will need: a 10 mm wrench, a plastic mounting blade.

NOTE: Shown are the removal and installation of trims on the left side of the vehicle interior. The trims on the right side are removed in a similar manner.


1. Disconnect the wire from the negative terminal of the battery.
1. Disconnect the wire from the negative terminal of the battery.


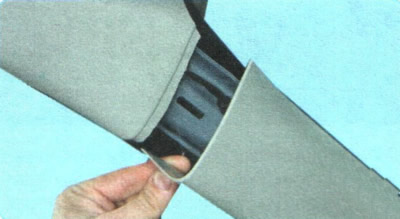
2. Pry up the edge of the upper trim of the front pillar and detach the trim from the body pillar, overcoming the force of the clamps.
2. Pry up the edge of the upper trim of the front pillar and detach the trim from the body pillar,…


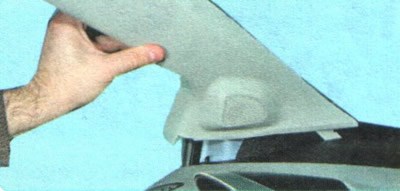
3. Remove the catch at the bottom of the trim from the groove in the instrument panel.
3. Remove the catch at the bottom of the trim from the groove in the instrument panel.


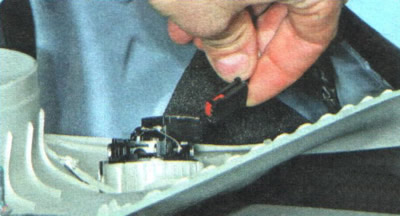
4. Squeeze the retainer and disconnect the wiring harness connector from the tweeter, then remove the upper trim of the front pillar.


4. Squeeze the retainer and disconnect the wiring harness connector from the tweeter, then remove…


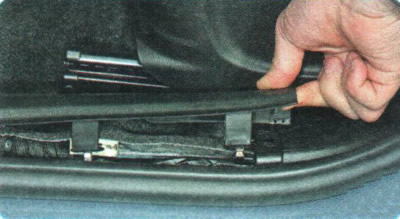
5. Pry up the edge of the front door sill trim and remove the trim, overcoming the force of the clamps.
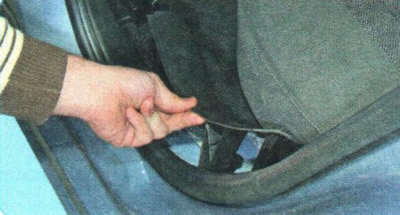
5. Pry up the edge of the front door sill trim and remove the trim, overcoming the force of the…


6. Pry up the edge of the rear door sill trim and remove the trim, overcoming the force of the clamps.
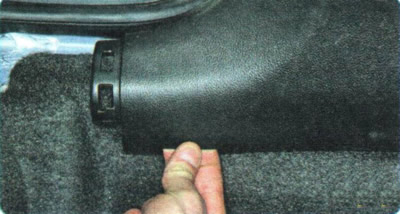
6. Pry up the edge of the rear door sill trim and remove the trim, overcoming the force of the…


7. Pull the edge of the lower trim of the B-pillar and remove the trim, overcoming the force of the spring clips.
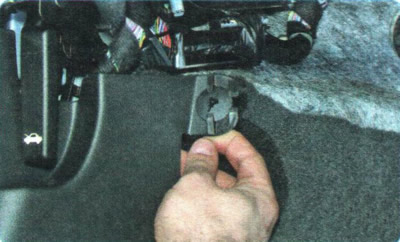


7. Pull the edge of the lower trim of the B-pillar and remove the trim, overcoming the force of the…


8. Remove the front pillar lower trim retainer from the body floor stud.
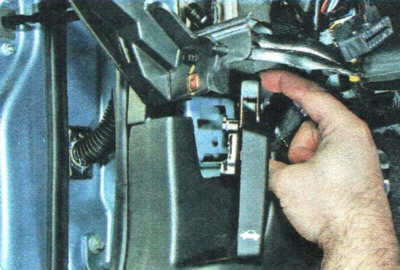
8. Remove the front pillar lower trim retainer from the body floor stud.


9. Remove the hood lock drive lever (see "Removal and installation the hood lock drive").
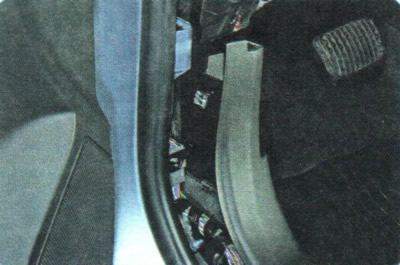
9. Remove the hood lock drive lever (see «Removal and installation the hood lock drive»).


10. Remove the lower trim of the front pillar, overcoming the force of the spring clips.
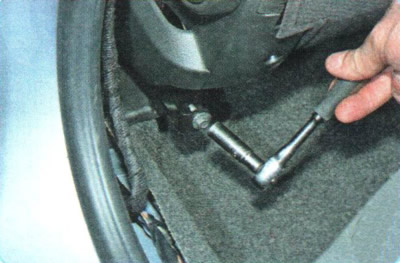
10. Remove the lower trim of the front pillar, overcoming the force of the spring clips.


11. Remove the bolt securing the seat belt bracket to the front seat...
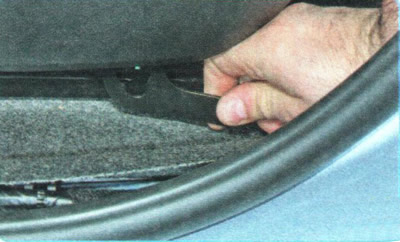


11. Remove the bolt securing the seat belt bracket to the front seat...


12. ...and remove the bracket from the seat bracket.
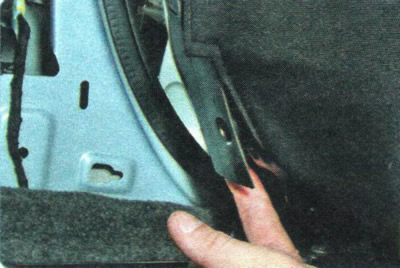
12. ...and remove the bracket from the seat bracket.


13. Press the latch...
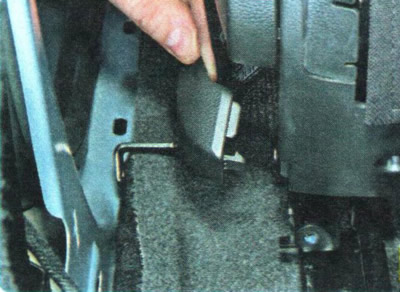
13. Press the latch...


14. ...and move the rear edge of the seat belt cover away from the seat...
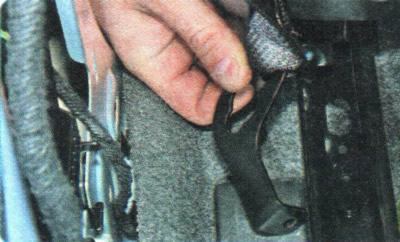
14. ...and move the rear edge of the seat belt cover away from the seat...


15. ...then remove the bracket from under the casing.
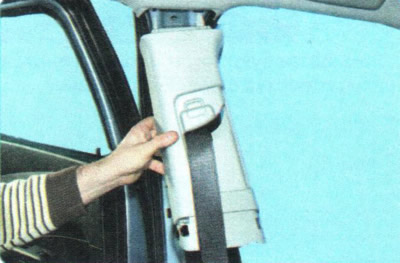


15. ...then remove the bracket from under the casing.


16. Overcoming the force of the clamps, detach the upper trim of the middle pillar from the body...
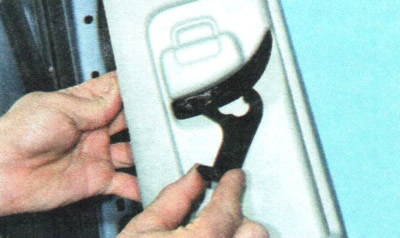
16. Overcoming the force of the clamps, detach the upper trim of the middle pillar from the body...


17. ...and remove the trim by threading the belt buckle through the slot.

18. Remove the rear seat (see "Removal and installation the rear seat").
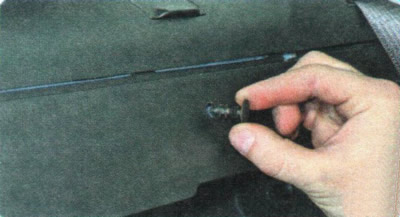
18. Remove the rear seat (see «Removal and installation the rear seat»).


19. Pry up the pin securing the trim of the partition between the passenger compartment and the trunk and remove the pin.


19. Pry up the pin securing the trim of the partition between the passenger compartment and the…


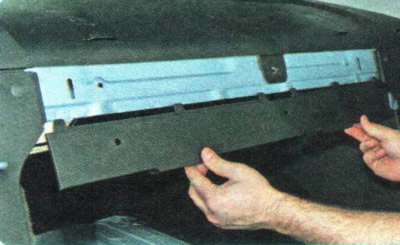
20. Remove the other two pins and remove the trim of the partition between the passenger compartment and the trunk.
20. Remove the other two pins and remove the trim of the partition between the passenger…


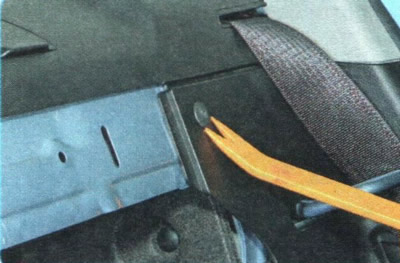
21. Remove the upper mounting pin of the lower trim of the rear body pillar.
21. Remove the upper mounting pin of the lower trim of the rear body pillar.


22. Move the trim away from the pillar, overcoming the force of the clamps, detach the lower trim of the rear body pillar from the trunk trim and remove the lower trim of the rear pillar.
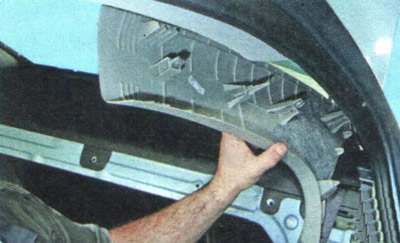
22. Move the trim away from the pillar, overcoming the force of the clamps, detach the lower trim…


23. Pry up the edge of the upper trim of the rear body pillar and remove the trim, overcoming the force of the clamps.
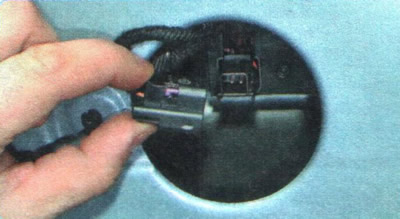
23. Pry up the edge of the upper trim of the rear body pillar and remove the trim, overcoming the…


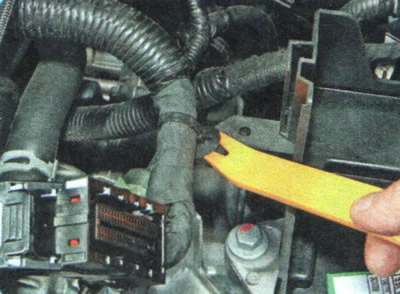
24. From the bottom of the rear shelf, squeeze the retainer and disconnect the wiring harness connector from the additional brake light.
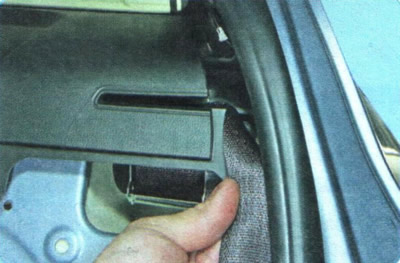
24. From the bottom of the rear shelf, squeeze the retainer and disconnect the wiring harness…


25. Remove the seat belts from the slots in the rear shelf trim.
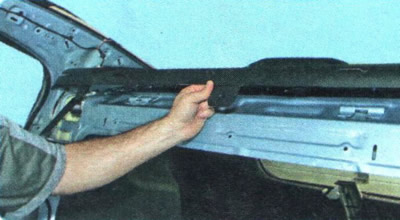
25. Remove the seat belts from the slots in the rear shelf trim.


26. Pull the edge of the rear shelf trim and remove the trim, overcoming the force of the clamps.

27. Install the interior trims in the reverse order of removal.

The article was borrowed from the website CHEVYMAN.RU

The article was checked: Vladimir Romannikov
This article is available at russian, bulgarian, belarusian, ukrainian, serbian, croatian, romanian, polish, slovak, hungarian

Share information:

Previous articles
Aveo T300: Interior
Next articles

Replacing sun visors
Replacing handrails
Removal and installation decorative instrument panel trims
Removal and installation the lower decorative panel of the instrument panel
Removal and installation storage boxes
Removal and installation trunk trims


See similar articles on the topic of Chevrolet cars:
Interior mirrors Chevrolet Captiva 1 (2006-2018)
Removal and installation of interior trim Chevrolet Cruze 1 (2008-2016)
Removal the front door trim Chevrolet Lacetti 1 (2002-2009)
Removal the front door trim Chevrolet Lanos T150 (2002-2009)
Interior heating Chevrolet Niva 1 (2002-2016)
Interior trim of the external rear view mirror Chevrolet Tahoe 2 and 3 (2000-2014)
Removal and installation interior door panels Chevrolet Lumina 1 (1989-1994)
Link in different formats to this page


Visitor comments

No comments yet


How much will 45 + 12 =


Aveo T300 (2012-2018) 
  • General information
  • Vehicle device
  • User manual
  • Main malfunctions
  • Maintenance
  • Power unit
  • Engine
  • Lubrication system
  • Cooling system
  • Supply system
  • Exhaust system
  • Transmission
  • Clutch
  • Manual gearbox
  • Automatic gearbox
  • Front wheel drives
  • Chassis
  • Front suspension
  • Rear suspension
  • Steering
  • Brake system
  • Body
  • Exterior
  • Interior
  • Doors and trunk
  • Security systems
  • Electrical equipment
  • Engine electrics
  • Equipment and devices
  • Heating and air conditioning
  • Electrical circuits


Aveo T250 (2006-2011) 
  • Manual
  • Driver's workplace
  • Salon equipment
  • Vehicle characteristics
  • Maintenance
  • Engine 1.5 SOHC
  • Engine repair
  • Fuel supply system
  • Control system
  • Cooling system
  • Engine 1.6 DOHC
  • Engine repair
  • Control system
  • Transmission
  • Clutch
  • Manual gearbox
  • Automatic gearbox
  • Wheel drive
  • Chassis
  • Wheel suspension
  • Steering
  • Brake system
  • Body
  • Exterior
  • Interior


Aveo T200 (2003-2008) 
  • General information
  • User manual
  • Power unit
  • Engine repair 1.5L SOHC
  • Fuel system
  • Control system
  • Cooling system
  • Transmission
  • Clutch
  • Manual gearbox
  • Automatic gearbox
  • Drive shafts
  • Chassis
  • Front suspension
  • Rear suspension
  • Steering
  • Brake system
  • Body
  • Exterior (external elements)
  • Interior (internal elements)
  • Electrical equipment
  • Equipment and devices
  • Electrical circuits


ChevyMan.ru © 2017-2026 · Mobile version · Feedback · Site search · Interesting to read · Sitemap: EN BG BY UA RS HR RO PL SK HU

Aveo 2003-2008 · Aveo 2006-2011 · Aveo 2012-2018 · Captiva 2006-2018 · Cruze 2008-2016 · Lacetti 2002-2009 · Lanos 2002-2009 · Niva 2002-2016 · Tahoe 1992-2000 · Tahoe 2000-2014 · Lumina 1 1989-1994 · Trailblazer 1 2001-2008 · Orlando 1 2010-2018 ·
🛡️ For your security and to improve our service, this site uses cookies. You can disable them in your browser.