
ChevyMan.ru
Mazda Mitsubishi Toyota Land Rover Honda Kia Nissan
English Русский
Български
Беларускі
Український
Српски
Hrvatski
Română
Polski
Slovenský
Magyar
|
Articles | Sitemap | Contacts |


Home   Aveo   Captiva   Cruze   Lacetti   Lanos   Niva   Tahoe   Others  
Aveo T300 (2012-2018) Aveo T250 (2006-2011) Aveo T200 (2003-2008)
  • Home
  • Aveo
  • T300 (2012-2018)
  • Body
  • Security systems
  • Removal and installation front seat belts

Removal and installation front seat belts (Chevrolet Aveo T300)

            0

You will need: a 10 mm socket head, a TORX T50 key, a flat-blade screwdriver, and a plastic mounting blade.

The driver's and front passenger's seat belts are secured in the car's interior in the same way, using the same fasteners. The operation is shown using the driver's seat belt as an example.

1. Disconnect the wire from the negative terminal of the battery, as the front seat belts are equipped with pyrotechnic pretensioners.

WARNING: After disconnecting the wire from the negative terminal of the battery, you must wait at least 15 minutes before you can begin removing the seat belt equipped with a pyrotechnic pretensioner.
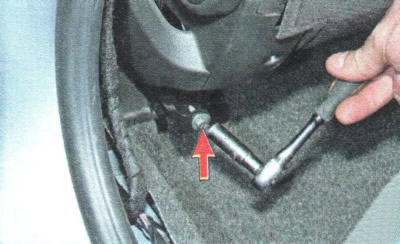

WARNING: After disconnecting the wire from the negative terminal of the battery, you must wait at…


2. Remove the bolt securing the seat belt bracket to the front seat rails.
2. Remove the bolt securing the seat belt bracket to the front seat rails.


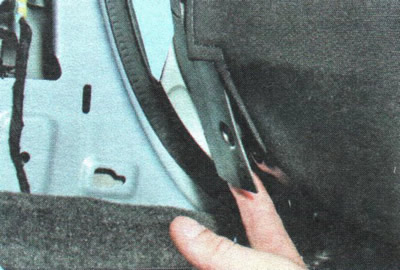
3. From the inside of the seat pad, press the latch...
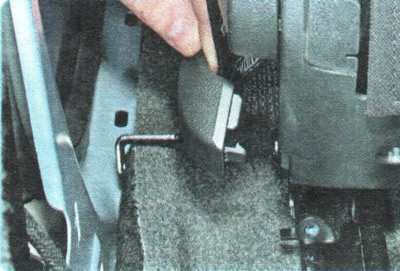


3. From the inside of the seat pad, press the latch...


4. ...and detach the rear edge of the decorative trim of the bracket.
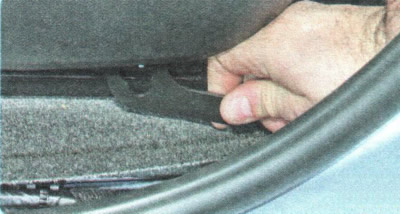
4. ...and detach the rear edge of the decorative trim of the bracket.


5. Slide the belt bracket down to align the enlarged diameter portion of the hole in the bracket with the pin on the seat rails...
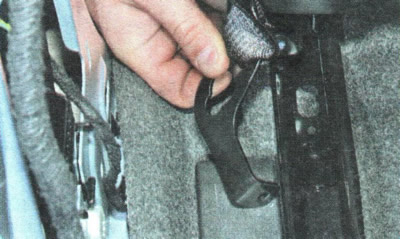
5. Slide the belt bracket down to align the enlarged diameter portion of the hole in the bracket…


6. ...and remove the bracket from the finger.
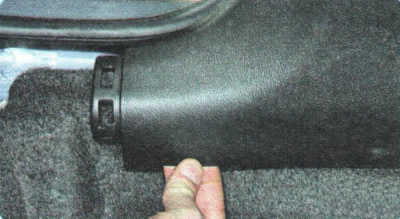
6. ...and remove the bracket from the finger.


7. Remove the lower center pillar trim...
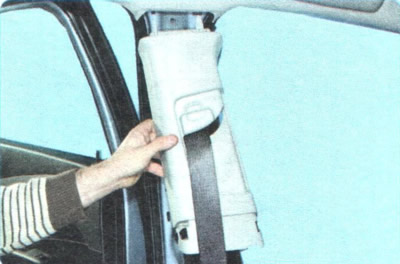


7. Remove the lower center pillar trim...


8. ...and detach the upper pillar trim from the body (see "Removal and installation of interior trim").
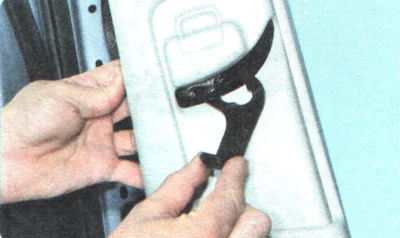
8. ...and detach the upper pillar trim from the body (see «Removal and installation of interior…


9. Pass the buckle and the belt clip through the opening in the trim, then remove the trim.
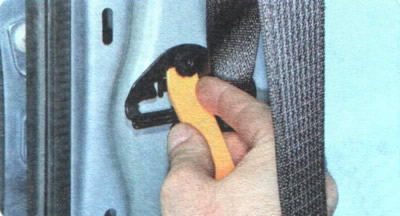
9. Pass the buckle and the belt clip through the opening in the trim, then remove the trim.


10. Pry and remove the belt guide retainer from the hole in the center pillar.
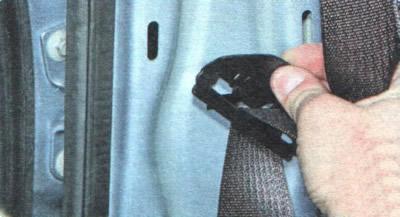
10. Pry and remove the belt guide retainer from the hole in the center pillar.


11. Disconnect the guide from the rack.
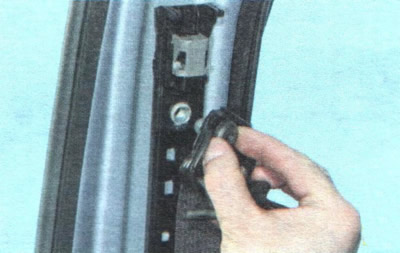


11. Disconnect the guide from the rack.


12. Unscrew the bolt of the upper fastening of the belt buckle to the slider of the belt height adjustment mechanism and disconnect the belt from the mechanism.
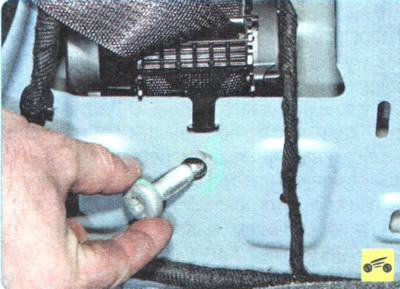
12. Unscrew the bolt of the upper fastening of the belt buckle to the slider of the belt height…


13. Unscrew the bolt securing the belt inertia reel and remove the reel from the cavity of the rack.
13. Unscrew the bolt securing the belt inertia reel and remove the reel from the cavity of the rack.


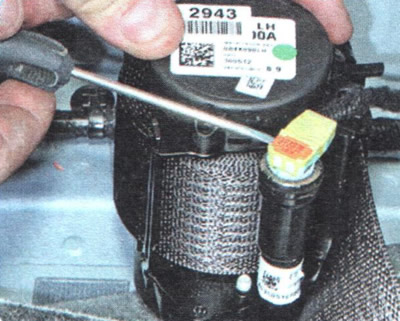
14. Use a screwdriver to pry up the retainer on the pretensioner wiring harness connector and slide the retainer out of the connector.
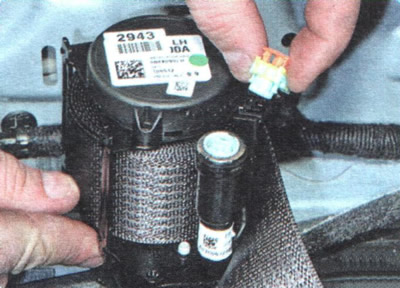


14. Use a screwdriver to pry up the retainer on the pretensioner wiring harness connector and slide…


15. Disconnect the shoe from the pretensioner...
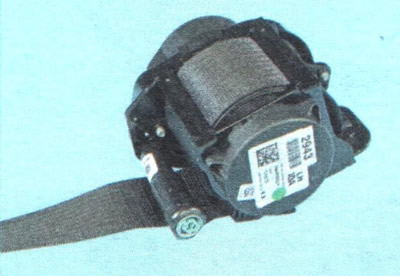
15. Disconnect the shoe from the pretensioner...


16. ...and remove the belt.

WARNINGS: Do not disassemble the seat belt pretensioners.


Prevent the reels of the belts with pretensioners from falling and prevent water and oil from getting into them.


Do not expose seat belt pretensioners to temperatures above 95°C.

Do not expose seat belt pretensioners to temperatures above 95°C.


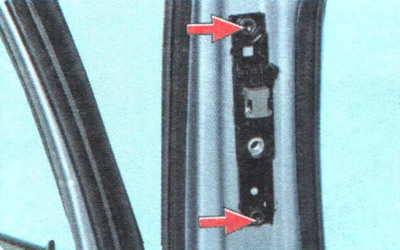
17. If necessary, remove the belt height adjustment mechanism. To do this, unscrew the two bolts securing the mechanism to the central pillar...
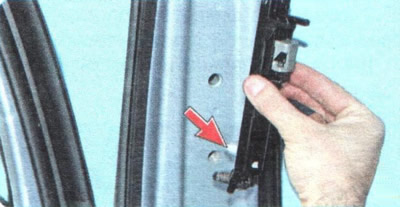


17. If necessary, remove the belt height adjustment mechanism. To do this, unscrew the two bolts…


18. ...and remove the mechanism by extracting the piston of its additional fastening (shown in the photo by an arrow) from the hole in the rack.
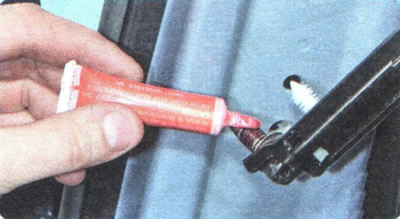
18. ...and remove the mechanism by extracting the piston of its additional fastening (shown in the…


19. Install the belt height adjustment mechanism in the reverse order of removal. When installing, apply anaerobic thread lock to the threads of the mounting bolts.
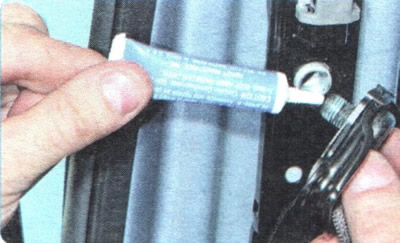
19. Install the belt height adjustment mechanism in the reverse order of removal. When installing,…


20. Install the seat belt in the reverse order of removal. When installing, apply anaerobic thread locker to the threads of the reel and buckle mounting bolts.
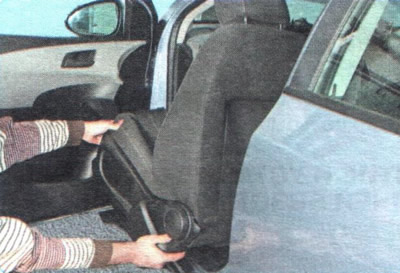
20. Install the seat belt in the reverse order of removal. When installing, apply anaerobic thread…


21. If necessary, remove the seat belt buckle. To do this, remove the front seat (see "Removal and installation the front seat").
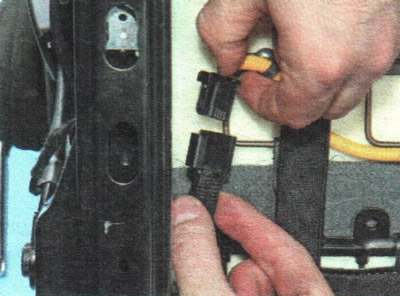
21. If necessary, remove the seat belt buckle. To do this, remove the front seat (see «Removal and…


22. Press the seat belt reminder light harness connector lock and disconnect the connector.
22. Press the seat belt reminder light harness connector lock and disconnect the connector.


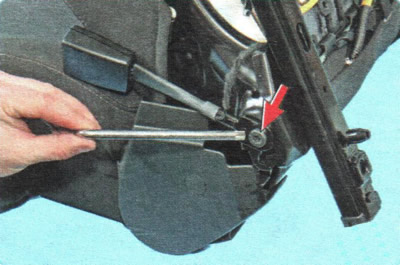
23. Remove the bolt securing the belt buckle to the seat rails...
23. Remove the bolt securing the belt buckle to the seat rails...


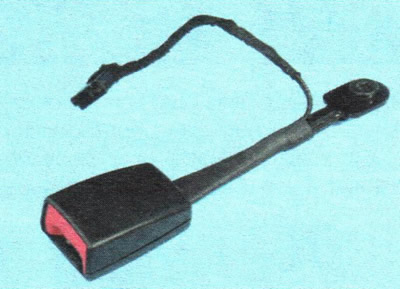
24. ...and remove the lock.
24. ...and remove the lock.


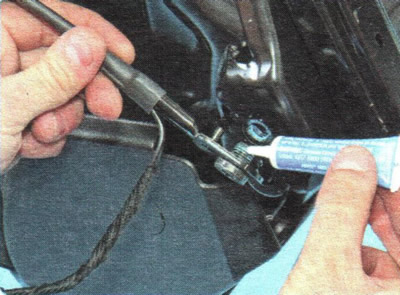
25. Install the lock in the reverse order of removal. When installing, apply anaerobic thread lock to the threads of the mounting bolt.

The material was created based on information from the website chevyman

The article was checked: Vladimir Romannikov
This article is available at russian, bulgarian, belarusian, ukrainian, serbian, croatian, romanian, polish, slovak, hungarian

Share information:

Previous articles
Aveo T300: Security systems
Next articles

Removal and installation the driver's airbag contact ring
Removal and installation the front passenger airbag
Removal and installation the driver's airbag
Design features of the passive safety system (SRS)
Removal and installation rear seat belts
Removal and installation of the electronic control unit of the passive safety system
Removal and installation the driver's airbag control unit
Removal and installation the shock sensor
Removal and installation the front passenger airbag switch


See similar articles on the topic of Chevrolet cars:
Safety seat belts Chevrolet Captiva 1 (2006-2018)
Seat belts Chevrolet Cruze 1 (2008-2016)
Adjustment of front seats, steering column, seat belts Chevrolet Lacetti 1 (2002-2009)
Replacing the front crankshaft oil seal Chevrolet Lanos T150 (2002-2009)
Removal and installation front seat belts Chevrolet Niva 1 (2002-2016)
Front seat backrest tilt Chevrolet Tahoe 1 (1992-2000)
Inspection of seat belts Chevrolet Trailblazer 1 (2001-2008, petrol)
Link in different formats to this page


Visitor comments

No comments yet


How much will 47 + 45 =


Aveo T300 (2012-2018) 
  • General information
  • Vehicle device
  • User manual
  • Main malfunctions
  • Maintenance
  • Power unit
  • Engine
  • Lubrication system
  • Cooling system
  • Supply system
  • Exhaust system
  • Transmission
  • Clutch
  • Manual gearbox
  • Automatic gearbox
  • Front wheel drives
  • Chassis
  • Front suspension
  • Rear suspension
  • Steering
  • Brake system
  • Body
  • Exterior
  • Interior
  • Doors and trunk
  • Security systems
  • Electrical equipment
  • Engine electrics
  • Equipment and devices
  • Heating and air conditioning
  • Electrical circuits


Aveo T250 (2006-2011) 
  • Manual
  • Driver's workplace
  • Salon equipment
  • Vehicle characteristics
  • Maintenance
  • Engine 1.5 SOHC
  • Engine repair
  • Fuel supply system
  • Control system
  • Cooling system
  • Engine 1.6 DOHC
  • Engine repair
  • Control system
  • Transmission
  • Clutch
  • Manual gearbox
  • Automatic gearbox
  • Wheel drive
  • Chassis
  • Wheel suspension
  • Steering
  • Brake system
  • Body
  • Exterior
  • Interior


Aveo T200 (2003-2008) 
  • General information
  • User manual
  • Power unit
  • Engine repair 1.5L SOHC
  • Fuel system
  • Control system
  • Cooling system
  • Transmission
  • Clutch
  • Manual gearbox
  • Automatic gearbox
  • Drive shafts
  • Chassis
  • Front suspension
  • Rear suspension
  • Steering
  • Brake system
  • Body
  • Exterior (external elements)
  • Interior (internal elements)
  • Electrical equipment
  • Equipment and devices
  • Electrical circuits


ChevyMan.ru © 2017-2026 · Mobile version · Feedback · Site search · Interesting to read · Sitemap: EN BG BY UA RS HR RO PL SK HU

Aveo 2003-2008 · Aveo 2006-2011 · Aveo 2012-2018 · Captiva 2006-2018 · Cruze 2008-2016 · Lacetti 2002-2009 · Lanos 2002-2009 · Niva 2002-2016 · Tahoe 1992-2000 · Tahoe 2000-2014 · Lumina 1 1989-1994 · Trailblazer 1 2001-2008 · Orlando 1 2010-2018 ·
🛡️ For your security and to improve our service, this site uses cookies. You can disable them in your browser.