Contents: Longitudinal inclination of kingpin… ↧ Front wheel alignment ↧ Rear wheel alignment ↧ Checking the height of the body ↧
Poor directional stability and vibration are not always the result of improper wheel alignment. One possible cause is an imbalance in the wheel or wheels. Another possibility is wheel pull due to tire wear or a tire manufacturing defect. The presence of pull is determined as follows: at a constant speed on a straight section of the highway, a constant one-sided force must be applied to the steering wheel to maintain straight-line movement. If there is no pull, the steering wheel does not need to be held.
Before adjusting the wheel alignment angles, check:
- tire pressure and tread wear pattern;
- wheel and disc runout;
- the amount of clearance in the hub bearings;
- clearance in the ball joints of the steering rods;
- condition and reliability of the suspension arms and anti-roll bar fastening;
- reliability of the steering gear mounting (steering rack);
- condition and reliability of suspension shock absorber mounting;
- suspension height;
- speed of return of the steering wheel to the neutral position (slow return of the steering wheel indicates that the suspension parts are jammed);
- fuel level (the vehicle must be loaded so as to compensate for the load on the wheels of one side).
Please take into account the presence of additional cargo (tool boxes or other permanent loads). If additional weights are normally carried on the vehicle, they should remain on the vehicle when performing wheel alignments. Follow the equipment manufacturer's instructions for measuring the angles. If there is a rear toe adjustment, perform that adjustment first.
Note: Wheel alignment measurements and adjustments must be made at the vehicle's unladen weight and standard ride height.
Caution: To obtain correct measurement results, do not apply any force to the wheel during the measurement process.
Longitudinal inclination of kingpin and camber of front wheels
Attention: measurements (or magnitude) the longitudinal inclination of the kingpin must be adjusted to take into account the inclination of the frame.
1. The tilt of the frame should be measured with a digital protractor (or its equivalent) on the flat part of the frame near the front and rear wheels.
2. The frame tilt angle is considered positive if the rear part of the frame is higher than the front part. Measurements should be taken on both sides of the frame and the average value should be taken. The obtained result is added to the measured value of the longitudinal tilt of the kingpin.
3. The frame inclination angle is considered negative if the rear part of the frame is lower than the front part. Measurements should be taken on both sides of the frame and the average value should be taken. The obtained result is subtracted from the measured value of the longitudinal inclination of the kingpin.
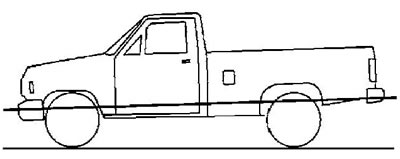
Positive frame tilt |
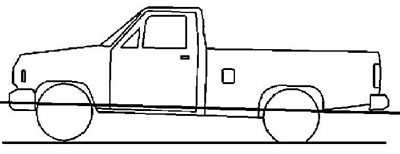
Negative frame tilt |
4. Adjustment of the longitudinal inclination of the kingpin and the camber of the wheels is carried out by rotating the cam bolt and cam in the slot of the frame bracket to change the position of the transverse arm of the wheel suspension.
Caution: Before measuring the kingpin and camber angles, press the front bumper three times to set the suspension to its normal position.
5. Determine the longitudinal inclination angle of the kingpin (2) relative to the vertical (1). Do not forget to adjust the result according to the inclination angle of the frame.
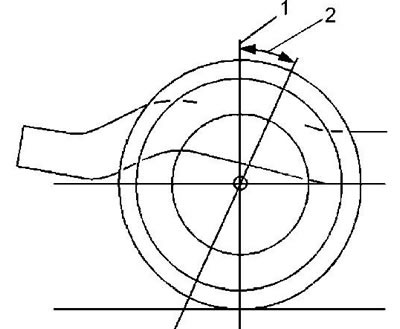
6. Determine the positive (2) or negative (3) camber of the wheel relative to the vertical (1).
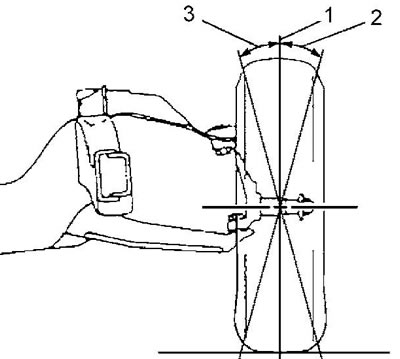
7. Remove the cotter pinned adjusting cam insert. This insert does not need to be installed again.
8. Loosen the upper control arm adjusting cam bolts.
9. Adjust the kingpin caster and wheel camber by rotating the bolts. Hold the bolts from turning and tighten the nuts to the specified torque. Tightening torque 190 Nm.
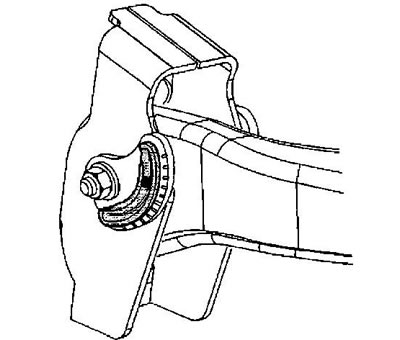
10. Recheck the wheel alignment angles. After adjusting the camber and kingpin inclination, check and adjust the wheel alignment if necessary.
Front wheel alignment
1. Loosen the lock nut (2) of the outer steering rod.
2. Rotate the inner tie rod (1) until the desired toe-in is achieved.
3. Tighten the outer tie rod lock nut (2). Tightening torque 68 N·m.
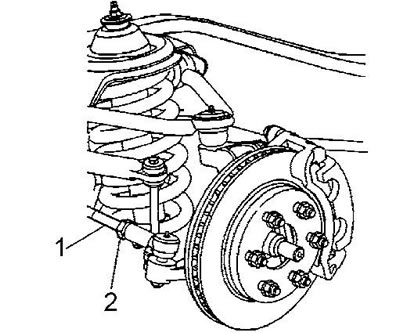
4. Check the toe-in value.
Rear wheel alignment
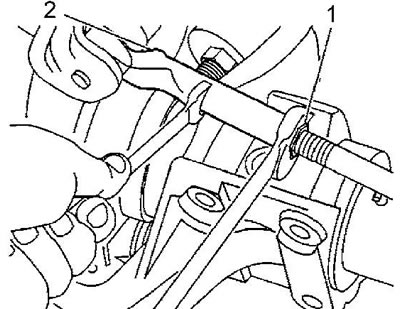
Note: rear wheel alignment adjustment is performed if there is an adjustment unit.
1 Loosen the lock nut (1) of the cross rod.
2. Rotate the movable part of the rod until the desired wheel alignment is achieved.
3. Tighten the lock nut. Tightening torque 65 N·m.
4. Check the toe-in value and adjust if necessary.
Checking the height of the body
On models with torsion suspension, an adjustment lever is used to adjust the height of the body. On models with spring suspension, adjustment is not performed: non-compliance with the height specifications indicates damage, defects and malfunction of suspension components.
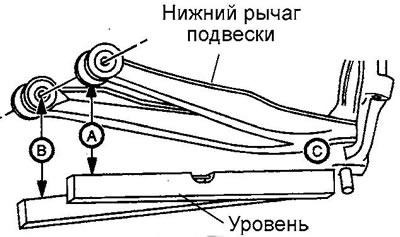
The height of the body is determined by measuring the distance between the attachment points of the lower arm to the frame and an imaginary horizontal line drawn through the lower attachment point of the arm. For convenience, use a regular level.