


Contents: Removal ↧ Installation ↧
Removal
Note: Fuel manifold parts are marked with identification numbers. When replacing manifold parts, install parts with the same number.
1. Remove the air filter outlet duct.
2. Relieve pressure in the fuel system.
3. Loosen the nut (1) securing the engine wire harness bracket. Tightening torque 5 Nm.
4. Disconnect the connector (2) of the fuel vapor canister purge valve.
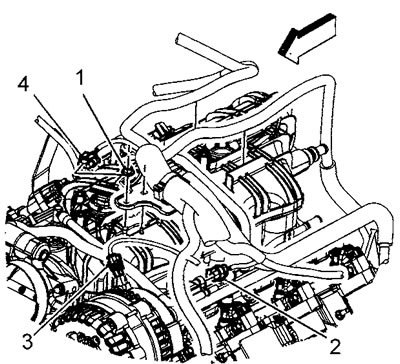
5. Disconnect the generator connector (3).
6. Disconnect the connector (4) of the absolute air pressure sensor in the intake manifold.
7. Remove the holder (2) of the wiring harness connector (left).
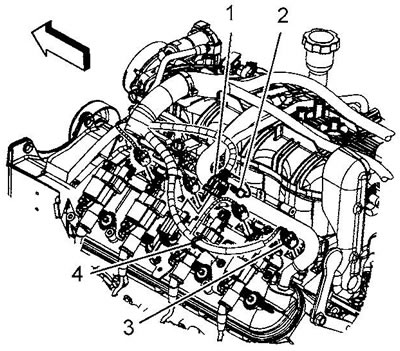
8. Disconnect the ignition coil wire harness connector (1) (left).
9. Disconnect the connectors (3) of the fuel injectors (left):
- a) Mark the connectors with the injector numbers.
- b) Install the connector holder (2) onto the connector by one click.
- c) Press the connector locking key.
- d) Disconnect the fuel injector connector.
10. Remove the holder (2) of the wiring harness connector (right).
11. Disconnect the connector (1) of the ignition coil wire harness (right).
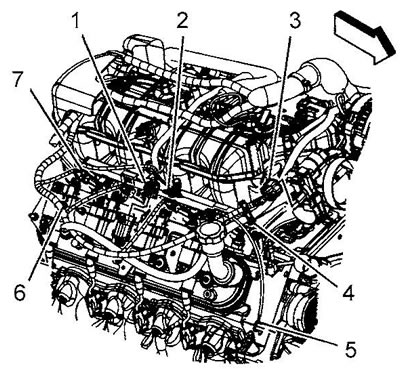
12. Disconnect the throttle control connector (3).
13. Disconnect the connectors (7) of the fuel injectors (on the right):
- a) Mark the connectors with the injector numbers.
- b) Install the connector holder (2) onto the connector by one click.
- c) Press the connector locking key.
- d) Disconnect the fuel injector connector.
14. Remove the clip (4) supporting the engine wire harness from the alternator cable for charging the battery.
15. Remove the wire harness support clip (6) from the ignition coil bracket stud.
16. Remove the stud (1) securing the ground cable from the right cylinder head. Tightening torque 25 Nm.
17. Disconnect the ground cables (2) and (3) from the cylinder head.
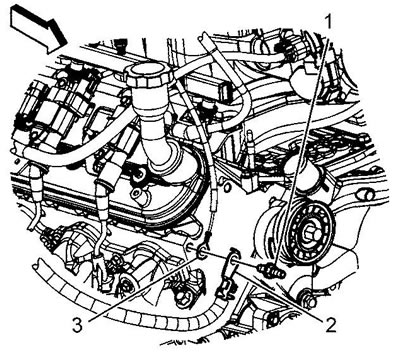
18. Unscrew the bolt (3) securing the wire support clip to the generator bracket.
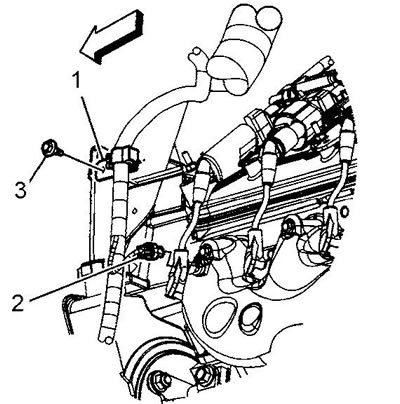
Tightening torque 9 Nm.
19. Collect the branches of the wire bundle and lay the wires aside.
20. Remove the crankcase ventilation hose.
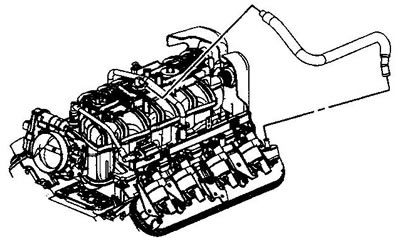
21. Disconnect the fuel supply hose (2) from the fuel manifold.
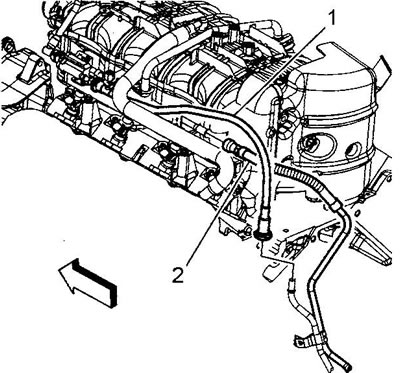
22. Disconnect the fuel vapor recovery system pipe from the intake manifold.
23. Disengage the retainer securing the fuel vapor canister purge valve to the fuel manifold.
24. Remove the fuel vapor recovery system tube and the fuel vapor canister purge valve.
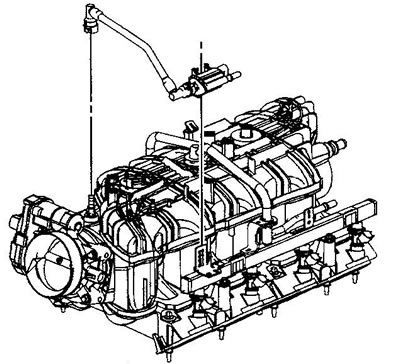
25. Loosen the fuel manifold mounting bolts.
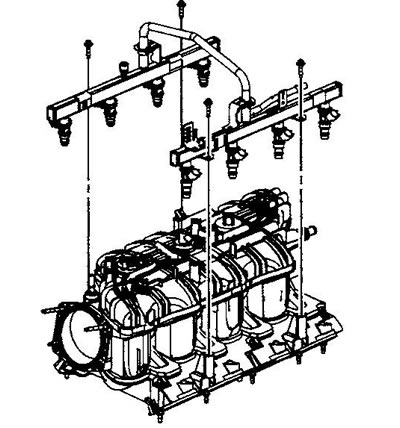
Tightening torque 10 Nm.
Note:
- Before removing, clean the fuel rail with engine cleaner spray. Do not clean the fuel rail with solvents.
- When removing the fuel rail, be careful not to damage the connectors and injector nozzles.
- Lift the fuel manifold evenly on both sides until all injectors are completely out of their sockets.
- Plug open holes to prevent dirt from entering the system.
26. Remove the fuel manifold.
27. Remove the fuel injector mounting clips (1).
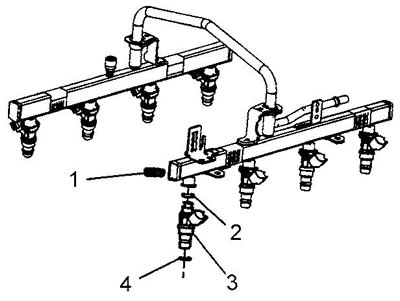
28. Remove the fuel injectors (3).
29. Remove and discard the sealing rings (2) and (4).
30. Loosen the screws (2) securing the fuel manifold bypass pipe.
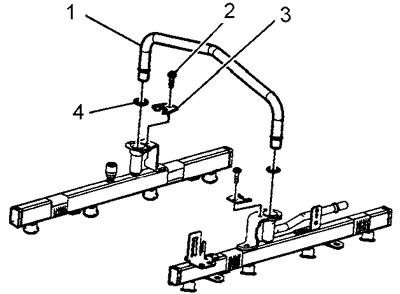
Tightening torque 4 Nm.
31. Remove the clamps (3) securing the bypass pipe.
32. Remove the bypass pipe (1).
33. Remove and discard the sealing rings (4).
34. Replace the defective part of the fuel manifold.
Installation
35. Installation is carried out in the reverse order. When installing, lubricate the NEW sealing rings with engine oil.
36. Check the fuel supply system for leaks:
- a) Turn on the ignition for two seconds (do not start the engine).
- b) Turn off the ignition for ten seconds.
- c) Turn on the ignition (do not start the engine).
- d) Inspect the system, look for fuel leaks.
[The original article is on the website «CHEVYMAN.RU»]