
ChevyMan.ru
Mazda Mitsubishi Toyota Land Rover Honda Kia Nissan
English Русский
Български
Беларускі
Український
Српски
Hrvatski
Română
Polski
Slovenský
Magyar
|
Articles | Sitemap | Contacts |


Home   Aveo   Captiva   Cruze   Lacetti   Lanos   Niva   Tahoe   Others  
Captiva 1 (2006-2018)
  • Home
  • Captiva
  • 1 (2006-2018)
  • Chassis
  • Steering
  • Rack and pinion steering assembly

Rack and pinion steering assembly (Chevrolet Captiva 1)

            0

Contents: Removal procedure ↧ Installation procedure ↧

Removal procedure


1. Raise the vehicle and place it on the supports provided for this purpose.

2. Remove the front exhaust pipe. Depending on the engine type, See Section 1G1 or 1G2, 1G3 "Engine exhaust system".
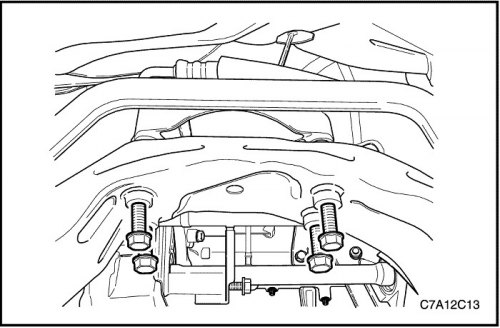
2. Remove the front exhaust pipe. Depending on the engine type, See Section 1G1 or 1G2, 1G3 «Engine…


3. Remove the rear mount assembly of the transmission with the main gear. Depending on the engine type, See Section 1B or 1C1, 1C2 "Engine Mechanical Part".

4. For all-wheel drive, remove the transfer case See Section 5D "Transfer Case"
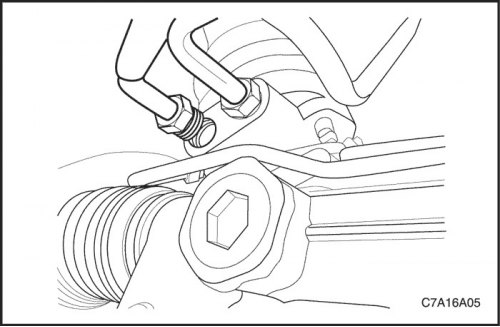
4. For all-wheel drive, remove the transfer case See Section 5D «Transfer Case»


5. Disconnect the negative battery cable.

6. Raise the vehicle and place it on the supports provided for this purpose.

7. Remove the wheels. See section 2E, "Tires and Wheels".

8. Disconnect the power steering fluid inlet pipe.
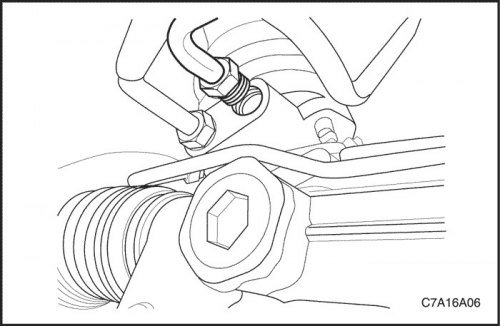


8. Disconnect the power steering fluid inlet pipe.


9. Disconnect the power steering fluid outlet pipe. Place a drain pan under the steering gear to catch any leaking hydraulic fluid.
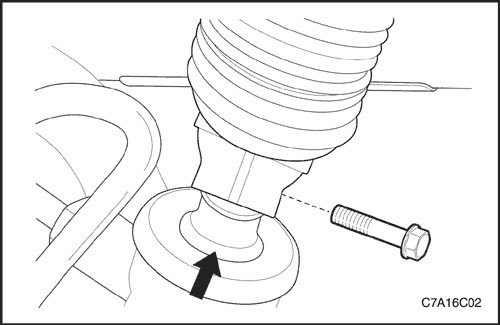
9. Disconnect the power steering fluid outlet pipe. Place a drain pan under the steering gear to…


10. Wiggle the steering wheel to gain access to the intermediate shaft pinch bolt.

11. Disconnect the SSPS connector if equipped.

12. Place a mark on the pivot shaft housing opposite the mark on the lower intermediate shaft joint.

13. Loosen the intermediate shaft clamp bolt.
13. Loosen the intermediate shaft clamp bolt.


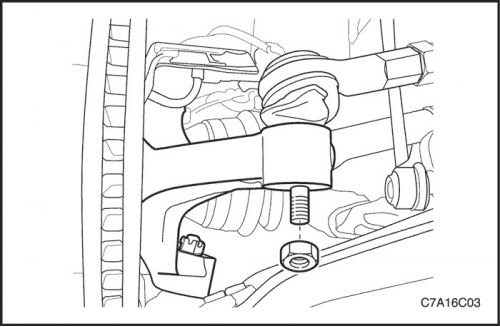
14. Remove the outer tie rod nuts and disconnect the tie rod ends from the steering knuckle.


14. Remove the outer tie rod nuts and disconnect the tie rod ends from the steering knuckle.


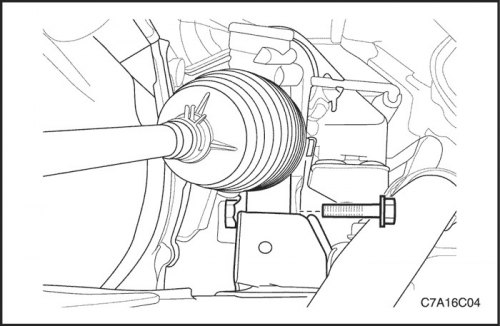
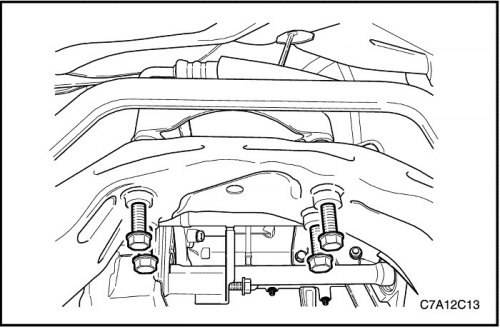
15. Remove the left mounting bolt from the steering gear.
15. Remove the left mounting bolt from the steering gear.


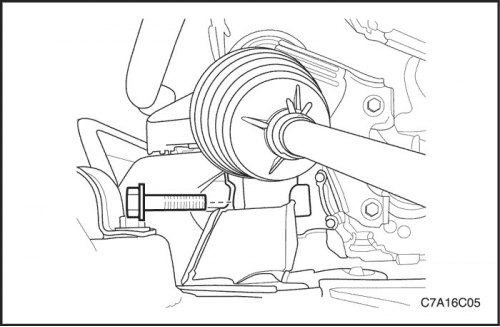
16. Remove the right mounting bolt from the steering gear.

17. Remove the rack and pinion steering assembly from the vehicle.
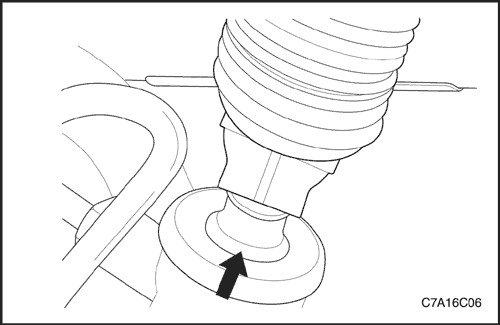
17. Remove the rack and pinion steering assembly from the vehicle.


Installation procedure


1. Install the rack and pinion steering gear assembly from below. The steering gear should be in the straight-ahead position and the steering wheel spokes should be vertical and pointing to the left. Align the marks on the shafts to ensure proper alignment. Insert the steering shaft into the intermediate shaft.


1. Install the rack and pinion steering gear assembly from below. The steering gear should be in…


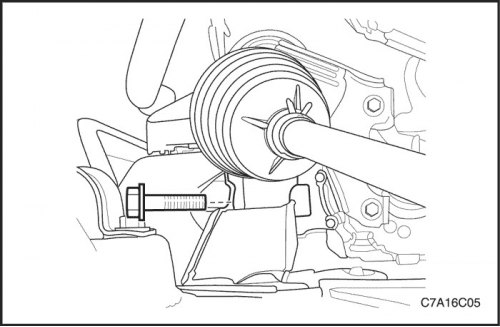
2. Install the left and right mounting bolts onto the steering gear.

Tighten

Tighten the nuts and bolts on the steering gear mounting bracket to 110 N·m (81 lb-ft).
Tighten the nuts and bolts on the steering gear mounting bracket to 110 N·m (81 lb-ft).


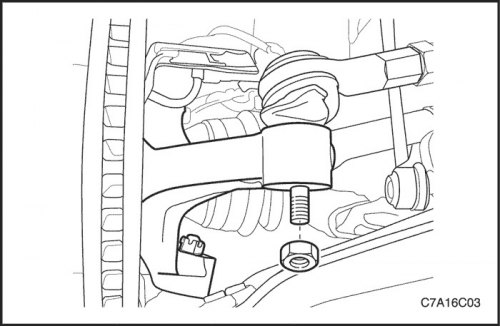
3. Attach the tie rod ends to the steering knuckle.

4. Tighten the outer tie rod nuts.

Tighten

Tighten the outer tie rod nuts to 50 Nm (37 lb-ft).
Tighten the outer tie rod nuts to 50 Nm (37 lb-ft).


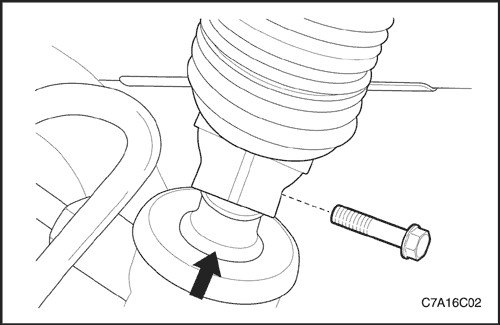
5. Insert the lower intermediate shaft pinch bolt.


Tighten

Tighten the intermediate shaft clamping bolt to 34 Nm (25 ft·lbs).
Tighten the intermediate shaft clamping bolt to 34 Nm (25  ft·lbs).


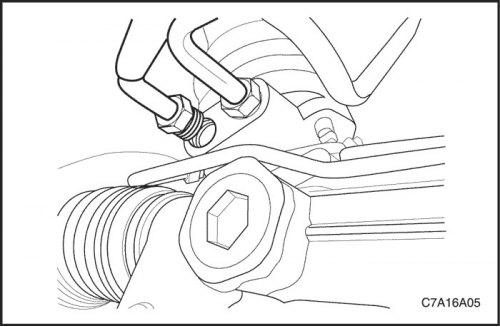
6. Connect the power steering fluid inlet pipe.

Tighten

Tighten the steering gear inlet pipe fitting to 28 N·m (21 ft·lbs).
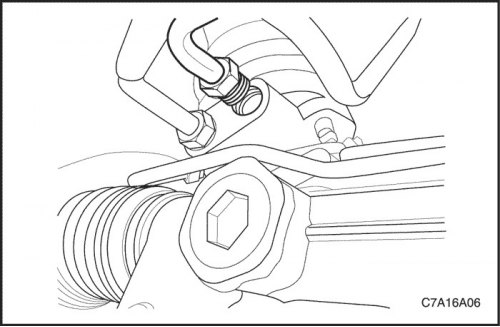
Tighten the steering gear inlet pipe fitting to 28 N·m (21  ft·lbs).


7. Connect the power steering fluid outlet pipe.

Tighten

Tighten the steering gear outlet pipe fitting to 28 N·m (21 ft·lbs).
Tighten the steering gear outlet pipe fitting to 28 N·m (21  ft·lbs).


8. For all-wheel drive, install a transfer case. See Section 5D "Transfer Case"


9. Install the rear mount unit of the transmission with the final drive assembly. Depending on the engine type, See Section 1B or 1C1, 1C2 "Engine Mechanical Part".

10. Install the front exhaust pipe. Depending on the engine type, See Section 1G1 or 1G2, 1G3 "Engine exhaust system".

11. Install the wheels. See section 2E, "Tires and Wheels".

12. Lower the car.

13. Perform a straight-ahead check of the steering wheels. See "Checking the straight-ahead position of the steering wheels" in this section.

Note: Always use only DEXRON®-IID power steering fluid for refueling or complete fluid changes. The use of unsuitable fluids can cause damage to the hoses and seals, resulting in leaks.


14. Fill the power steering system and check for leaks. If a leak is found, repair the cause and bleed the system. See section 6A, "Power Steering System".

15. Connect the negative battery cable.

The article was checked: Vladimir Romannikov
This article is available at russian, bulgarian, belarusian, ukrainian, serbian, croatian, romanian, polish, slovak, hungarian

Share information:

Previous articles
Captiva 1: Steering
Next articles

Steering Gear Diagnostic Trouble Codes
Diagnostics of the power steering mechanism
Technical characteristics of the steering gear
General description and operation of the steering mechanism
Pump assembly (engine 3.2 petrol)
External transverse tie rod
Steering gear boot
Checking the straight-ahead position of the steering wheels
Intermediate shaft, hinge and front panel seal
Hydraulic cylinder pipelines


See similar articles on the topic of Chevrolet cars:
Removal and installation the rack and pinion mechanism Chevrolet Aveo T200 (2003-2008)
Steering wheel-mounted controls Chevrolet Cruze 1 (2008-2016)
Checking the level of working fluid in the power steering reservoir Chevrolet Lacetti 1 (2002-2009)
Steering column switches Chevrolet Lanos T150 (2002-2009)
Adjusting the position of the steering wheel Chevrolet Niva 1 (2002-2016)
Adjusting the steering rack bearing preload Chevrolet Tahoe 2 and 3 (2000-2014)
Check Power Steering Fluid (Every 3,000 miles or 3 months) Chevrolet Lumina 1 (1989-1994)
Link in different formats to this page


Visitor comments

No comments yet


How much will 15 + 31 =


Captiva 1 (2006-2018) 
  • Manual
  • Before leaving
  • Keys, doors and windows
  • Seats, protection systems
  • Instruments and controls
  • Lighting system
  • Information and entertainment
  • Navigation system
  • Climate control
  • Driving a car
  • Car care
  • Maintenance
  • Engine 2.0 l (diesel)
  • Engine device
  • Troubleshooting
  • Engine repair
  • Cooling system
  • Engine electrical equipment
  • Control and power systems
  • Exhaust system
  • Engine FAM II 2.4D
  • Engine device
  • Troubleshooting
  • Engine repair
  • Cooling system
  • Engine electrical equipment
  • Control and power systems
  • Exhaust system
  • Engine HFV6 3.2L
  • Engine device
  • Troubleshooting
  • Engine repair
  • Cooling system
  • Engine electrical equipment
  • Control and power systems
  • Exhaust system
  • Transmission
  • Front drive axle
  • Rear drive axle
  • Automatic gearbox - device
  • Automatic gearbox - service
  • Automatic gearbox - repair
  • Manual gearbox - device
  • Manual gearbox - service and repair
  • Clutch
  • Transfer case
  • Chassis
  • Car suspension
  • Brake system
  • Steering
  • Body
  • Heating and ventilation
  • Air conditioning (manual)
  • Air conditioning (automatic)
  • Seat belts
  • Airbags
  • Car seat
  • Interior (internal elements)
  • Exterior (external elements)
  • Doors and windows
  • Electrical equipment
  • Equipment and devices
  • Lighting and lamps
  • Windshield wipers and washers
  • Electrical circuits


ChevyMan.ru © 2017-2026 · Mobile version · Feedback · Site search · Interesting to read · Sitemap: EN BG BY UA RS HR RO PL SK HU

Aveo 2003-2008 · Aveo 2006-2011 · Aveo 2012-2018 · Captiva 2006-2018 · Cruze 2008-2016 · Lacetti 2002-2009 · Lanos 2002-2009 · Niva 2002-2016 · Tahoe 1992-2000 · Tahoe 2000-2014 · Lumina 1 1989-1994 · Trailblazer 1 2001-2008 · Orlando 1 2010-2018 ·
🛡️ For your security and to improve our service, this site uses cookies. You can disable them in your browser.