


Contents: Checking the level ↧ Oil change ↧
Checking the level
1. Raise the vehicle.
2. Place the car body horizontally.
3. Inspect the rear axle. Check for oil leaks. Repair leaks if necessary.
4. Clean the surfaces around the drain and filler plugs.
5. Unscrew the filler plug.
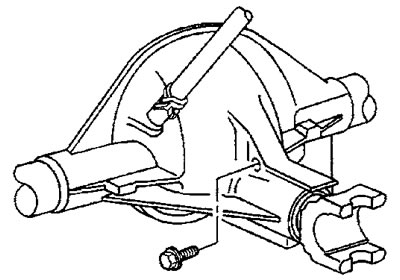
Note: The filler plug may be installed on the gearbox cover.
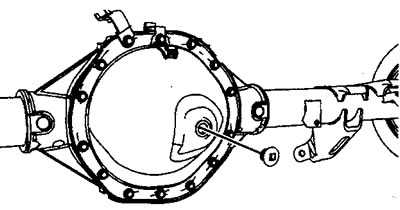
6. Make a dipstick in the shape of the letter "G" from wire to measure the oil level. The length of the dipstick legs should be more than 40 mm.
7. Insert the dipstick into the filler plug hole. One leg of the dipstick should be pressed against the edge of the hole, the other should stand vertically.
8. Remove the dipstick and measure the distance from the dipstick bend to the oil level. Normally, the oil level should be equal to (from the cut of the level plug hole) the values specified below.
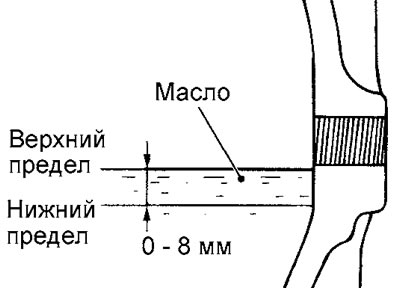
Oil level:
- Models before 2007:
- 8.6 inch gearbox - 15-40 mm
- 9.5" and 10.5" gearboxes - 0-10 mm
- Models since 2007:
- gearbox 8.6 inches — 1-19 mm
- 9.5 inch LD gearbox - 15-40 mm
- 9.5 inch HD gearbox - 0-10 mm
9. Add oil if necessary.
10. Install and tighten the filler plug.
Tightening torque:
- gearbox 9.75 inches - 21 N·m
- except 9.75 inch gearbox - 33 Nm
Oil change
1. Place the vehicle horizontally.
2. Unscrew the filler plug.
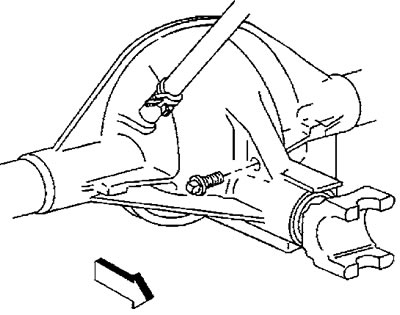
Note: The filler plug may be installed on the gearbox cover.
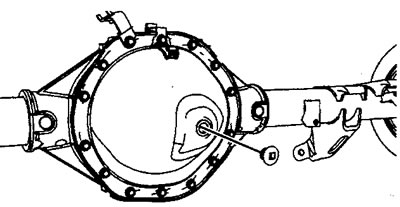
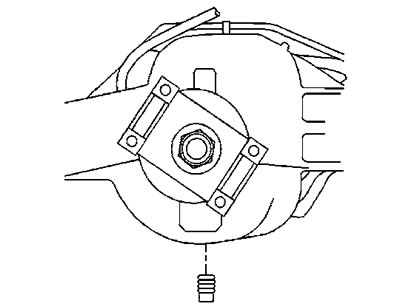
3. Remove the drain plug (if installed). Drain the oil.
4. If there is no drain plug, unscrew the gearbox cover mounting bolts (1). Inspect the bolts and replace them with new ones if necessary.
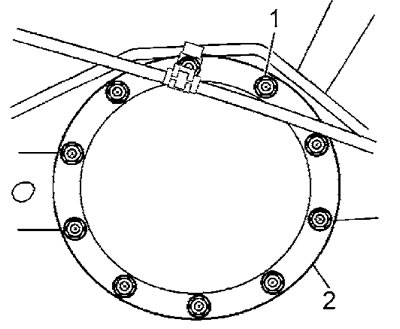
5. Carefully separate the cover (2) from the gearbox housing and drain the oil.
6. Remove any remaining gasket from the mating surfaces of the gearbox cover and housing.
7. Before assembly, carefully inspect all gearbox parts. Check for signs of wear or stress. Timely replacement of defective parts reduces the likelihood of expensive repairs after poor assembly.
- a) Inspect the surfaces of the drive gear shaft for installing the seal, remove any burrs or scratches.
- b) Inspect the mounting seats in the differential bearing caps. Eliminate any defects found (for example, bullies).
- c) Inspect the walls of the gearbox housing. Look for signs of cracking, replace the housing if necessary.
- d) Inspect the underside of the gearbox housing. If there are visible deposits of metal particles, this indicates extreme wear of the gearbox.
8. Clean the walls of the gearbox housing.
9. Install the new gasket and gearbox cover.
10. Install the cover mounting bolts, tighten the bolts. Tightening torque 40 Nm.
11. Install and tighten the drain plug.
Tightening torque:
- 9.75 inch gearbox - 27 Nm
- except for 9.75 inch gearbox - 33 Nm
12. Fill with new transmission oil.
Filling volume:
- with 8.6 inch gearbox - 2.1 l
- with 9.5 inch gearbox - 2.6 l
- with 9.75 inch gearbox - 2.9 l
- with 10.5 inch gearbox - 2.6 l
- with 11.5 inch gearbox - 3.0 l
Recommended transmission oil:
Models produced before 2007:
- with gearboxes other than 9.75 inches:
- according to SAE — 75W-90
- according to GM specification - 12378261 (or equivalent 9986115)
- with 9.75 inch gearbox (with LSD differential):
- according to GM specification - 12378557 (or equivalent 9986207)
Models produced since 2007:
- according to SAE — 75W-90
- according to GM specification - 9986115
13. Install and tighten the filler plug.
Tightening torque:
- with 9.75 inch gearbox - 21 Nm
- except with 9.75 inch gearbox - 33 Nm
(The original article can be found on the resource «ChevyMan.ru»)