


| Engine (body) | Automatic transmission (Pro code) |
| 5.3L V8 (L59) | 4L60E (M30) |
| 5.3L V8 (LM7) | 4L60E (M30) |
| 6.0L V8 (LQ4) | 4L60E HD (M32) |
| 6.0L V8 (LQ9) | 4L60E HD (M32) |
| 6.2L V8 (L92) | 6L80 (MYC) |
Checking the condition and level of the working fluid
Note: It is recommended to check the automatic transmission fluid level after each engine oil change.
1. Drive the vehicle until the transmission fluid (ATF) reaches normal operating temperature (82-93°C).
Attention: if the vehicle was operated under the conditions listed below before performing the procedure for checking the working fluid level, it is necessary to wait about 30 minutes and only after this time perform the check:
- operation at ambient temperatures above 32°C;
- towing a trailer;
- moving in heavy traffic.
2. Place the car on a level, horizontal surface. Leave the engine running.
3. Secure the vehicle with the parking brake and move the automatic transmission selector to position "P".
4. Press the brake pedal and move the automatic transmission selector sequentially through all positions, holding it in each of them for a few seconds to fill the entire hydraulic control system and torque converter with working fluid (ATF), and then set the selector to the "P" position.
5. Leave the engine idling (selector in position "P") for 3 minutes or more.
6. Checking the level of automatic transmission fluid.
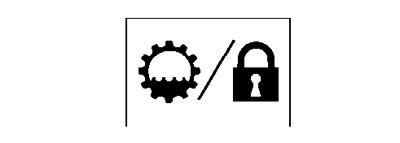
As a rule, the handle of the automatic transmission fluid level dipstick is red or orange. It also has an inscription "TRANS/LOCK" or image:
7. Before removing the fluid level dipstick, clean the area around the dipstick from dirt using a clean, lint-free cloth.
Turn the dipstick handle and remove the dipstick, assessing the condition of the transmission fluid (ATF).
Caution: It is necessary to perform a major overhaul of the gearbox and clean the cooler tubes of the working fluid under the following conditions:
- If the working fluid (ATF) in the automatic transmission has a burnt smell.
- If the working fluid (ATF) in the automatic transmission is noticeably black.
- If the working fluid (ATF) in the automatic transmission is contaminated with a large number of metal particles.
8. Wipe the dipstick with a clean rag or tissue and reinstall the dipstick.
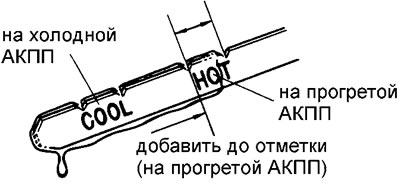
9. Remove the dipstick again and check the level of the working fluid in the automatic transmission. The normal level of the working fluid should be in the "HOT" range of the dipstick (on a warmed-up automatic transmission). When checking the working fluid level on a cold automatic transmission, the working fluid level should be in the "COLD" range on the dipstick. If the working fluid level is below this mark, then add the working fluid to the lower mark of the "HOT" range.
Attention: it is not recommended to add working fluid to a cold automatic transmission.
Note: Since 2005, GMC has recommended using DEXRON VI fluid for all automatic transmissions (including for cars produced before 2005). The use of DEXRON III working fluid in cars manufactured since 2005 may lead to automatic transmission failure.
Recommended working fluid:
- models before 2005 - DEXRON III
- models from 2005 onwards - DEXRON VI
10. Make sure you have carefully examined the condition of the working fluid (ATF) on the working fluid level dipstick. Insert the dipstick into place, turn the handle to securely fix the dipstick and make sure the dipstick cover is tightly seated.
11. The working fluid in the automatic transmission and the filter must be replaced with new ones if a major overhaul of the automatic transmission was carried out or the working fluid is heavily contaminated and does not meet technical requirements (operation in severe conditions).
Note: a special filter is installed in the automatic transmission.
Replacement of working fluid
It is recommended to simultaneously replace the automatic transmission fluid and the automatic transmission fluid filter at intervals of 83,000 km under the following operating conditions:
- When driving in dense traffic, at ambient temperatures above 32°C;
- When driving frequently on hilly terrain;
- When frequently towing a trailer;
- When using the vehicle as a commercial vehicle, such as a taxi, etc.
If the car is not used in the above conditions, the replacement frequency of the working fluid and filter is 166,000 km. However, taking into account the operation of cars in the territory of the Russian Federation and the CIS countries, as well as the quality of fuel, the replacement frequency can be reduced.
Note: When replacing normally (drain from the tray) the working fluid is not completely drained (some remains in the hydraulic lines). A complete replacement of the working fluid can be done at a special station or by disassembling the automatic transmission.
Filling volume:
- 4-speed automatic transmission (4L60E):
- when replacing - 4.7 l
- full - 10.6 l
- 6-speed automatic transmission (6L80E):
- when replacing - 5.7 l
- full - 9.9 l
Recommended working fluid:
- models before 2005 - DEXRON III
- models from 2005 — DEXRON VI
1. Raise the vehicle to provide clear access to the front.
2. Place a container under the automatic transmission fluid pan to collect the fluid.
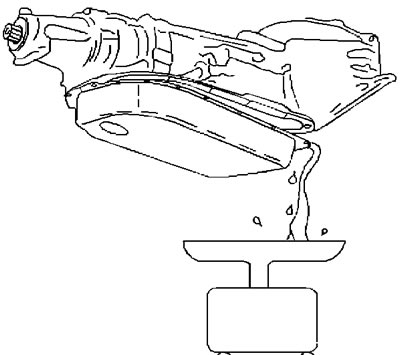
3. If there is a drain plug on the pan, unscrew it and drain the working fluid into a container. Tightening torque 18 Nm/
If there is no plug, then follow these steps:
- a) Loosen the gear selector cable bracket bolts and move the cable to the side. If necessary, disconnect the cable.
- b) Unscrew the bolts securing the automatic transmission fluid pan at the front.
- c) Loosen the pan mounting bolts at the rear.
- d) Using a special tool and/or a knife, separate the sump from the front of the crankcase. Be careful, as the working fluid will start to spill out.
Note: Do not damage the surfaces of the sump and crankcase.
- d) Unscrew the remaining pan mounting bolts and remove it. Tightening torque 11 Nm.
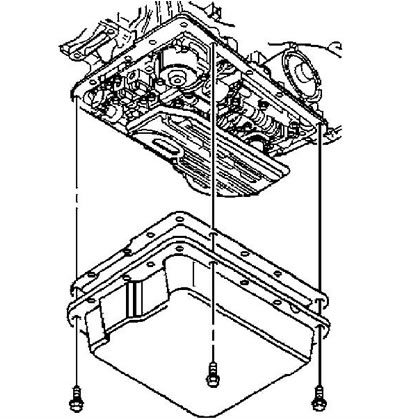
- e) Remove the oil pan gasket. Clean the mating surfaces of the oil pan and the automatic transmission housing from any remaining old gasket, working fluid, and dirt.
4. Remove the automatic transmission fluid filter by moving it downwards.
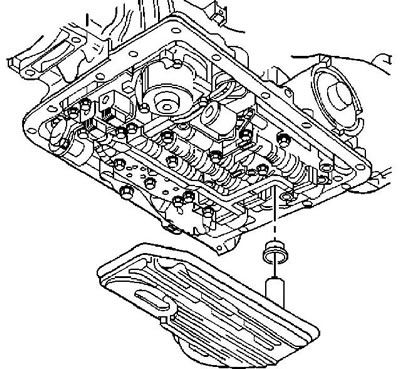
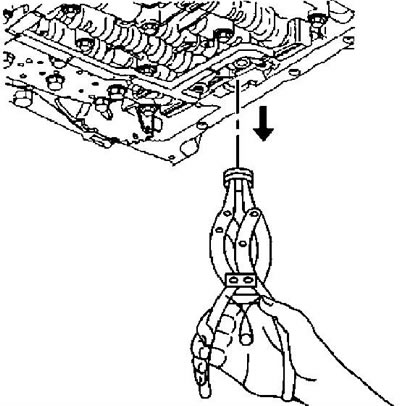
5. Remove the automatic transmission fluid filter seal.
6. Assess the condition of the automatic transmission by opening the metal mesh of the automatic transmission working fluid filter. If the filter contains the following wear components, you should perform a full diagnosis of the automatic transmission and decide on its repair:
- metal wear particles;
- bronze wear particles;
- particles of friction materials.
7. Clean the automatic transmission fluid pan and all mating surfaces from dirt, traces of the old gasket, etc.
8. Apply fresh working fluid to the new filter seal and install it into the automatic transmission housing. Install the new filter.
9. Further installation of parts is carried out in the reverse order of removal.
10. Fill the automatic transmission with the recommended working fluid.
11. Check the working fluid level on a cold automatic transmission. Check for leaks.
12. Start and warm up the engine and automatic transmission fluid. Check the fluid level.
[The original source of the article is the website ChevyMan.ru]