
2. With the engine off, lift the hood and run your fingers along the belt (if necessary, use a flashlight) and check for cracks and separation of belt fibers. Also, check to see if the belt has been sanded or abraded, which will result in a shiny surface. Both sides of the belt should be checked. This means you have to bend the belt and check the inside.
3. Check the ribs on the inside of the belt. They should all have the same depth, and none of the surfaces should be smooth.
4. The belt tension is maintained by the tensioner unit and is not adjustable. At the mileage specified in the technical specifications in the maintenance schedule at the beginning of this chapter, the belt must be replaced, otherwise it will become severely worn or damaged.
5. To replace the belt, turn the tensioner counterclockwise to loosen the belt tension (see illustration). When the belt tension decreases, the tensioner will move downward.
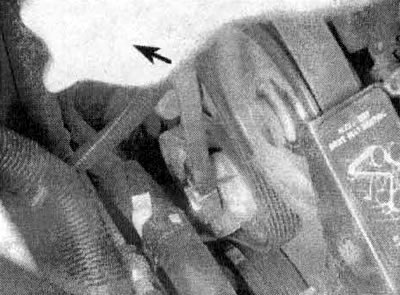
21.5. Insert the special rod into the tensioner and turn it counterclockwise to remove or install the belt
6. Release the belt from the auxiliary parts and carefully release the tensioner.
7. Place the new belt over the various pulleys, rotating the tensioner again to install the belt, then release the belt tensioner.
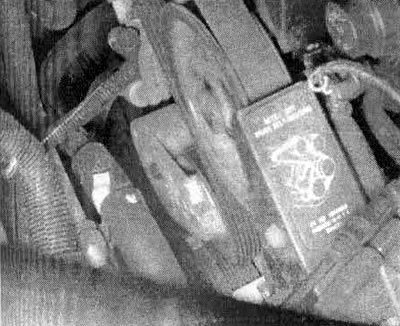
21.7. The drive belt routing diagram is located on the plate and on the belt cover on most vehicle models