
ChevyMan.ru
Mazda Mitsubishi Toyota Land Rover Honda Kia Nissan
English Русский
Български
Беларускі
Український
Српски
Hrvatski
Română
Polski
Slovenský
Magyar
|
Articles | Sitemap | Contacts |


Home   Aveo   Captiva   Cruze   Lacetti   Lanos   Niva   Tahoe   Others  
Aveo T300 (2012-2018) Aveo T250 (2006-2011) Aveo T200 (2003-2008)
  • Home
  • Aveo
  • T300 (2012-2018)
  • Electrical equipment
  • Heating and air conditioning
  • Replacing the air conditioner condenser

Replacing the air conditioner condenser (Chevrolet Aveo T300)

            0

You will need: an 8 mm socket head, a 13 mm wrench, and a flat-blade screwdriver.

1. Disconnect the wire from the negative terminal of the battery.
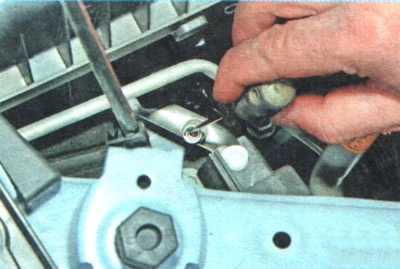
1. Disconnect the wire from the negative terminal of the battery.


2. Remove the refrigerant from the air conditioning system (see "Removal refrigerant from the air conditioning system").
2. Remove the refrigerant from the air conditioning system (see «Removal refrigerant from the air…


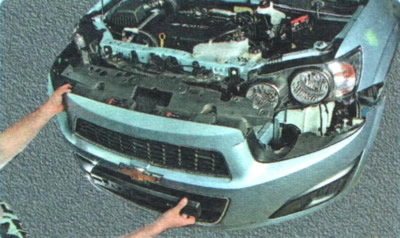
3. Remove the front bumper (see "Removal and installation the front bumper").
3. Remove the front bumper (see «Removal and installation the front bumper»).


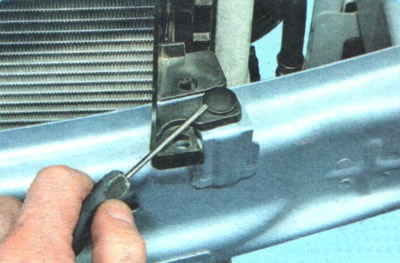
4. Remove the retaining clips of the two pins securing the upper part of the air guide casing...
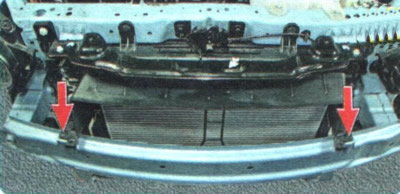


4. Remove the retaining clips of the two pins securing the upper part of the air guide casing...


NOTE: This is the location of the upper air guide housing retaining pins.
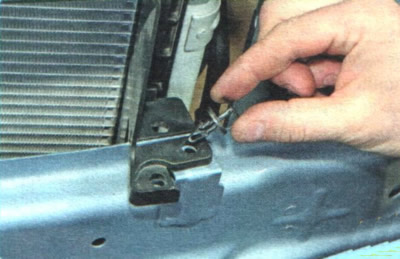

NOTE: This is the location of the upper air guide housing retaining pins.


5. ...remove the pistons...
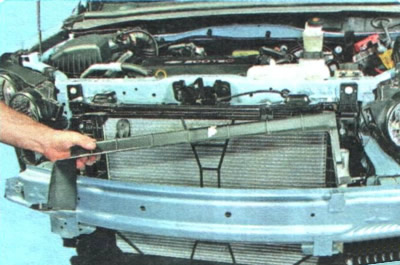
5. ...remove the pistons...


6. ...and remove the top part of the casing.
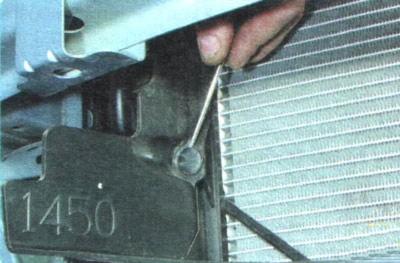
6. ...and remove the top part of the casing.


7. Remove the retaining clips of the four pistons securing the lower part of the air guide casing...
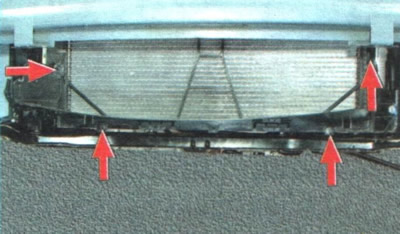


7. Remove the retaining clips of the four pistons securing the lower part of the air guide casing...


NOTE: This is the location of the lower air guide housing mounting pins.
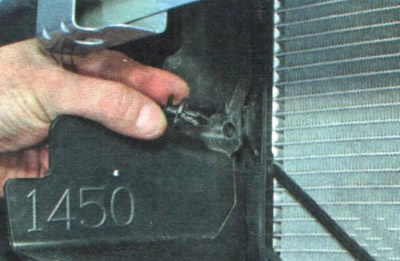

NOTE: This is the location of the lower air guide housing mounting pins.


8. ...remove the pistons...
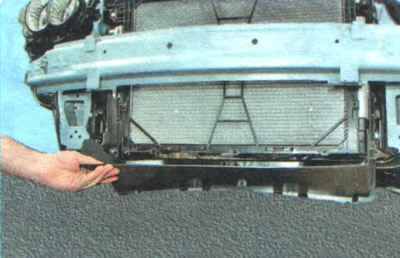
8. ...remove the pistons...


9. ...and remove the bottom part.
9. ...and remove the bottom part.


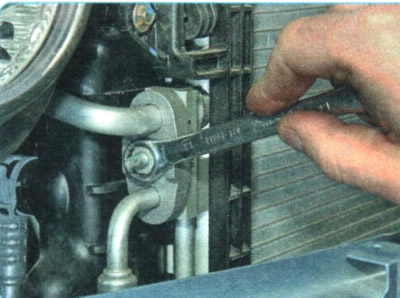
10. While holding the stud from turning, unscrew the nut securing the flange of the air conditioning system pipes and disconnect the pipes from the condenser.


WARNINGS: Immediately after disconnecting, plug open ends of pipes to prevent dirt and moisture from entering the system.


Pay attention to the sealing rings of the flange connections of the pipelines. During the repair of the system, when disconnecting the pipelines, the sealing rings must be replaced.
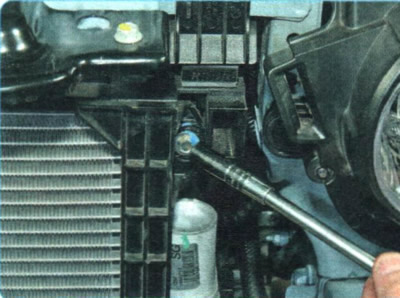

Pay attention to the sealing rings of the flange connections of the pipelines. During the repair of…


11. Remove the four screws securing the air guide casing holder...
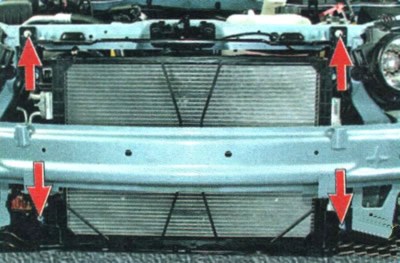
11. Remove the four screws securing the air guide casing holder...


NOTE: This is the location of the screws that secure the air guide housing bracket.

NOTE: This is the location of the screws that secure the air guide housing bracket.


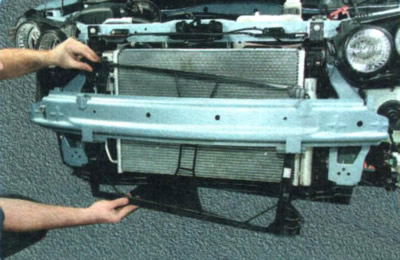
12. ...and remove the holder.


12. ...and remove the holder.


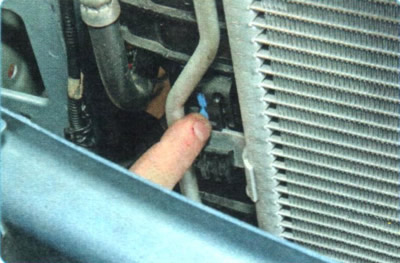
13. Press the locking button of the right condenser bracket holder...
13. Press the locking button of the right condenser bracket holder...


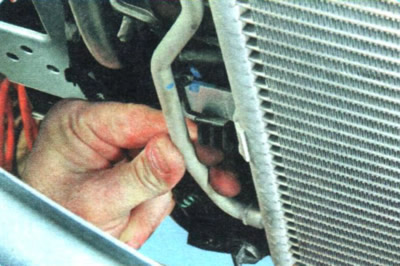
14. ...and remove the bracket from the holder on the radiator tank of the cooling system.
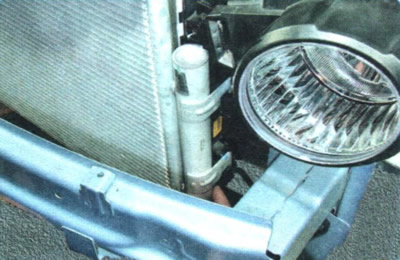
14. ...and remove the bracket from the holder on the radiator tank of the cooling system.


15. Similarly, remove the left bracket from the holder...
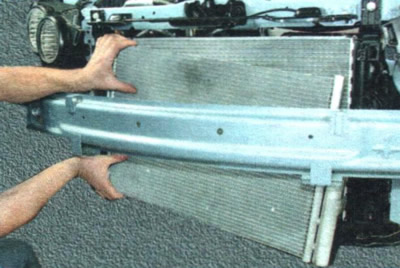
15. Similarly, remove the left bracket from the holder...


16. ...and remove the condenser.


17. Install the condenser in the reverse order of removal.

WARNINGS: Open the new condenser flange caps only immediately before connecting the piping. When installing new piping flange sealing rings, be sure to lubricate them with air conditioning compressor oil.


18. Fill the air conditioning system with refrigerant at a specialized center for servicing automotive air conditioners.

The original source of the article is the website: CHEVYMAN

The article was checked: Vladimir Romannikov
This article is available at russian, bulgarian, belarusian, ukrainian, serbian, croatian, romanian, polish, slovak, hungarian

Share information:

Previous articles
Aveo T300: Heating and air conditioning
Next articles

Removal and installation the air conditioning compressor
Features of air conditioning compressor operation
Replacing sealing rings
Removal refrigerant from the air conditioning system
Safety rules for repair and maintenance of air conditioning systems
Replacing the filter element of the receiver-dryer
Replacing the pressure sensor in the air conditioning system
Replacing the outside temperature sensor
Removal and installation the control unit for the heating, air conditioning and ventilation system
Replacing the cabin air filter


See similar articles on the topic of Chevrolet cars:
Air Conditioner Condenser — Removal and Installation Chevrolet Captiva 1 (2006-2018)
Replacing the condenser Chevrolet Cruze 1 (2008-2016)
Removal the condenser and air conditioner receiver Chevrolet Lacetti 1 (2002-2009)
Replacing Windshield Wiper Blades Chevrolet Lanos T150 (2002-2009)
Air conditioner Chevrolet Niva 1 (2002-2016)
Air Conditioner Condenser — Removal and Installation Chevrolet Tahoe 2 and 3 (2000-2014)
Checking and replacing spark plug wires, distributor cap and rotor Chevrolet Lumina 1 (1989-1994)
Link in different formats to this page


Visitor comments

No comments yet


How much will 11 + 41 =


Aveo T300 (2012-2018) 
  • General information
  • Vehicle device
  • User manual
  • Main malfunctions
  • Maintenance
  • Power unit
  • Engine
  • Lubrication system
  • Cooling system
  • Supply system
  • Exhaust system
  • Transmission
  • Clutch
  • Manual gearbox
  • Automatic gearbox
  • Front wheel drives
  • Chassis
  • Front suspension
  • Rear suspension
  • Steering
  • Brake system
  • Body
  • Exterior
  • Interior
  • Doors and trunk
  • Security systems
  • Electrical equipment
  • Engine electrics
  • Equipment and devices
  • Heating and air conditioning
  • Electrical circuits


Aveo T250 (2006-2011) 
  • Manual
  • Driver's workplace
  • Salon equipment
  • Vehicle characteristics
  • Maintenance
  • Engine 1.5 SOHC
  • Engine repair
  • Fuel supply system
  • Control system
  • Cooling system
  • Engine 1.6 DOHC
  • Engine repair
  • Control system
  • Transmission
  • Clutch
  • Manual gearbox
  • Automatic gearbox
  • Wheel drive
  • Chassis
  • Wheel suspension
  • Steering
  • Brake system
  • Body
  • Exterior
  • Interior


Aveo T200 (2003-2008) 
  • General information
  • User manual
  • Power unit
  • Engine repair 1.5L SOHC
  • Fuel system
  • Control system
  • Cooling system
  • Transmission
  • Clutch
  • Manual gearbox
  • Automatic gearbox
  • Drive shafts
  • Chassis
  • Front suspension
  • Rear suspension
  • Steering
  • Brake system
  • Body
  • Exterior (external elements)
  • Interior (internal elements)
  • Electrical equipment
  • Equipment and devices
  • Electrical circuits


ChevyMan.ru © 2017-2026 · Mobile version · Feedback · Site search · Interesting to read · Sitemap: EN BG BY UA RS HR RO PL SK HU

Aveo 2003-2008 · Aveo 2006-2011 · Aveo 2012-2018 · Captiva 2006-2018 · Cruze 2008-2016 · Lacetti 2002-2009 · Lanos 2002-2009 · Niva 2002-2016 · Tahoe 1992-2000 · Tahoe 2000-2014 · Lumina 1 1989-1994 · Trailblazer 1 2001-2008 · Orlando 1 2010-2018 ·
🛡️ For your security and to improve our service, this site uses cookies. You can disable them in your browser.