
ChevyMan.ru
Mazda Mitsubishi Toyota Land Rover Honda Kia Nissan
English Русский
Български
Беларускі
Український
Српски
Hrvatski
Română
Polski
Slovenský
Magyar
|
Articles | Sitemap | Contacts |


Home   Aveo   Captiva   Cruze   Lacetti   Lanos   Niva   Tahoe   Others  
Aveo T300 (2012-2018) Aveo T250 (2006-2011) Aveo T200 (2003-2008)
  • Home
  • Aveo
  • T300 (2012-2018)
  • Transmission
  • Automatic gearbox
  • Checking the level, topping up and replacing the working fluid

Checking the level, topping up and replacing the working fluid (Chevrolet Aveo T300)

            0

You will need; working fluid for the gearbox, funnel, clean rag, wrench or socket head "11".

The manufacturer provides for checking the level of the working fluid in the automatic transmission every 30 thousand km of run, and the replacement of the fluid is regulated every 150 thousand km of run. However, the need to replace the fluid may arise earlier than the specified mileage when operating the car in difficult road conditions (for example, in a large city with heavy traffic or in mountainous terrain), in case of contamination or the appearance of a burnt smell. In the latter case, contact the service, since in addition to replacing the fluid, they will carry out diagnostics of the gearbox due to the fact that the listed signs may indicate its damage.

WARNING: Use DEXRON VI fluid recommended by the manufacturer. Use of other fluids or oils will result in transmission malfunction or failure.


1. Start the engine and warm up the gearbox. The temperature of the fluid in the gearbox should be 50-80°C. To speed up the warming up, you can take the car for a short drive. Usually, at an ambient temperature of 20°C, a 10-minute drive is enough.

NOTE: The temperature of the working fluid is determined using special diagnostic equipment connected to the vehicle's diagnostic connector or using information on the central information display, if the on-board computer has this function.


2. Place the vehicle on a level, horizontal surface and apply the parking brake.

3. Press the brake pedal and hold it down, alternately move the selector lever to all positions from "P" (parking) to "D" (forward movement), briefly in each position to allow fluid to fill the torque converter and hydraulic system. Then move the selector lever to the "N" (neutral) position. Release the brake pedal.


NOTE: The working fluid level changes depending on the temperature. Checking the fluid level at low temperature will result in overfilling, and checking the level at high fluid temperature will result in underfilling. Overfilling or underfilling will impair the operation of the transmission.

NOTE: The working fluid level changes depending on the temperature. Checking the fluid level at low…


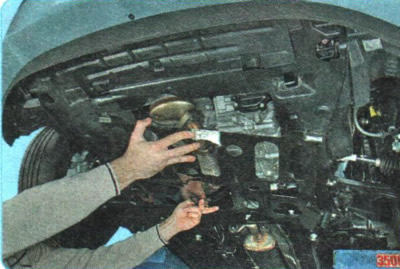
4. Remove the engine crankcase guard (see "Removal and installation mudguards and engine crankcase protection").

5. Place a wide container under the gearbox to drain the working fluid.
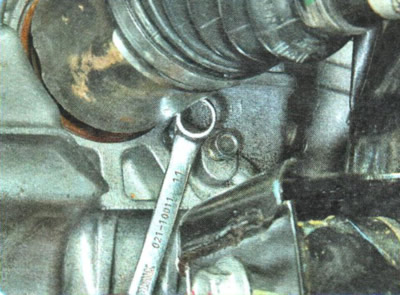
5. Place a wide container under the gearbox to drain the working fluid.


6. Loosen the tightening of the plug of the hole for checking the working fluid level...
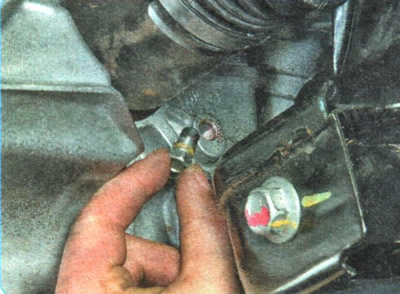
6. Loosen the tightening of the plug of the hole for checking the working fluid level...


7. ...and turn it inside out.


8. Start the engine and let it idle. At a normal level, the working fluid will start to flow out of the hole when the temperature reaches 35-37°C.

9. Assess the condition of the working fluid. If it is dirty or smells burnt, replace it completely.

WARNING: A burnt smell of the working fluid, combined with the presence of foreign particles in the form of fragments of friction material, indicates the need for gearbox repair.


10. If the working fluid does not start to flow out of the inspection hole when the temperature rises to 45°C, add fluid.
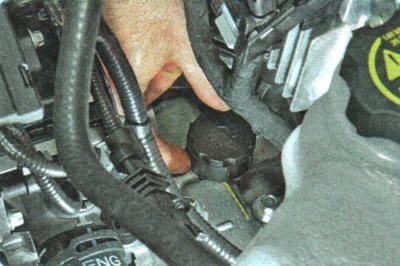
10. If the working fluid does not start to flow out of the inspection hole when the temperature…


11. Unscrew the plug of the hole for filling the working fluid...
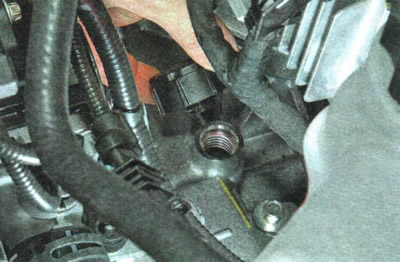
11. Unscrew the plug of the hole for filling the working fluid...


12. ...and take it off.
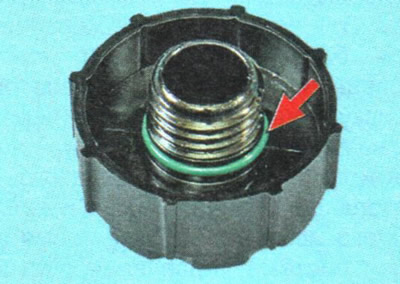
12. ...and take it off.


NOTE: The plug is sealed with a rubber ring. Replace the ring if it is too tight, hardened or torn.


NOTE: The plug is sealed with a rubber ring. Replace the ring if it is too tight, hardened or torn.


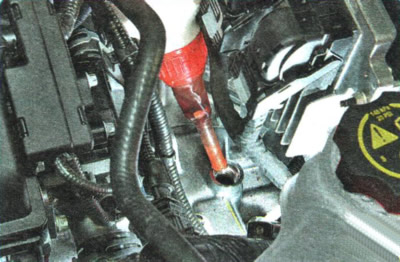
13. With the engine idling, add working fluid until it starts to flow out of the inspection hole.

NOTE: The fluid should flow out of the inspection hole in separate drops. If it flows out in a continuous stream, drain the excess until it begins to drip.


14. Replace the inspection hole plug and tighten it to 12 Nm.
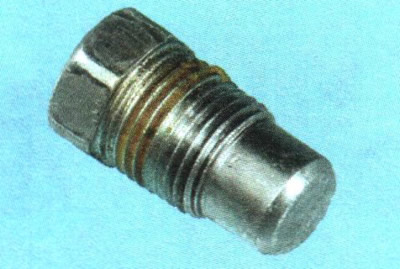
14. Replace the inspection hole plug and tighten it to 12 Nm.


NOTE: The inspection plug has a tapered thread and therefore does not have any sealing element.


15. To replace the working fluid, warm it up by driving in the city cycle for about 5 minutes...
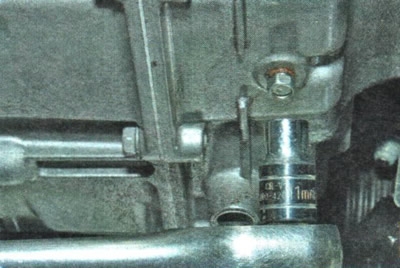
15. To replace the working fluid, warm it up by driving in the city cycle for about 5 minutes...


16. ...stop the engine, loosen the fluid drain plug located at the bottom of the gearbox housing...
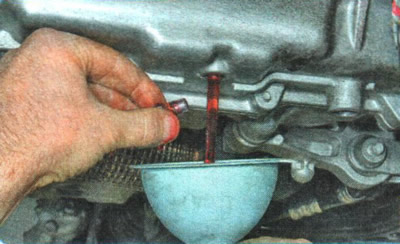


16. ...stop the engine, loosen the fluid drain plug located at the bottom of the gearbox housing...


17. ...unscrew the plug and drain the liquid.
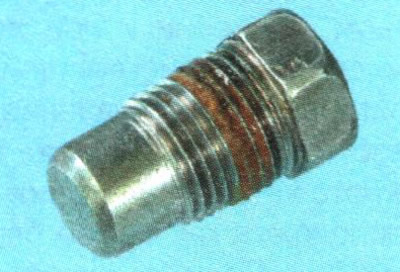
17. ...unscrew the plug and drain the liquid.


NOTE: The fluid drain plug has a tapered thread and therefore does not have any sealing element.


18. Replace the drain plug and tighten it to 12 Nm.

19. Pour liquid through the filler hole in an amount equal to the amount drained (approximately 7.7 l).

20. Start the engine, let it idle for about 5 minutes, check the level again (see paragraphs 6-8 in this subsection) and the quality of the fluid. If the fluid is still dirty, repeat steps 16-19.

The original article is on the website: «CHEVYMAN.ru»

The article was checked: Vladimir Romannikov
This article is available at russian, bulgarian, belarusian, ukrainian, serbian, croatian, romanian, polish, slovak, hungarian

Share information:

Previous articles
Aveo T300: Automatic gearbox
Next articles

Features of the automatic transmission design
Replacing automatic transmission seals
Removal and installation of automatic transmission
Removal and installation the automatic transmission selector control linkage
Replacing the automatic transmission control cable
Adjusting the automatic transmission control drive


See similar articles on the topic of Chevrolet cars:
Checking the level and refilling the fluid Chevrolet Captiva 1 (2006-2018)
Checking the level, topping up and replacing oil in a manual transmission Chevrolet Cruze 1 (2008-2016)
Checking the level of working fluid in the power steering reservoir Chevrolet Lacetti 1 (2002-2009)
Checking the fluid level in the windshield washer reservoir Chevrolet Lanos T150 (2002-2009)
Checking the level and density of the liquid in the cooling system Chevrolet Niva 1 (2002-2016)
Checking the Automatic Transmission Fluid Level Chevrolet Tahoe 1 (1992-2000)
Checking the hydraulic fluid level in the automatic transmission (every 3000 miles or 3 months) Chevrolet Lumina 1 (1989-1994)
Link in different formats to this page


Visitor comments

No comments yet


How much will 28 + 11 =


Aveo T300 (2012-2018) 
  • General information
  • Vehicle device
  • User manual
  • Main malfunctions
  • Maintenance
  • Power unit
  • Engine
  • Lubrication system
  • Cooling system
  • Supply system
  • Exhaust system
  • Transmission
  • Clutch
  • Manual gearbox
  • Automatic gearbox
  • Front wheel drives
  • Chassis
  • Front suspension
  • Rear suspension
  • Steering
  • Brake system
  • Body
  • Exterior
  • Interior
  • Doors and trunk
  • Security systems
  • Electrical equipment
  • Engine electrics
  • Equipment and devices
  • Heating and air conditioning
  • Electrical circuits


Aveo T250 (2006-2011) 
  • Manual
  • Driver's workplace
  • Salon equipment
  • Vehicle characteristics
  • Maintenance
  • Engine 1.5 SOHC
  • Engine repair
  • Fuel supply system
  • Control system
  • Cooling system
  • Engine 1.6 DOHC
  • Engine repair
  • Control system
  • Transmission
  • Clutch
  • Manual gearbox
  • Automatic gearbox
  • Wheel drive
  • Chassis
  • Wheel suspension
  • Steering
  • Brake system
  • Body
  • Exterior
  • Interior


Aveo T200 (2003-2008) 
  • General information
  • User manual
  • Power unit
  • Engine repair 1.5L SOHC
  • Fuel system
  • Control system
  • Cooling system
  • Transmission
  • Clutch
  • Manual gearbox
  • Automatic gearbox
  • Drive shafts
  • Chassis
  • Front suspension
  • Rear suspension
  • Steering
  • Brake system
  • Body
  • Exterior (external elements)
  • Interior (internal elements)
  • Electrical equipment
  • Equipment and devices
  • Electrical circuits


ChevyMan.ru © 2017-2026 · Mobile version · Feedback · Site search · Interesting to read · Sitemap: EN BG BY UA RS HR RO PL SK HU

Aveo 2003-2008 · Aveo 2006-2011 · Aveo 2012-2018 · Captiva 2006-2018 · Cruze 2008-2016 · Lacetti 2002-2009 · Lanos 2002-2009 · Niva 2002-2016 · Tahoe 1992-2000 · Tahoe 2000-2014 · Lumina 1 1989-1994 · Trailblazer 1 2001-2008 · Orlando 1 2010-2018 ·
🛡️ For your security and to improve our service, this site uses cookies. You can disable them in your browser.