
Attention! 1. Brake pads are changed only as a set for one axle.
2. Each time the drum brake shoes are replaced, the return and pressure springs of the shoes are also replaced. Due to the continuous heating/cooling that the springs are subjected to, they lose elasticity and over time the shoes touch the drums, causing them to wear out more.
1. Loosen the rear wheel nuts, lift the rear of the car. Remove the rear wheels.
2. Remove the drum (or the hub if the vehicle is equipped with a fully unloaded axle shaft). On a car with semi-unloaded axle shafts, the drum may not be removable. In this case, pour penetrating liquid between the axle shaft flange studs and the drum holes and tap the drum from the inside along the contour.
If the pads interfere with removal (a groove has formed on the drum due to wear), then bring the shoes together. To do this, remove the plug from the brake shield and insert a Phillips screwdriver into the hole. This will move the parking brake shoe drive lever away from the stop and the shoes will move away from the drum a little.
3. Clean the brake with a special cleaner.
4. Remove the hold-down springs by pressing and turning the cups 90° so that the slot in the spring axle pin aligns with the slot in the cup.
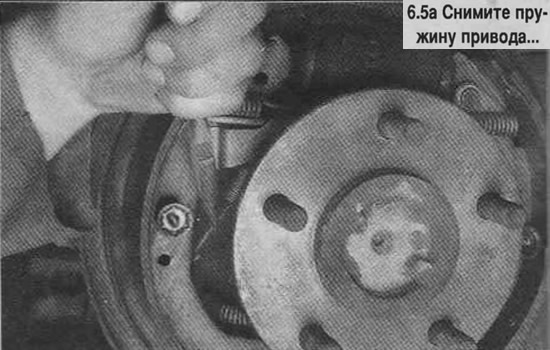
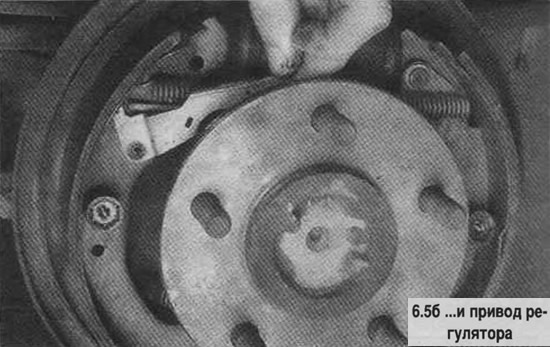
5. Remove the drive spring and the regulator drive (see photo).
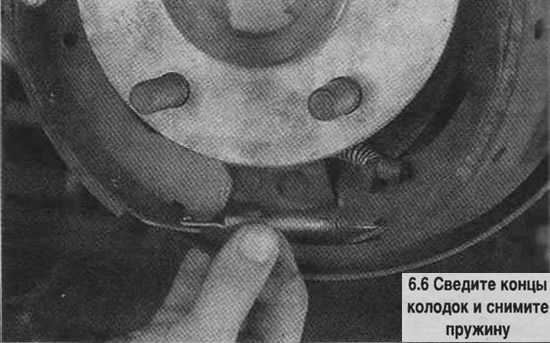
6. Move the lower ends of the pads apart and bring the lower return spring out through the thrust plate. Bring the ends of the pads together and remove the spring (see photo).
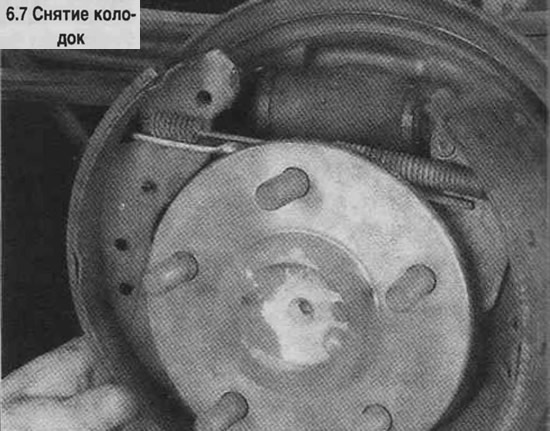
7. Remove the pads together with the upper spring by spreading them apart and lifting them up (see photo).
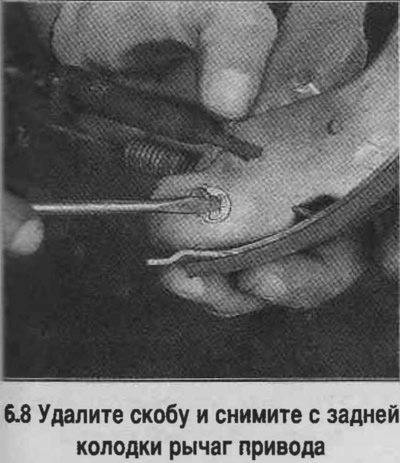
8. Remove the upper return spring assembly with the adjuster stud. Remove the shoe drive lever from the rear shoe (see photo).
9. Clean the brake drum and check its condition, the presence of deep grooves on the working surface, traces of overheating (which appear as small discolored areas) and cracks. If the drum is worn out or the ovality exceeds the norm, it should be turned in a car service.
10. If traces of brake fluid leakage are detected from the wheel cylinder, replace the cylinder as an assembly, or disassemble and replace worn or damaged parts.
11. Check the tightness of the brake shield mounting bolts. Clean the brake shield from dirt and corrosion.
12. Check the operation of the brake shoe adjuster. If the adjuster is sticking, is very worn, or if free play is detected, replace the adjuster assembly.
13. Lubricate the parking brake cable and the brake shoe drive lever axle. Hook the lever onto the shoe and make sure that the lever moves freely, without jamming.
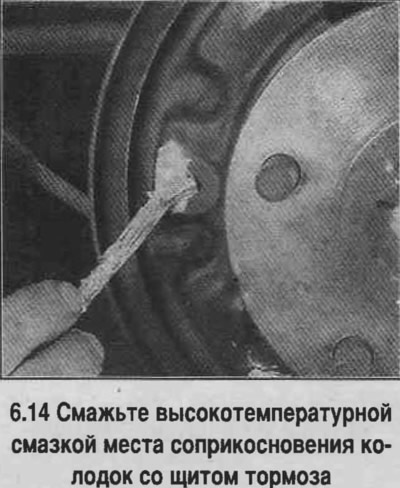
14. Lubricate the contact points of the pads with the brake shield with high-temperature grease (see photo).
15. Connect the shoes to the regulator stud and the upper return spring.
16. Connect the parking brake cable to the brake shoe actuator lever.
17. Install the pads in place, placing them behind the axle flange. Bring the bases of the pads together so that the upper ends come out of the wheel cylinder boots, avoiding damage to the boots.
•18. Bring the bases of the shoes and put on the lower return spring. Spread the shoes and place them on the brake shield, put them behind the thrust plate. Install the pressure springs.
19. Install the governor drive spring, then install the lower return spring.
20. Install the drum. Adjust the initial clearance between the shoes and the drum. To do this, spread the shoes until they touch the drum by turning the toothed nut through the opening in the brake shield. Slightly loosen the nut to move the shoes away from the drum. When finished, replace the opening plug in the brake shield.
21. Install the wheel, tighten the nuts and lower the car. Check the brake pedal travel. If the brake pedal approaches the floor of the body at the end of the travel, the brakes need to be re-adjusted. When finished, check the operation of the brakes before driving off.
The article is reprinted from the website ChevyMan